Custom menu af area setup, Monitor display setup, Recording display setup – Konica Minolta DYNAX 7D User Manual
Page 50: Anti-shake viewfinder display setup, Iso button setup, Zone matching
9
99
9
9
98
8
Custom menu
AF AREA SETUP
The spot focus or local AF areas are illuminated when the camera
focuses. The illumination period is selected in section 3 of the
custom menu (p. 92) between 0.3 seconds and 0.6 seconds. AF
area illuminator activation with the shutter-release button can also
be turned off.
AF area illuminator
S
Sh
hu
utttte
err llo
oc
ck
k
O
On
n
0
0..3
3s
s.. d
diis
sp
plla
ay
y
O
On
n
A
Au
utto
om
ma
attiic
c
A
Au
utto
o rro
otta
atte
e
A
AF
F a
arre
ea
a s
se
ettu
up
p
M
Mo
on
niitto
orr d
diis
sp
p..
R
Re
ec
c.. d
diis
sp
plla
ay
y
A
AS
S ffiin
nd
de
err d
diis
sp
p..
MONITOR DISPLAY SETUP
Automatic and manual monitor display is selected in section 3 of
the custom menu (p. 92). The automatic option employs the
viewfinder eye sensors to turn the monitor off when using the
viewfinder. The manual option requires the monitor to be turned off
using the display button (p. 33).
RECORDING DISPLAY SETUP
The auto-rotate and horizontal display is selected in section 3 of
the custom menu (p. 92). The auto-rotate option automatically
changes the recording display as the camera orientation is moved
between horizontal and vertical positions. The horizontal option
fixes the display to the horizontal position.
ANTI-SHAKE VIEWFINDER DISPLAY SETUP
The Anti-Shake scale can be turned on and off in section 3 of the
custom menu (p. 92).
Anti-Shake scale
ISO BUTTON SETUP
The function selected with the ISO button (p. 51) can be switched
between camera sensitivity (ISO) and Zone Matching in section 4
of the custom menu (p. 92). For more on Zone Matching, see
below.
IIS
SO
O b
bu
utttto
on
n s
se
ett
IIS
SO
O
1
10
00
0 –
– 1
16
60
00
0
M
Me
em
mo
orry
y
–
–
IIS
SO
O m
me
en
nu
u s
se
ettu
up
p
M
M s
se
ett b
bu
utttto
on
n
C
Cu
us
stto
om
m rre
es
se
ett
ZONE MATCHING
Zone Matching is used for recording high-key or low-key
scenes. Zone Matching is activated in section 4 of the
custom menu.
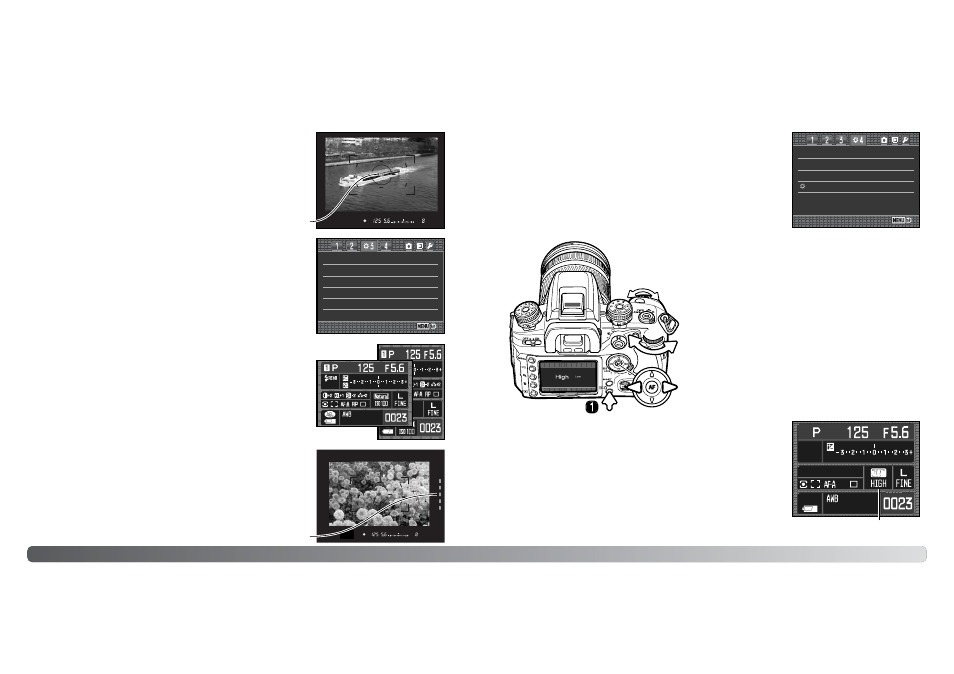
To set Zone Matching, press the ISO button (1) to open
the setup screen.
The left/right keys of the controller and the control dials
change between high (key) and low (key).
Press the central button of the controller or the shutter-
release button to complete the operation.
Zone Matching indicator
When selected, an indicator is displayed on the monitor. The
camera sensitivity is fixed at ISO 250 for high and ISO 100 for low.
The color mode is fixed at Natural. Contrast cannot be changed
with the Digital Effect Control.
A high-key scene is made up of predominately light tones and
colors. A low-key scene is made up of dark tones and colors. Zone
Matching controls exposure and contrast to improve reproduction
of these scenes.