Flash modes, Recording menu, Recording mode reset – Konica Minolta DYNAX 7D User Manual
Page 36: Bracketing setup, Bracketing order
7
70
0
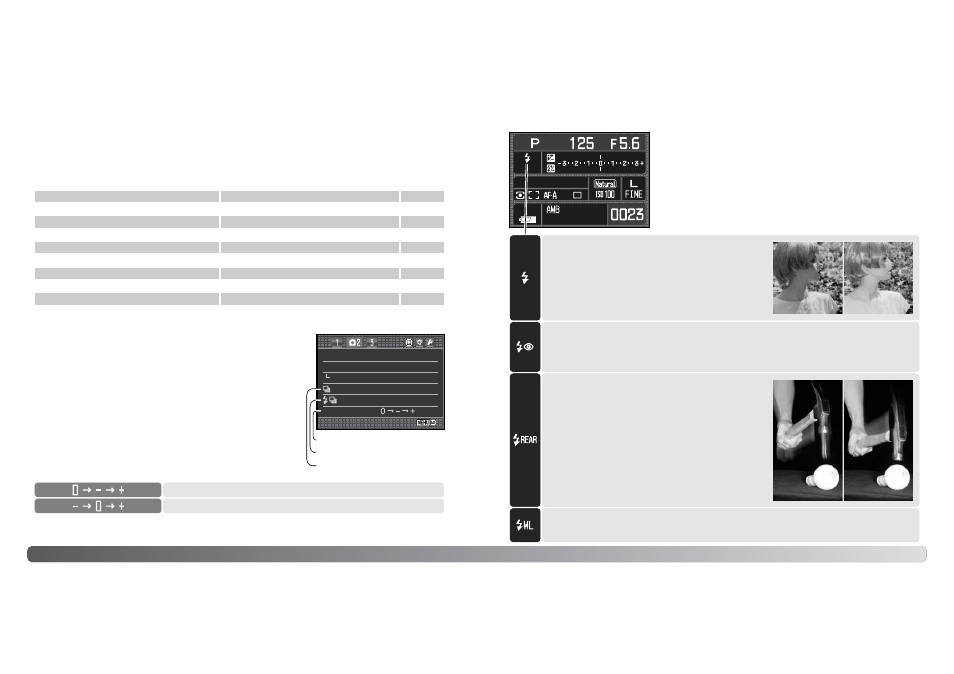
FLASH MODES
The flash mode can be changed in section 2 of the recording
menu (p. 64). For the flash to fire, the built-in unit must be
manually raised; lower the flash to prevent it from firing. The
auto-white-balance setting gives priority to the flash’s color
temperature. If another type of white balance is used, priority is
given to the active setting’s color temperature.
Recording menu
7
71
1
Fill-flash - used as the main or supplementary light.
In low-light conditions, the flash acts as the main
source of illumination and overpowers the ambient
light. Under strong sunlight or in backlit situations,
the fill-flash can reduce harsh shadows.
Red-eye reduction - used when taking photographs of people or animals in low-light
conditions. The red-eye effect is caused by light reflected from the retina of the eye. The
camera fires several pre-flashes before the main flash burst to contract the pupils of the
subject’s eyes.
Rear flash sync - used with long exposures to
make trailing lights or blurring appear to follow rather
than proceed the subject. The effect is not apparent
if the shutter speed is too fast and stops the
subject’s motion.
When the shutter is released, a pre-flash fires. This
pre-flash is not for exposure, but for metering. The
flash fires again just before the shutter closes.
Wireless / Remote flash - allows the camera to control an off-camera flash unit without
the need of a cable. See page 72.
Fill-flash
Rear sync.
RECORDING MODE RESET
The recording mode functions can be reset in section 1 of the recording menu (p. 64). When
selected, a confirmation screen appears; choosing “Yes” resets the following functions and settings,
“No” cancels the operation.
Focus area selection
Spot AF area
p. 55
Preset white balance
Daylight ±0
p. 60
Color temperature
5500K
p. 60
Digital Effects (FX)
All reset to ±0
p. 69
Flash mode
Fill flash or red-eye reduction1
p. 71
Flash control
ADI
p. 75
Manual flash power ratio
1/1
p. 76
Exposure bracketing setup
0.3Ev / 3 frames
p. 70
Flash bracketing setup
0.3Ev / 3 frames
p. 70
1. The flash mode is reset to whichever of the two modes was last set.
The bracketing increment and the number of frames in a
exposure and flash bracket is selected in section 2 of the
recording menu (p. 64). The bracketing increment is in Ev (p. 81).
For information on the bracketing drive mode, see page 58.
BRACKETING SETUP
F
Flla
as
sh
h m
mo
od
de
e
F
Fiillll--fflla
as
sh
h
F
Flla
as
sh
h c
co
on
nttrro
oll
A
AD
DII fflla
as
sh
h
P
Po
ow
we
err rra
attiio
o
1
1//1
1
S
Se
ettu
up
p
0
0..3
3E
Ev
v//3
3ffrra
am
me
es
s
0
0..3
3E
Ev
v//3
3ffrra
am
me
es
s
S
Se
ettu
up
p
B
Brra
ac
ck
ke
ett o
orrd
de
err
Exposure bracket setup
Flash bracket setup
The order in which the bracketing frames is captured selected in
section 2 of the recording menu (p. 64). For information on the
bracketing drive mode, see page 58.
BRACKETING ORDER
Normal - underexpose - overexpose*
Underexpose - normal - overexpose
Bracketing order
* With a five frame bracket, the bracketing order is 0, –, +, –, +.