Adjusting the picture quality, Osd operation 4, When "interlace" is set 1 – Kenwood DV-6050 User Manual
Page 38: When "progressive" is set 1
38
Chapter 4: OSD Operation
OSD Operation
4.
Select a setting item by pressing the cursor up/down
button, then press the ENTER button.
User Mode 1
Contrast
Color
Sharpness
Brightness
0
0
0
0
0
User Mode 1
GAMMA
5.
Select a value by pressing the cursor up/down but-
ton, then press the ENTER button.
¶ The picture quality varies according to the selected
value. Set the desired picture quality by repeating
steps 4 and 5.
Adjusting the picture quality
Use the following procedure to adjust the picture quality.
(If the desired picture quality cannot be obtained by the
following operation, adjust it on the TV.)
COMPONENT VIDEO OUTPUT switch : The setting
items vary depending on the position of the COM-
PONENT VIDEO OUTPUT switch on the rear of the
player.
@
When "Interlace" is set
1.
Press the ON SCREEN button during playback, then
display the "VISUAL" OSD by pressing the cursor up/
down button.
2.
Move the cursor to
Interlace
Normal
(Picture quality
adjustment icon) by pressing the cursor left/right
button, then press the ENTER button.
3.
Select one of the following picture quality settings by
pressing the cursor up/down button, then press the
ENTER button.
Noise Reduction
Normal
Fine
Soft
Cinema
Noise Reduction
User Mode 1
User Mode 2
When "User Mode 1" or "User
Mode 2" is selected, more detailed
setting is available. In this case, also
perform the operation in step 4.
"Normal": Normal picture quality.
"Fine": Sharp picture quality with
enhanced contours.
"Soft": Soft picture quality with less
noise.
"Cinema": Picture quality close to
the images on the movie theater
screen.
"Contrast": Adjustment of the
difference between the bright and
dark parts of picture in the range
between -7 and +7.
"Color" : Adjustment of the depth
of colors in the range between -7
and +7.
"Sharpness": Adjustment of the
degree of picture contour
enhancement in the range
between -2 and +2.
"Brightness": La luminosité de
l'image peut être réglée entre 0 et
+15.
The following setting items are
provided on the next page.
"GAMMA": Le gamma du moniteur
peut être réglé entre -7 et +7.
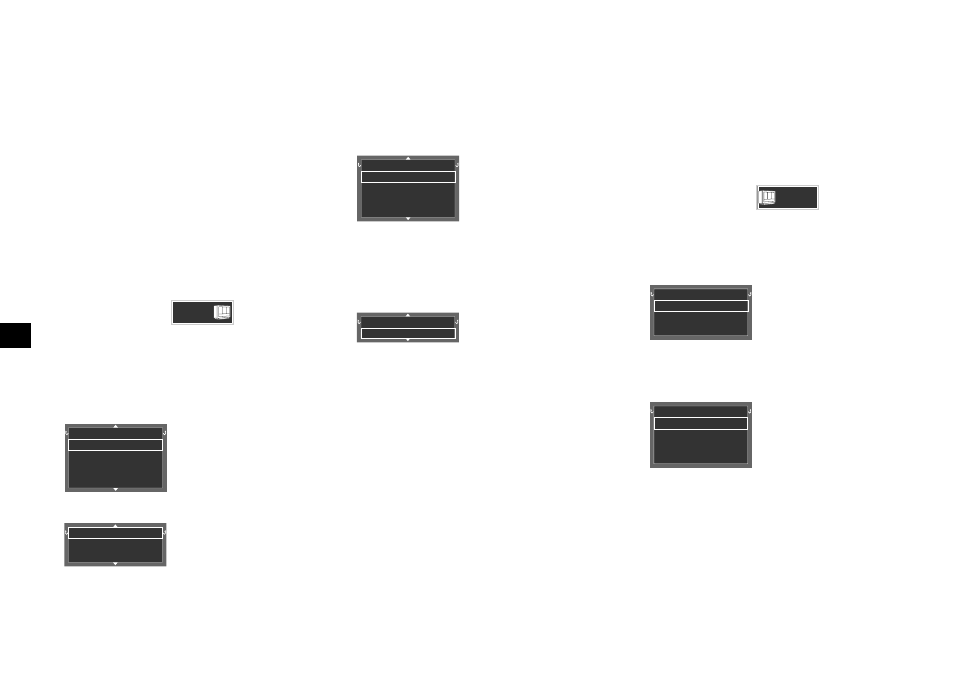
When "Progressive" is set
1.
Press the ON SCREEN button during playback, then
display the "VISUAL" OSD by pressing the cursor up/
down button.
2.
Move the cursor to
Progressive
Normal
(Picture quality
adjustment icon) by pressing the cursor left/right
button, then press the ENTER button.
3.
Select a setting item by pressing the cursor up/down
button, then press the ENTER button.
Noise Reduction
Normal
User Mode 1
User Mode 2
4.
Select a setting item by pressing the cursor up/down
button, then press the ENTER button.
User Mode 1
Sharpness
GAMMA
I / P
DCDi
0
0
Auto
Off
5.
Select a value by pressing the cursor up/down but-
ton, then press the ENTER button.
¶ The picture quality varies according to the selected
value. Set the desired picture quality by repeating
steps 4 and 5.
"Normal": Normal picture quality.
When "User Mode 1" or "User
Mode 2" is selected, more detailed
setting is available. In this case, also
perform the operation in step 4.
"Sharpness": Adjustment of the
degree of picture contour
enhancement in the range
between -2 and +2.
"GAMMA": Adjustment according to
the gamma curve of the monitor,
in the range between -7 and +7.
"I/P": If the disc is changed in the
middle of programming, the
playback may become different
from the intended playback.
"DCDi": Minimizes jaggies on angled
lines.