Advanced features, Menus for detailed adjustment, Changing the menu settings – JVC 0503-FO-ID-VP User Manual
Page 35: Pg. 35, Using the menus, Pg. 35), Pg. 35, 36, Sound, set “beep” to “off, Pg. 35, 38), Pg. 35, 40
EN
35
Master Page: Right-start
AD
V
A
NCED FE
A
TURE
S
MENUS FOR DETAILED ADJUSTMENT
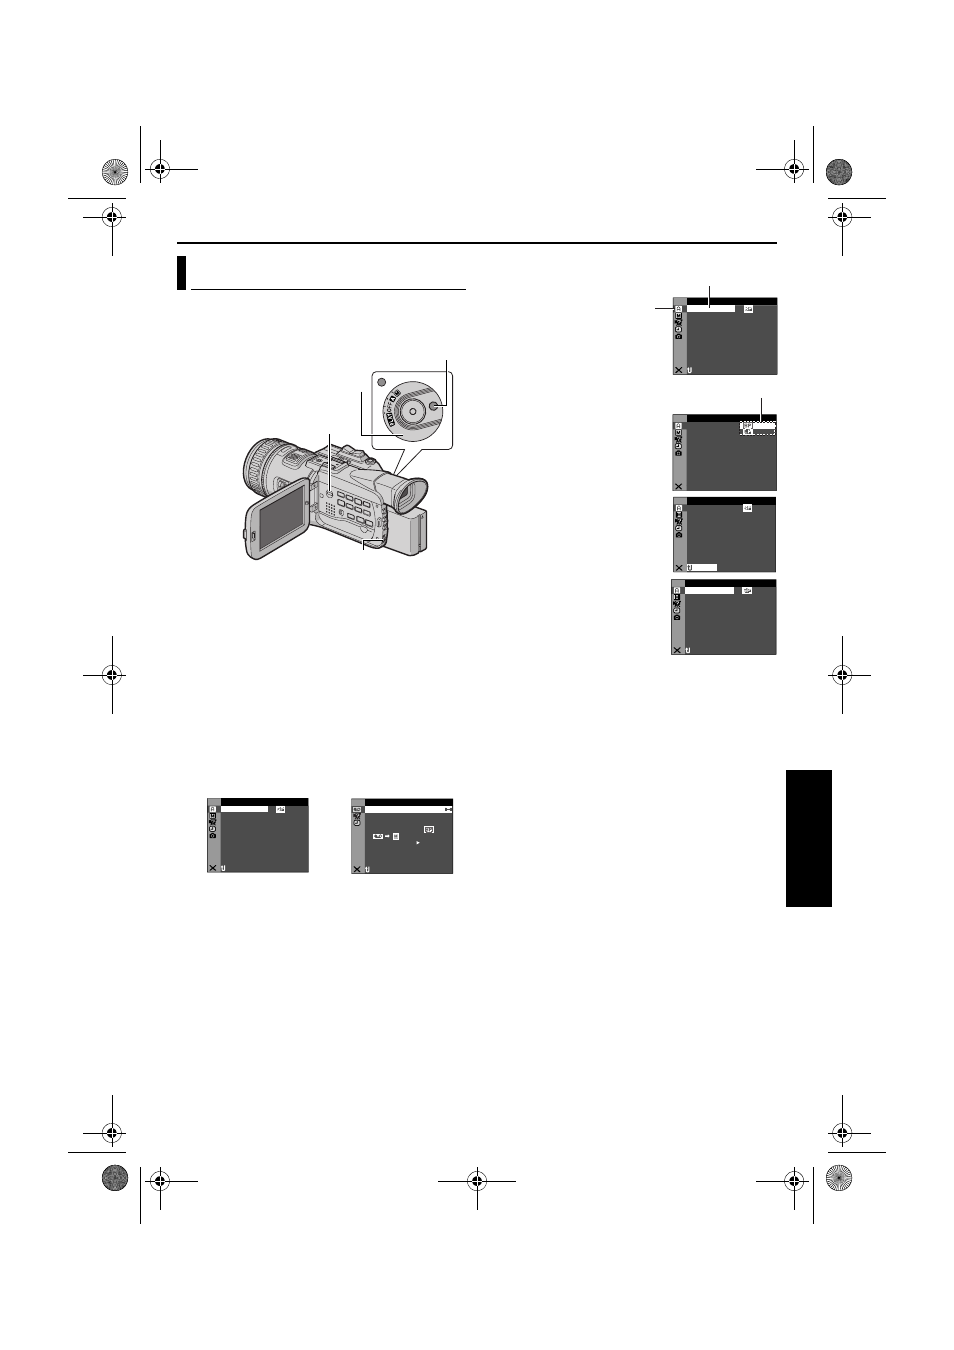
This camcorder is equipped with an easy-to-use, on-
screen menu system that simplifies many of the
more detailed camcorder settings. (
1
For Video and D.S.C. Recording Menus:
Set the Power Switch to “M” while pressing down
the Lock Button located on the switch.
For Video Playback Menus:
1) Set the Playback Mode Switch to “VIDEO”.
2) Set the Power Switch to “P” while pressing
down the Lock Button located on the switch.
For D.S.C. Playback Menus:
For details, refer to “D.S.C. PLAYBACK”
(
2
Open the LCD monitor fully, or pull out the
viewfinder fully.
3
Press the MENU Wheel in. The Menu Screen
appears.
4
Rotate the MENU Wheel to select the desired
function, and press it. The selected function
menu appears.
5
Rotate the MENU Wheel to select the desired
function, and press it. The Sub Menu appears.
Example: m CAMERA Menu
6
Rotate the MENU Wheel to
select the desired
parameter.
7
Press the MENU Wheel in.
Selection is complete.
● Repeat the procedure if
you wish to set other
function menus.
8
Press the MENU Wheel in.
The Menu Screen returns.
● Repeat the procedure if
you wish to set other
function menus.
9
Press the MENU Wheel in
again. The Menu Screen closes.
NOTES:
● The “m” settings are effective when the Power
Switch is set to both “A” and “M”. However, the
menu settings can be changed only when the
Power Switch is set to “M”.
● The “q” settings are effective only when the
Power Switch is set to “M”.
● The “s” functions which are set when the Power
Switch is set to “M” are also applied when the
Power Switch is set to “P”.
● The “n” (CAMERA DISPLAY) settings are
effective even when the Power Switch is set to
“A”. However, the menu settings can be changed
only when the Power Switch is set to “M”.
● The “n” (CAMERA DISPLAY) settings are
effective only for shooting except “BRIGHT”.
● The “n” (VIDEO DISPLAY) settings are effective
only for video playback except “BRIGHT”.
● The date indication can also be turned on/off by
pressing the DISPLAY Button on the remote
control (provided). (
Changing The Menu Settings
Power Switch
Lock Button
Playback Mode Switch
MENU Wheel
ME
A
CA
R
–
1 2
D
–
OUN
DV S
t
i
b
4 0
O
–
ZO M
x
AG
I
–
UP
GA N
C
MA
I O
V
–
GAT
NA I
N
A
U
N
L
N
RETUR
C MOD
RE
E
I D
O
V
E
OF
.
–
ARR
DV N
F
± 0
N
–
HRO
SY C
0
.
E
C
–
MOD
RE
OF
CO
Y
P
F
–
OF
PU
A
I N
S / V
T
F
–
N
RETUR
D
U D M
SO N
E
O
L .
V . DE
NA I
ST R
E
–
EO
Menu Screen for Video
and D.S.C. Recording
Menu
Menu Screen for Video
Playback Menu
ME
A
CA
R
–
1 2
D
–
OUN
DV S
t
i
b
4 0
O
–
ZO M
x
AG
I
–
UP
GA N
C
MA
I O
V
–
GAT
NA I
N
A
U
N
L
N
RETUR
C MOD
RE
E
Selected menu icon blinks.
Selected function
ME
A
CA
R
–
C MOD
RE
E
N
RETUR
Sub Menu
ME
A
CA
R
–
1 2
D
–
OUN
DV S
t
i
b
4 0
O
–
ZO M
x
AG
I
–
UP
GA N
C
MA
I O
V
–
GAT
NA I
N
A
U
N
L
C MOD
RE
E
N
RETUR
ME
A
CA
R
–
1 2
D
–
OUN
DV S
t
i
b
4 0
O
–
ZO M
x
AG
I
–
UP
GA N
C
MA
I O
V
–
GAT
NA I
N
A
U
N
L
N
RETUR
C MOD
RE
E
GR-HD1US.book Page 35 Monday, April 14, 2003 5:21 PM