Removing a two-input 160-a power supply – Juniper Networks T1600 User Manual
Page 18
CAUTION: Do not substitute a metric nut driver or wrench. A tool that does not fit
the nuts exactly can damage them. If a 7/16-in. tool is not available, use pliers or an
adjustable wrench.
■
Phillips (+) screwdrivers, numbers 1 and 2
■
Flashlight
■
Non-conductive sharp object to set the input-mode switch
■
Wire cutters
Removing a Two-Input 160-A Power Supply
To remove a two-input 160-A power supply, follow this procedure:
1.
Switch off the external circuit breakers to the power supply being removed. Make
sure that the voltage across the DC power source cable leads is 0 V and that there
is no chance that the cables might become active during the removal process.
2.
Attach an electrostatic discharge (ESD) grounding strap to your bare wrist and
connect the strap to one of the ESD points on the chassis. See “Preventing
Electrostatic Discharge Damage” on page 47.
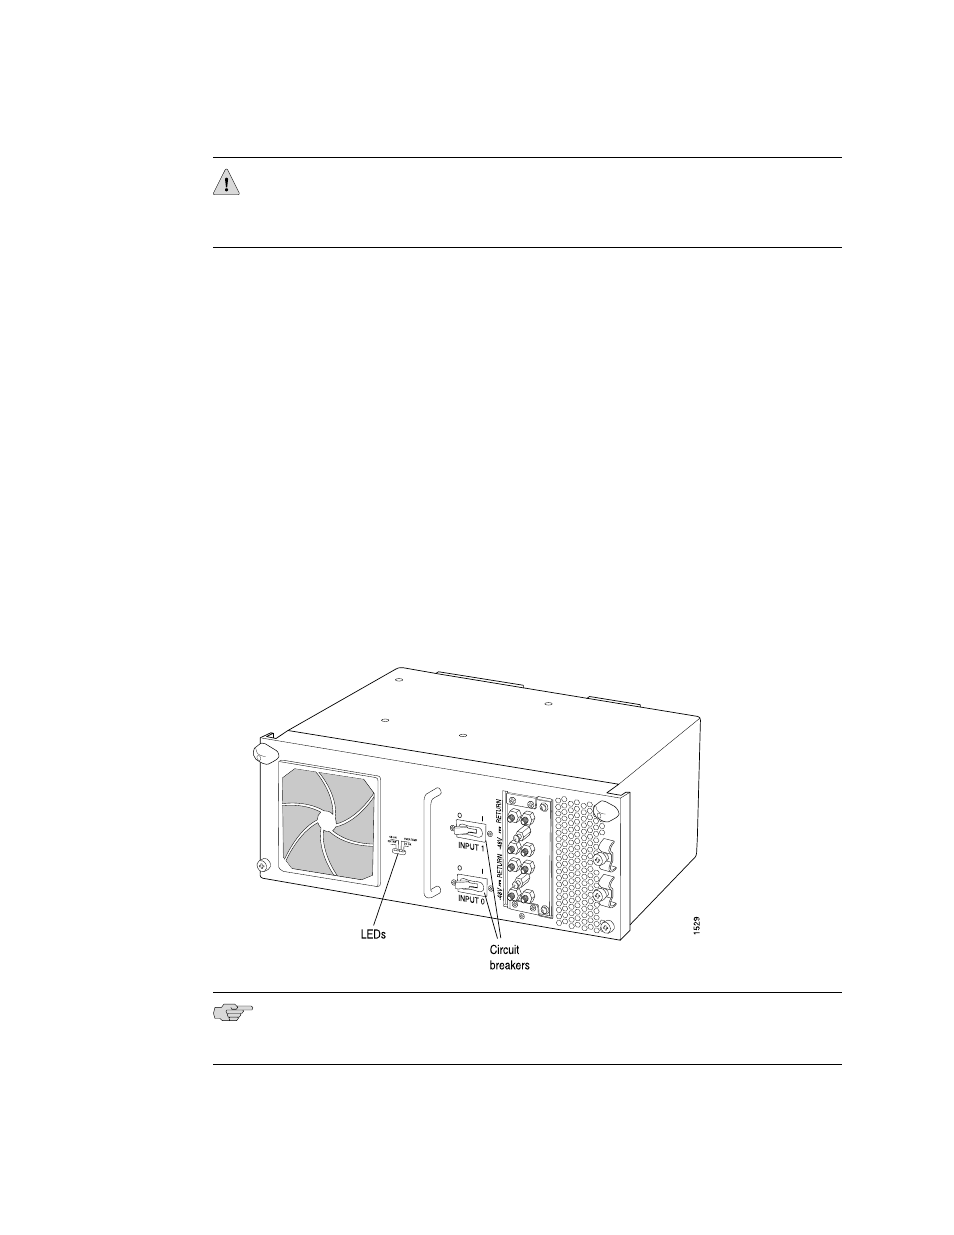
3.
Switch both circuit breakers on the power supply faceplate to the off position (
O
).
Figure 9: Two-Input 160-A Power Supply
NOTE: After powering off a power supply, wait at least 60 seconds before turning it
back on.
4.
Remove the clear plastic cover protecting the terminal studs on the faceplate.
18
■
Upgrading the DC Power Supplies
T1600 Routing Node Upgrade Guide