Playback, Vcr/tv connection, Basic connections (cont.) – JVC GR-DV1 User Manual
Page 46
46
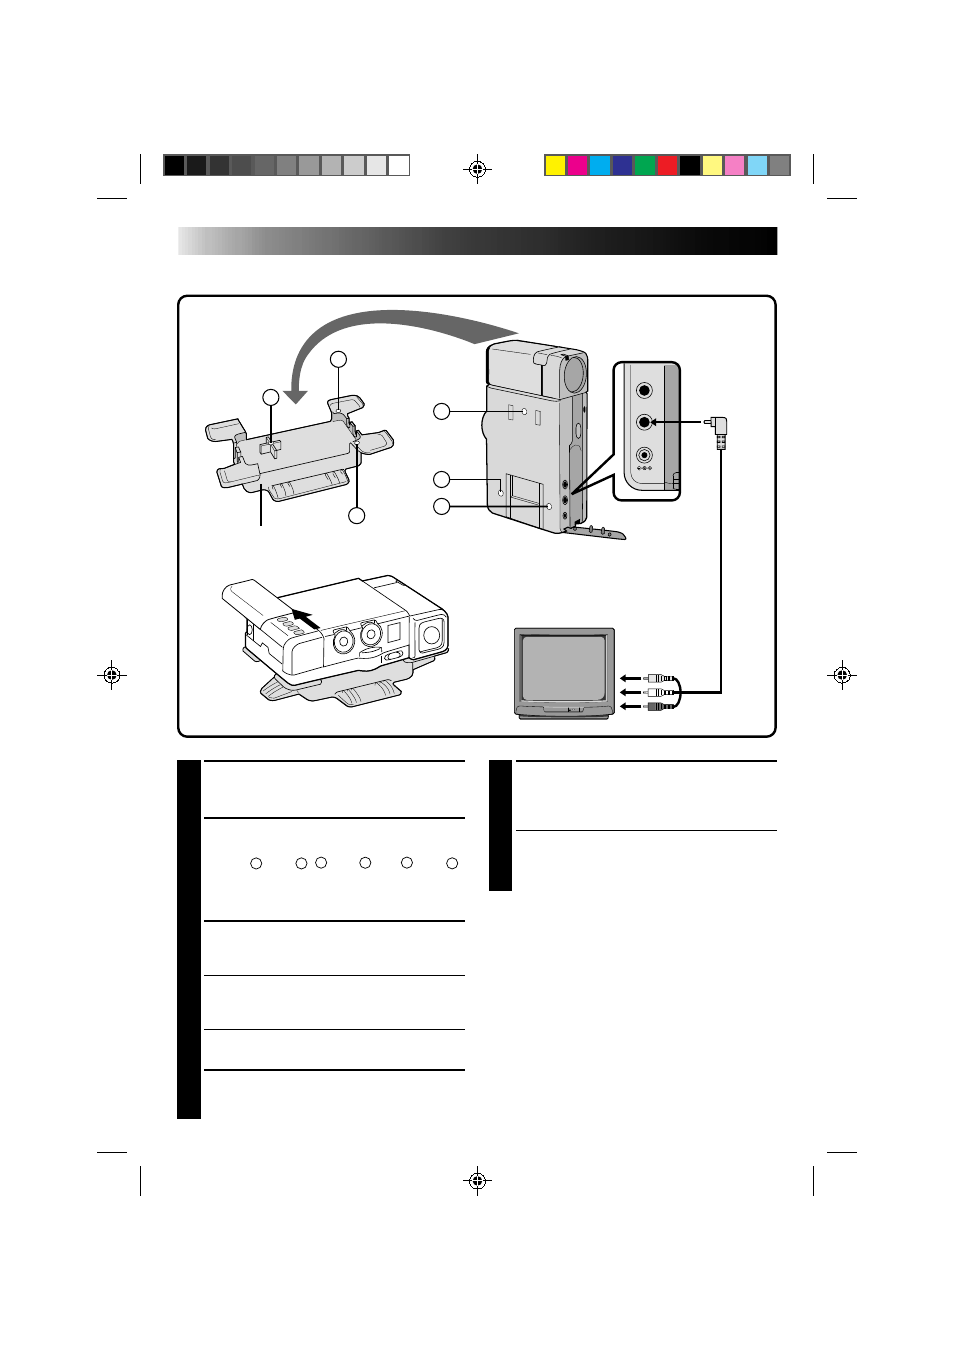
VCR/TV Connection
MIC
AV-OUT
DC-IN 6V
A
B
a
b
c
C
1
CONNECT CAMCORDER TO TV OR
VCR
Connect as shown in the illustration.
2
ATTACH CAM STAND TO
CAMCORDER
Line up
A
with
a
,
B
with
b
and
C
with
c
.
The CAM Stand has two sides. One side is
used to hold the camcorder upright and the
other side is used to hold the camcorder flat.
3
TURN ON POWER
Turn on the power to the camcorder and the
TV/VCR.
4
SELECT TV’S VIDEO MODE
Set the TV to the channel or mode appropriate
for video playback.
If Using A VCR . . . go to step
4
.
If not . . . go to step
5
.
5
CONNECT VCR OUTPUT TO TV
INPUT
Refer to your VCR’s instruction manual.
6
START PLAYBACK
Slide the cover (
੬
pg. 47) and press PLAY.
You can watch the scenes you recorded on the
TV.
7
END PLAYBACK
Press STOP and, if you’re not going to
continue using the camcorder, set the Power
pDial to “OFF”.
NOTES:
To choose whether or not the following displays
appear on the connected TV . . .
●
Date/Time, Time Code
..... set to “ON” or “OFF” in the Playback Menu
(
੬
pg. 49).
●
Playback Sound Mode Display
..... set the Power Dial to “REC”, and set “ON
SCREEN” in the Date/Time Menu (
੬
pg. 30)
to “ON” or “OFF”. Then set the Power Dial
back to “PLAY”.
CAM STAND
To AV OUT
AUDIO and VIDEO cable
(ø3.5 DV TV or VCR)
To AUDIO
and VIDEO IN
connectors
PLAYBACK
Basic Connections (Cont.)