Playback, Basic connections – JVC GR-DV1 User Manual
Page 44
44
5
SELECT MODE
Set the Power Dial to “PLAY”.
Using The Remote Control During Playback
Once the camcorder is attached to the Docking
Station, you can use the RM-V708U remote control
for regular playback, slow motion
(approx. 1/10 speed–
੬
pg. 45), Playback Zoom
(
੬
pg. 50), and P.AE/Effects (
੬
pg. 51).
Charging The GR-DV1 Battery
If you attach the camcorder with the battery
installed to the Docking Station, you can charge the
battery. Set the Power Dial to “OFF”, then perform
steps 1 through 4 of the Docking Station Attachment
procedure. The Docking Station’s charging lamp
starts blinking to indicate that charging has begun.
When it stops blinking but stays on, charging is
complete. It normally take approximately 170
minutes to charge using this method.
•Do not attach or remove the battery while the
camcorder is attached to the Docking Station.
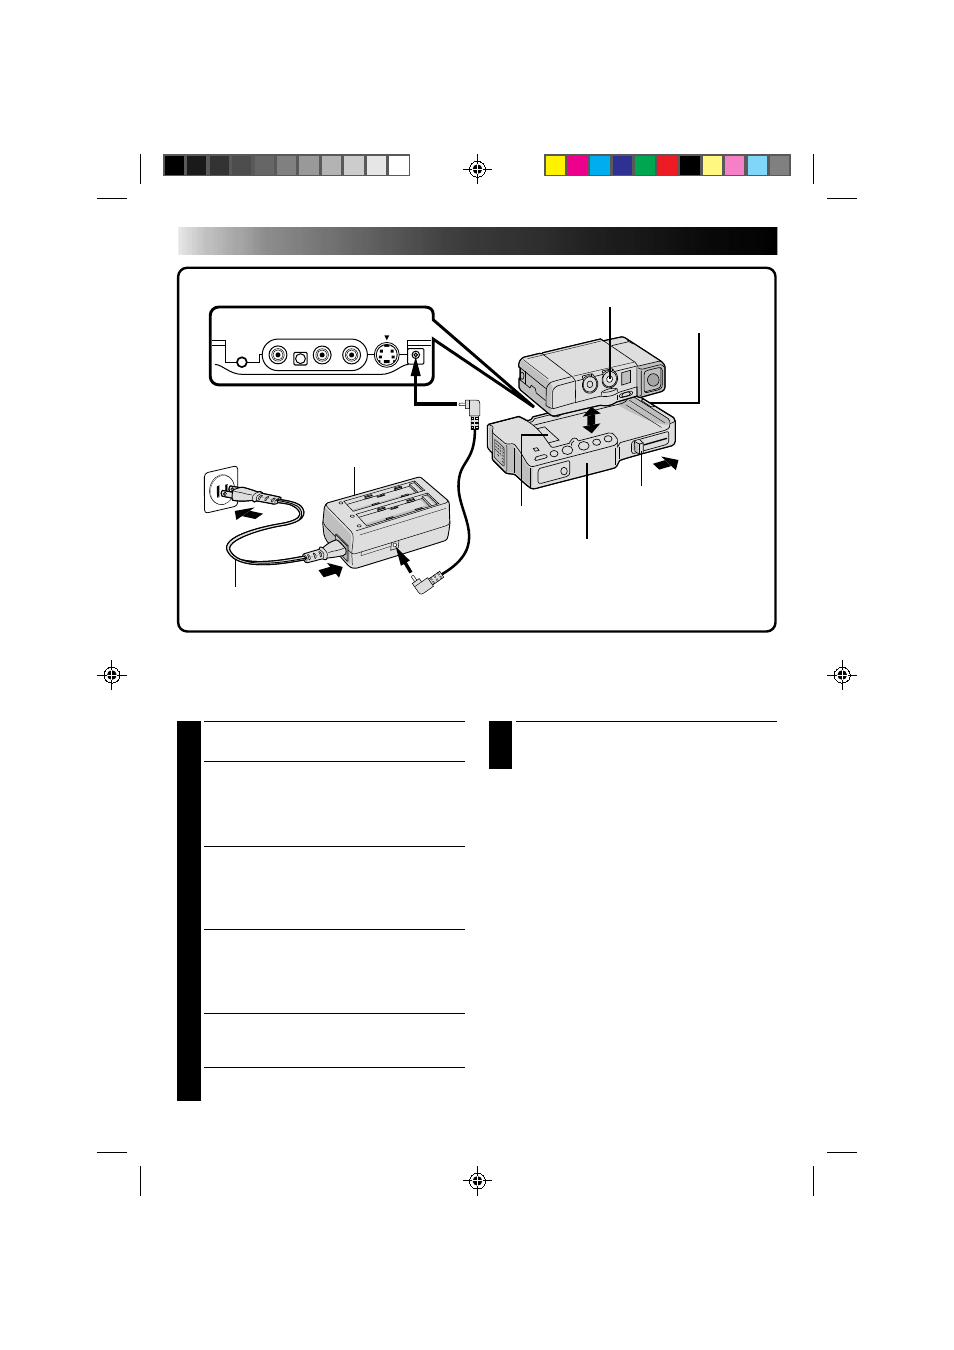
1
CONFIRM POWER-OFF STATUS
Make sure the camcorder’s power is off.
2
PLACE CAMCORDER IN DOCKING
STATION
If you plan to use the MENU button while the
camcorder is docked, you need to pull out its
viewfinder before attaching.
3
ATTACH AND LOCKS
Press down on the camcorder and slide the
Lock Lever in the direction of the arrow. The
camcorder and the Docking Station are now
securely attached.
• Make sure that the camcorder does not have
a DC cord or an AV cable connected to it
before attaching.
• When removing the camcorder, press the
Release button and lift the camera out.
4
SUPPLY POWER
Connect the optional AC Adapter between the
Docking Station and an AC outlet.
• The Docking Station cannot function using
the camcorder’s battery.
Docking Station Attachment
When you attach your camcorder to the optional Docking Station, you can add many interesting effects
during playback.
LOCK LEVER
DOCKING STATION
MULTI JACK
POWER DIAL
RELEASE BUTTON
TO DC JACK
POWER CORD
AC OUTLET
PLAYBACK
Basic Connections
AC POWER ADAPTER/CHARGER
TO DC INPUT JACK