Getting started, Charging the battery – JVC GR-DV1 User Manual
Page 10
10
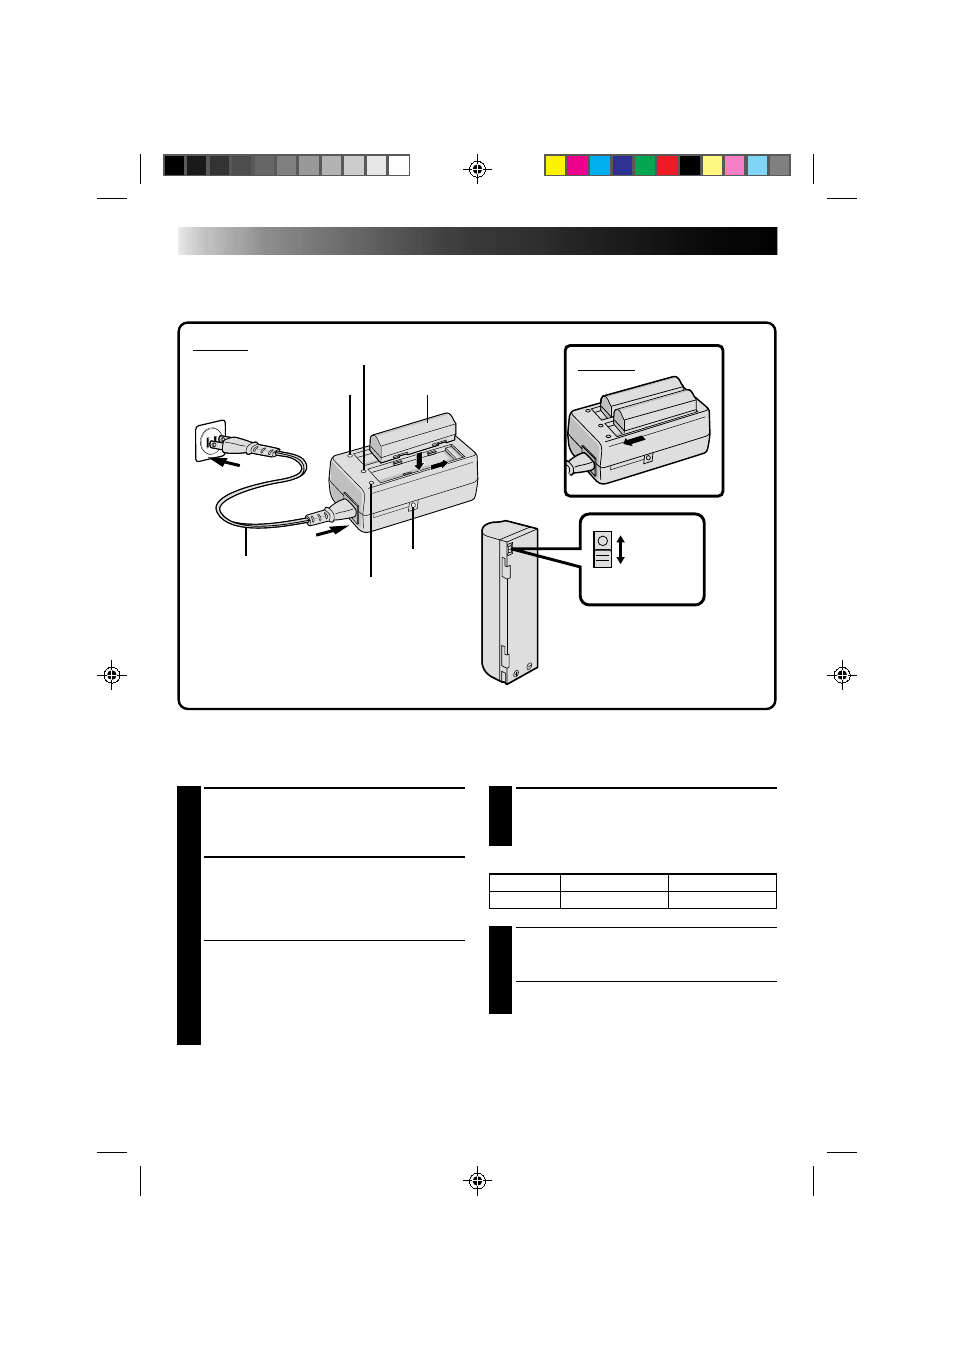
Charging The Battery
You can charge one battery pack at a time, or two consecutively.
GETTING STARTED
POWER CORD
DC JACK
POWER LAMP
CHARGE INDICATOR 1
CHARGE INDICATOR 2
BATTERY PACK BN-V712U
3
CONFIRM STATUS
When the charge indicator stops blinking but stays
on, charging is finished. (If two batteries are attached,
this means that they’ve both been charged.)
CHARGING TIME
1
SUPPLY POWER TO CHARGER
Connect the power cord between the AC
Power Adapter/Charger and an AC outlet. The
power indicator comes on.
2
ATTACH BATTERY/BATTERIES
Remove the battery pack’s protective cap and
make sure the + – marks are facing down and
aligned with the corresponding marks on the
AC Power Adapter/Charger.
• The Charge Indicator begins blinking to
indicate charging has started.
• To charge two batteries consecutively, attach
one right after the other. If you attach a
second battery while the first one is being
charged, the time required for charging will
increase.
BATTERY
ONE
TWO
BN-V712U
approx. 140 min.
approx. 210 min.
4
DETACH BATTERY/BATTERIES
Slide the battery or batteries in the direction of
the arrow and lift off.
•Remember to unplug the power cord from
the AC Power Adapter/Charger.
Charge Marker
The charge marker makes it easy for you to differentiate between charged and discharged batteries. Choose
RED or BLACK to mean charged or discharged, and you'll always know the status of your batteries.
BLACK
RED
CHARGE MARKER
• The charge marker does not move
by itself. After charging or removing
a discharged battery, be sure to set
the marker to the predetermined
position.
ATTACH
DETACH