Select the desired menu, Select the desired file, Select [ok – JVC Everio GZ-HD40 User Manual
Page 47: Select [yes] or [no
EN
Select Files for Backup
Preparation:
•
Connect the camera to the DVD burner.
•
Select
!
or
#
mode.
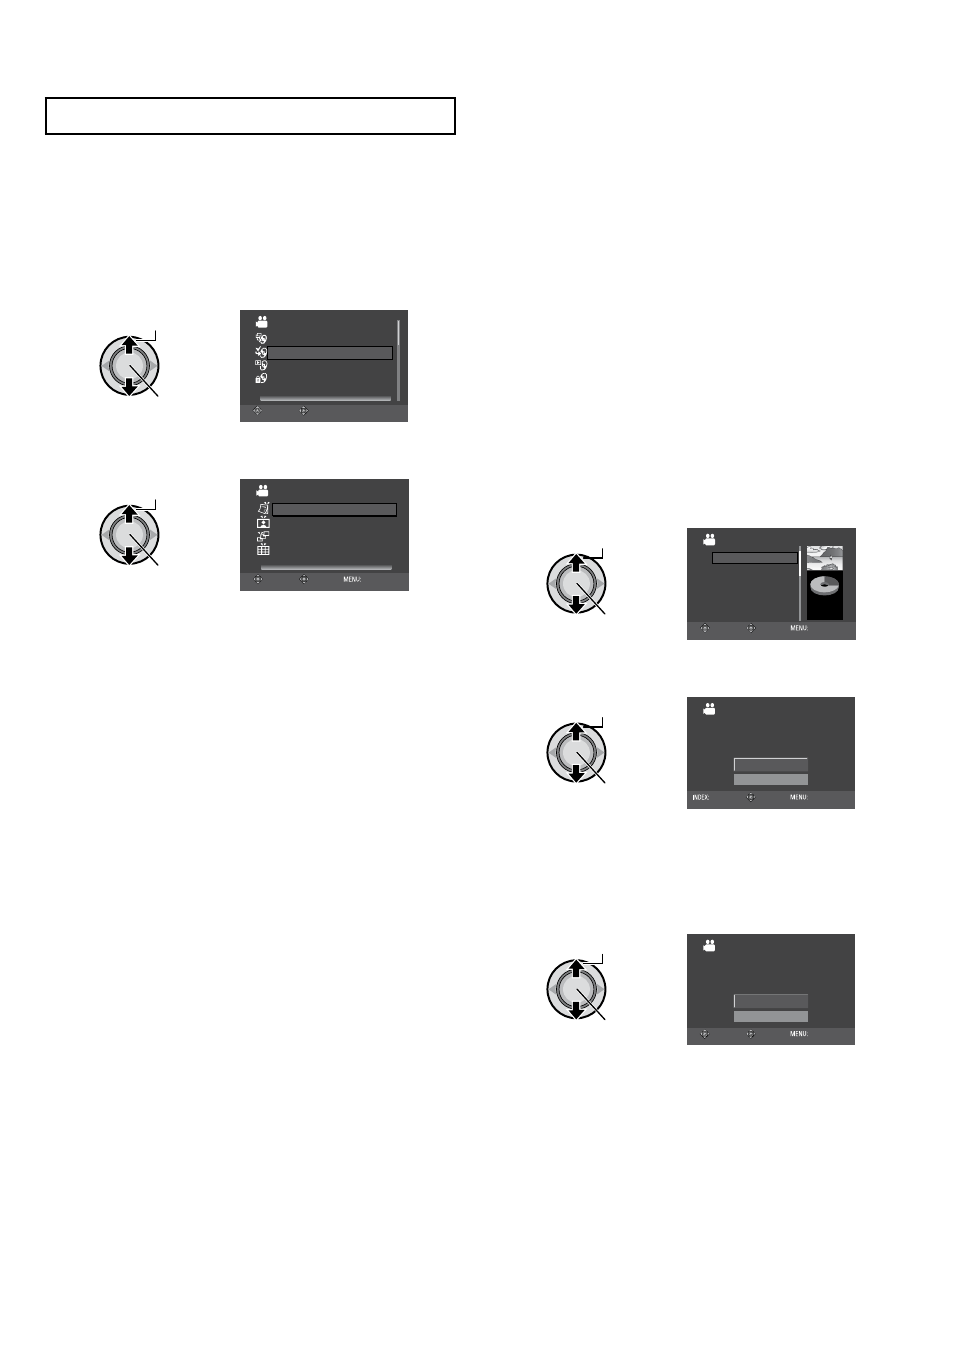
1
Select [SELECT AND CREATE] (
!
mode) or [SELECT AND SAVE] (
#
mode).
Select
Set
VIDEO
PLAYBACK
SELECT AND CREATE
CREATE FROM ALL
FINALIZE
SELECT AND CREATE
SET
SELECT
2
Select the desired menu.
Select
Set
SELECT AND CREATE
CREATE DISC BY DATE
CREATE BY DATE
CREATE BY PLAYLIST
CREATE BY EVENT
SELECT FROM SCENES
SELECT
SET
TOP
! mode:
•
[CREATE BY DATE]:
Files are sorted according to the date
on which they were recorded. Relevant
files are displayed in a list. Select the
recording date.
•
[CREATE BY EVENT]:
Files are sorted according to event.
Relevant files are displayed in a list.
Select the event.
•
[CREATE BY PLAYLIST]:
Select the desired playlist from the list
of playlists. The selected playlists are
displayed in a list.
1) Select the desired list. To select other
lists, repeat this process.
2) Move the set lever to
¤ twice.
•
[SELECT FROM SCENES]:
Register backup files individually.
1) Select the desired file. To select other
files, repeat this process.
2) Press
INDEX then go to step
4.
# mode:
•
[SAVE BY DATE]:
Files are sorted according to the date
on which they were recorded. Relevant
files are displayed in a list. Select the
recording date.
•
[SELECT FROM IMAGES]:
Register backup files individually.
1) Select the desired file. To select other
files, repeat this process.
2) Press
INDEX then go to step
4.
To preview scenes, press
INDEX. When the
index screen of individual scenes appears,
select the file.
To return to the previous screen, press
INDEX.
3
Select the desired file.
Select
Set
CREATE BY DATE
01
03
02
04
05
06
DVD(DL)
DVD
3
5
SELECT
SET
TOP
JAN.01.2008
JAN.03.2008
JAN.02.2008
JAN.04.2008
JAN.05.2008
JAN.06.2008
4
Select [OK].
Select
Set
CREATE BY DATE
QUANTITY REQUIRED
PREPARE AN EMPTY DISC
DVD10 / DVD(DL)5
RETURN
OK
CHECK
SET
TOP
To cancel the backup, select [RETURN].
5
Select [YES] or [NO].*
•
[YES]: Displays the thumbnails by group.
•
[NO]: Displays the thumbnails by date.
Select
Set
ALL SCENES
NO
YES
DO YOU WANT TO MAKE
AN AUTOMATIC HEADLINE ON
THE DISC TOP MENU?
SET
TOP
SELECT
When selecting [CREATE BY PLAYLIST],
select [OK] when [HEADLINE DISPLAYED
ON THE DISC TOP MENU IS EITHER THE
PLAYLIST OR DATE] appears.
* In case of still image or video in MPEG-2
TS format, go to step
6.