Removing/installing the drive wheels (figure 2) – Invacare BUZZ HMV User Manual
Page 35
Part No. 1118395
35
®
REMOVING/INSTALLING THE DRIVE WHEELS
(FIGURE 2)
REMOVING
WARNING
Before performing any maintenance, adjustment or service, turn power
OFF and remove key from ignition.
1. Turn power OFF and remove the key from the ignition.
2. Remove the rear shroud. Refer to REMOVING/INSTALLING THE REAR SHROUD
in this section of the manual.
3. Place the sub-frame up on blocks so that the drive wheels are OFF the ground.
4. Remove the hex nut and washer that secures the drive wheel to the drive shaft.
5. Use a wheel puller if necessary to remove the EXISTING drive wheel assembly from
the drive shaft.
6. Remove keystock from drive shaft. Set aside.
7. If necessary, repeat STEPS 1-5 to remove other drive wheel.
INSTALLING
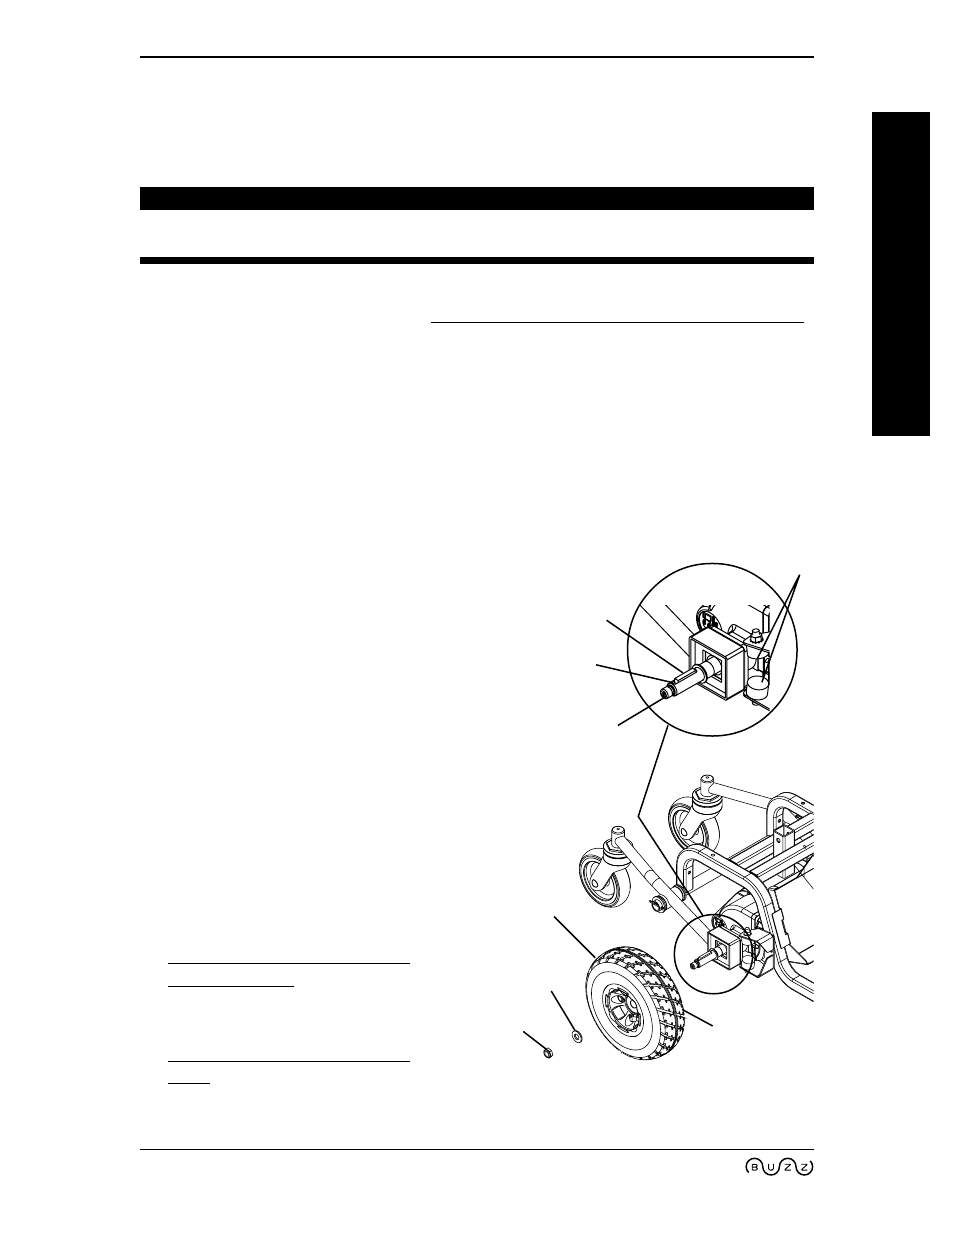
1. Place keystock in cutout on drive
shaft as shown in FIGURE 2.
NOTE: The keystock in the drive shaft MUST
lineup with the cutout in the wheel hub.
NOTE: If necessary, use a rubber hammer to
gently tap drive wheel completely into position
on the drive shaft.
2. Install the drive wheel onto the drive
shaft.
3. Secure wheel to drive shaft using a
washer and hex nut. Securely tighten.
4. Repeat STEPS 1-5 to install the other
drive wheel.
5. Install the rear shroud. Refer to
REMOVING/INSTALLING THE
REAR SHROUD in this section of
manual.
6. Install the seat. Refer to
REMOVING/INSTALLING THE
SEAT in SECTION 4 of this manual.
SHROUD/WHEELS
SECTION 7
SHROUD/WHEELS
FIGURE 2 - REMOVING/INSTALLING
THE DRIVE WHEELS
Wheel Hub
Hex Nut
Drive
Wheel
Drive Shaft
Keystock
Cutout
Washer
WARNING:
Pinch Point