IBM 5000 User Manual
Page 72
Installing or Removing Internal Drives
Installing or Removing a Drive in Bay C (Diskette Drive)
This section gives the procedure for installing or removing a diskette drive.
Before you begin
Read “Electrical Safety” on page 41 and “Handling Static-Sensitive Devices”
on page 42.
Read the documentation that comes with the option.
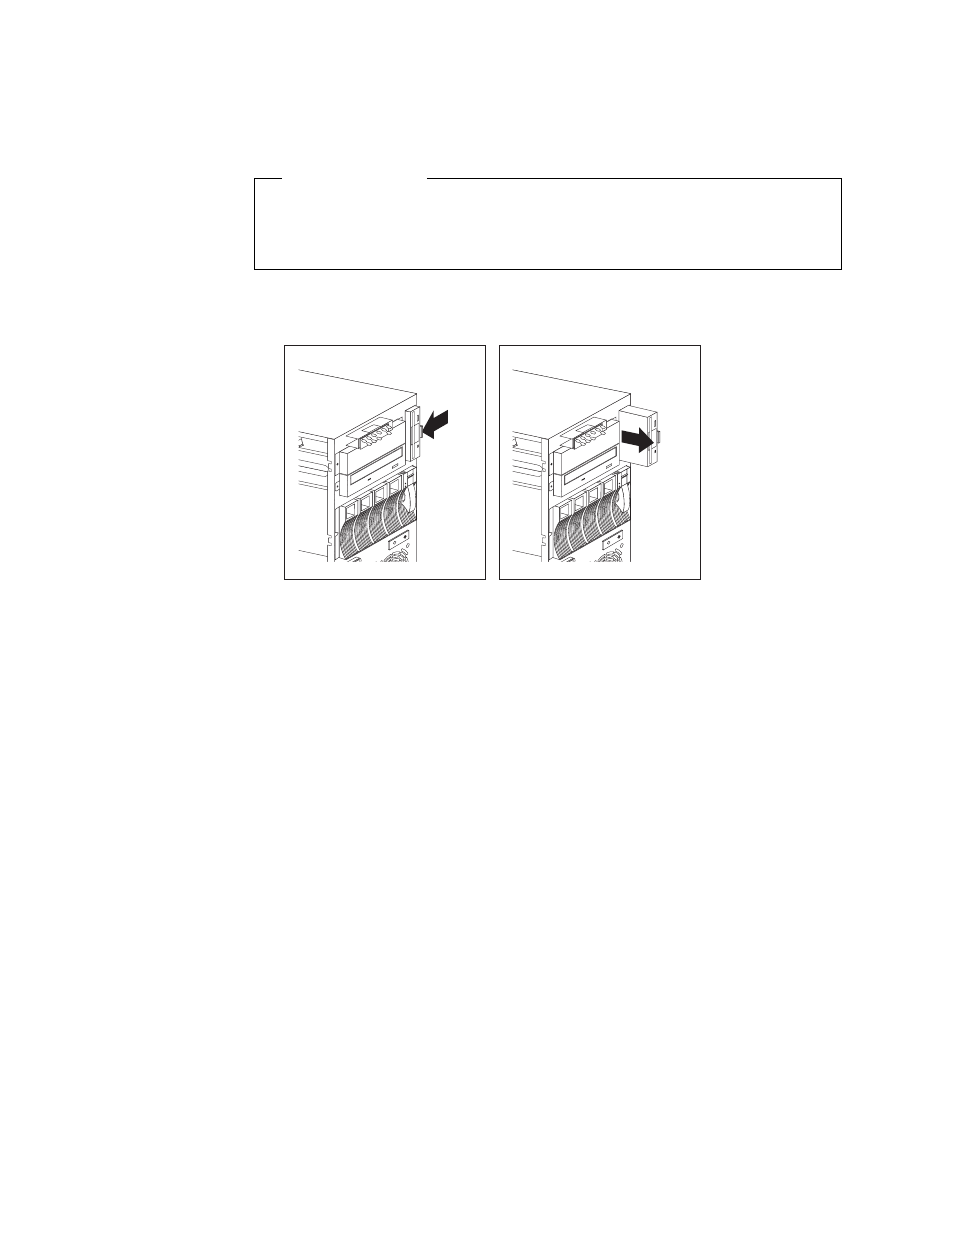
To remove a drive in bay C:
1. Locate the drive-release tab on the diskette drive.
2. Press the tab against the drive and hold it there while pulling the drive out.
3. Disconnect the diskette drive cable and power cable from the drive.
4. If you want to install or remove any other options, do so now. Otherwise, go to
“Completing the Installation” on page 76.
To install a drive in bay C:
1. If you have not done so, remove the server cover and front bezel. See
“Preparing to Install Options” on page 43.
2. Using the instructions that come with the drive, together with these instructions,
check that any switches or jumpers on the drive are set correctly. Change the
settings if necessary. For information about termination requirements, see
“Termination Requirements” on page 59.
3. Insert the drive into the bay.
a. Position the drive so that the connectors face the rear of the server and the
diskette eject button is toward the outside of the server.
b. Connect the diskette drive cable and power cable to the drive.
Note: If you have difficulty connecting a cable, turn the cable connector
over and try again; cable connectors are keyed to connect only one
way.
62
Netfinity 5000 Server Hardware Information and Procedures