IBM 9516-BXX User Manual
Page 25
12
Auto Setup for Windows 3.1, Windows 95, or Windows NT
Continued from
Auto Setup for DOS on page 11
11
Drag the icon bar and tool bar, if they are displayed, to the bottom of the
screen
12. Insert the diskette labelled ‘ Setup Option Diskette (for DOS / Windows /
Windows NT)’ into the diskette drive.
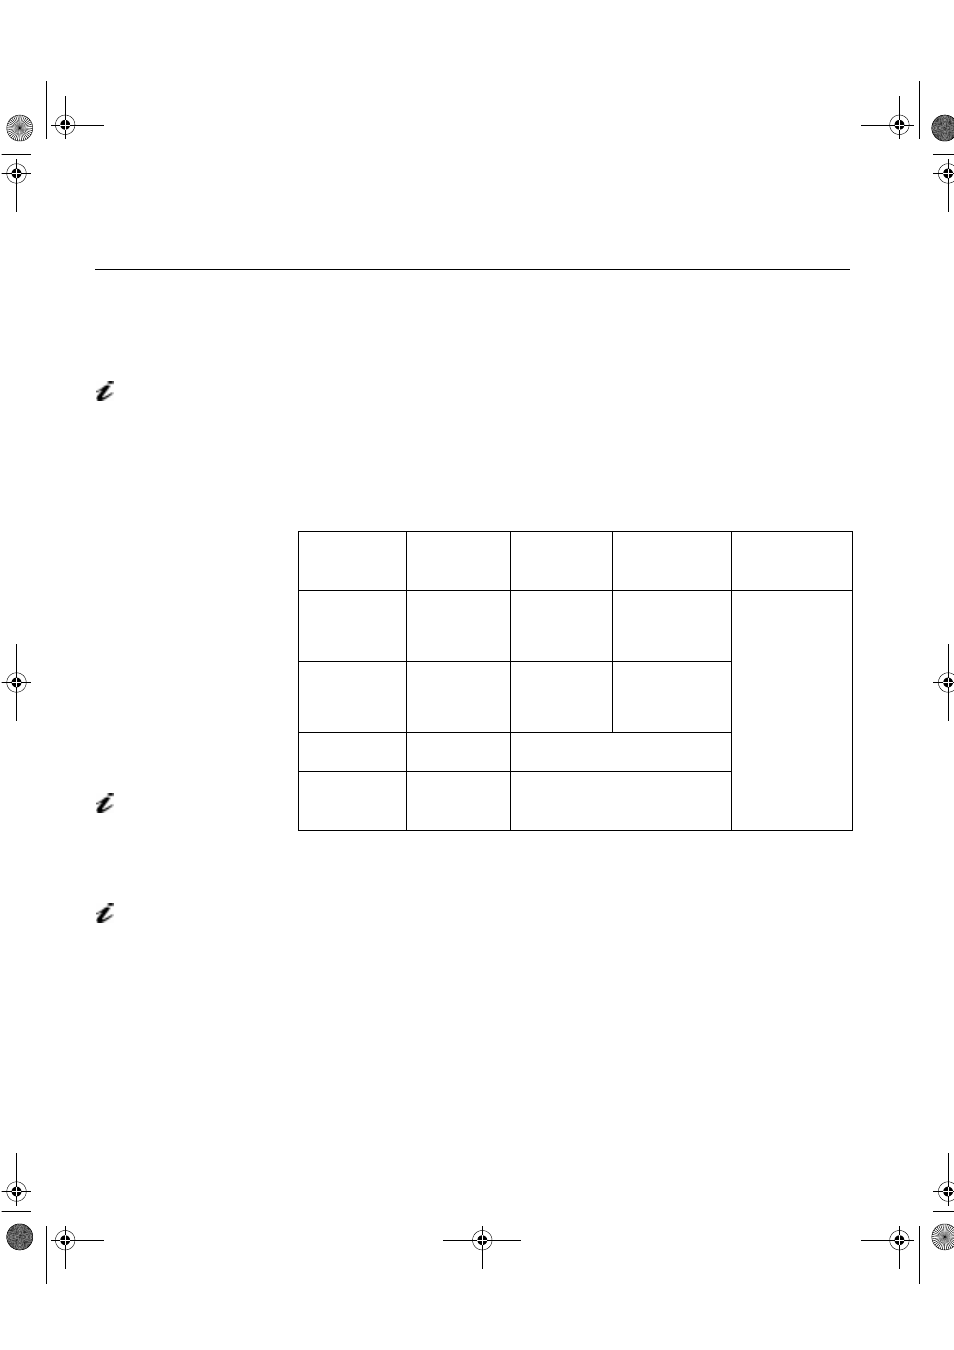
13. Check the operating system installed on your PC and follow the
instructions from the table below
.
14. The color-bar pattern appears and auto setup starts.
15. Position the mouse pointer at the bottom center of the screen. This
allows auto setup to run properly.
16. The AUTO SETUP line changes to COMPLETED when auto setup is
completed.
If “AUTO SETUP COMPLETED” is not displayed, or the “AUTO SETUP FAILED”
message appears, repeat the auto setup procedure several times. If auto setup
continues to fail, complete the
Manual Setup
on page 28.
17. Press ALT+F4 to exit auto setup.
You have completed the monitor setup.
Operating
system
Step 1
Step 2
Step 3
Step 4
Windows 3.1
open
Program
Manager
click on File
click on run
Type
‘A:\TESTPAT’
Windows NT
3.5
open
Program
Manager
click on File
click on run
Windows 95
click on Start
click on Run
Windows NT
4.0
click on Start
click on Run
If the monitor is in standby
mode (STANDBY ON), it
may automatically turn off while
you are waiting for it to warm up.
The size and diversity of the
color pattern varies with the
screen resolution.
If the screen flickers, repeat
the setup several times until
the flicker is minimised, or adjust it
manually by following Manual
Setup on page 28.
txteng.book Page 12 Friday, April 3, 1998 3:28 PM