Middleby Cooking Systems Group PS360/PS360WB User Manual
Page 28
2-14
SECTION 2
INSTALLATION
JOINING THE OVEN BODIES
For TANDEM and DOUBLE TANDEM installations, perform
Steps 1-7 to join the ovens.
For TRI TANDEM installations, perform Steps 1-7 to join two of
the ovens together, and ensure that they are level; then, repeat
Steps 1-7 to join the third oven to the two that are assembled.
For QUAD TANDEM installations, perform Steps 1-7 for EACH
PAIR of ovens, producing two sets of two joined ovens. Do not
assemble the center bridge section at this time.
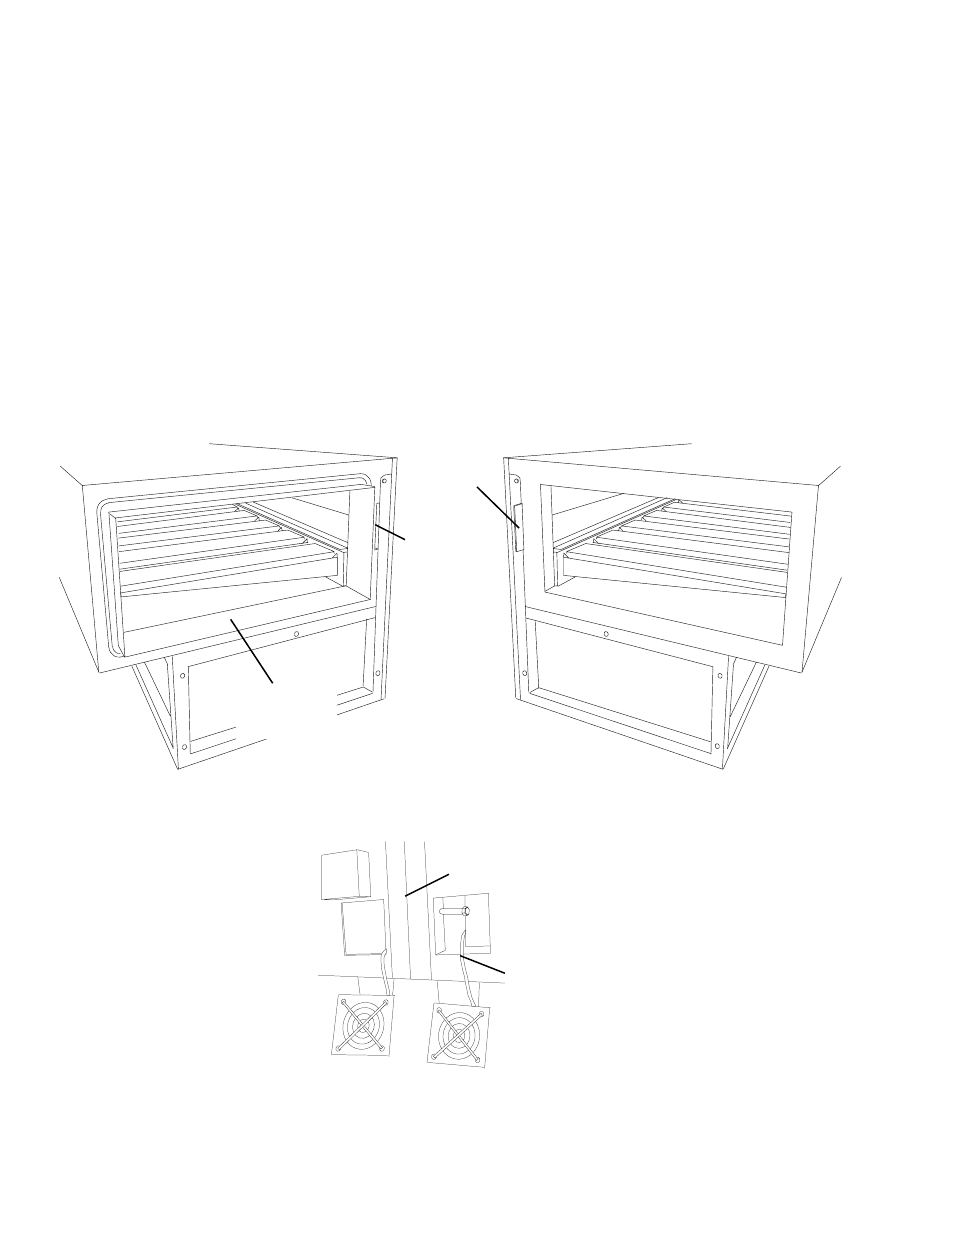
1. Determine the proper position of the ovens by referring to
Figure 2-15. Then, move the ovens to their approximate
final locations.
NOTE: The Sealing Gasket Assembly is shown attached
to the left oven in Figure 2-15, but may be pre-mounted to
EITHER of the two ovens.
2. Remove the rear axial cooling
fans that are adjacent to the
mating sides of the ovens, as
shown in the diagram. Leave
the fan wiring connected to
the oven.
Figure 2-16
Cooling Fan Removal
Mating surface of
ovens (shown
from lower rear)
Wiring is still
connected
Figure 2-15
Oven Positioning and Alignment
Alignment
plate
Slot for
alignment
plate
Sealing gasket
assembly (pre-
mounted)
LEFT OVEN
RIGHT OVEN