Before operation, Paper sheet set, Unlock the printing unit – MITSUBISHI ELECTRIC CP900E User Manual
Page 17: Installation of print paper
17
CONNECTIONS
PRINTING
ADJUSTMENTS
PRECAUTIONS
FEA
TURES
PREP
ARA
TION
OTHERS
TROUBLE-
SHOOTING
BEFORE OPERATION
Before printing,
1. Unlock the printing unit. (See below)
2. Install the print paper and ink cassette. (pages 17-21)
1
2
with gear
without gear
About 20cm
PAPER SHEET SET
When using this unit for printing, make sure to use the following types of paper sheet and ink sheet set.
2
2
2
2
2
PAPER SHEET SET
Product name
Ink sheet size
No. of prints
Usage
CK900S
S size
200
Colour print
CK900L
L size
130
Colour print
CK900S4P
S size
130
Surface-laminated colour print
CK900L4P
L size
90
Surface-laminated colour print
CK900S4P(HX)EU
S Size
130
Surface-laminated colour print for ID photo
CK900L4P(HX)EU
L Size
90
Surface-laminated colour print for ID photo
2
2
2
2
2
THERMAL PAPER
Product name
Print size
No. of prints
Usage
K65HM-CE
S/L size
S size Approx.200
Thermal print
L size Approx.125
2
2
2
2
2
PAPER INK SHEET CASSETTE
Product name
Ink sheet size
No. of prints
Usage
PKC900S
S size
200
Colour print
PKC900L
L size
130
Colour print
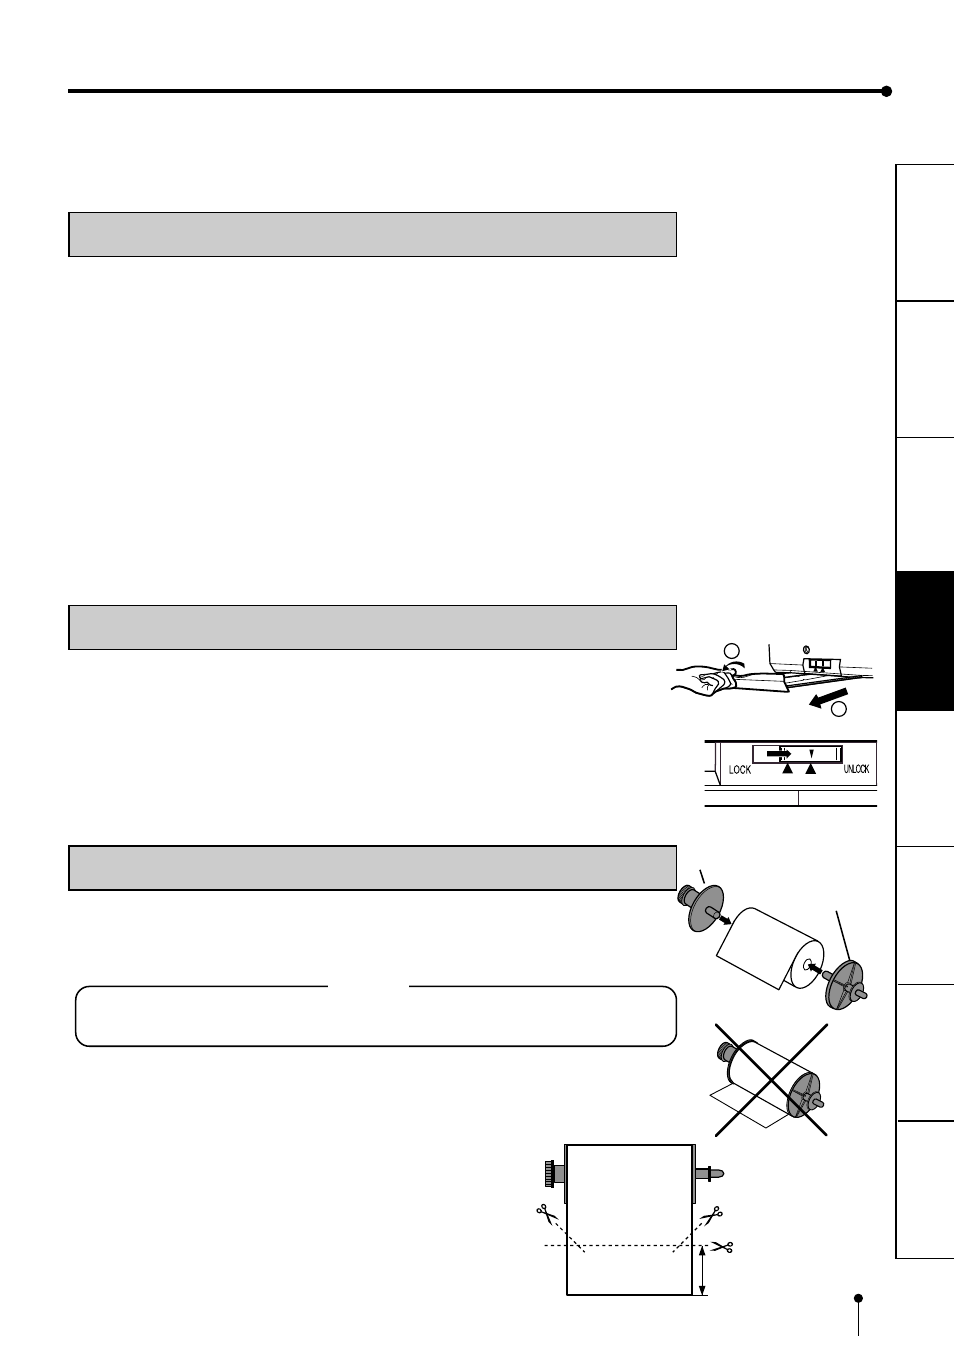
UNLOCK THE PRINTING UNIT
2
2
2
2
2
RELEASING THE PRINTING UNIT LOCK
1
1
1
1
1
Press down the knob to pull out the tray.
2
2
2
2
2
Shift the printing unit lock switch to the right (UNLOCK). (See page 8.)
INSTALLATION OF PRINT PAPER
When using the thermal paper, prepare the following steps first.
1
1
1
1
1
Set the supplied paper attachments to both sides of the thermal paper.
NOTE
Set the attachment with gear on the left side.
Make sure to set them correctly.
2
2
2
2
2
Pull out the thermal paper about 20cm and cut it.
Remove the part with seal paste, dust and fingerprints.
3
3
3
3
3
Cut the both corners of the paper.
Installation for the thermal paper is completed.