Connections, Connection with a monitor, 1press menu button – MITSUBISHI ELECTRIC CP900E User Manual
Page 11: 2press stop button on remote control unit
11
CONNECTIONS
PRINTING
ADJUSTMENTS
PRECAUTIONS
FEA
TURES
PREP
ARA
TION
OTHERS
TROUBLE-
SHOOTING
CONNECTIONS
The functions of this unit can be set by the menu screens displayed on the monitor.
•
Connection with a monitor
•
Connection with VIDEO/S-VIDEO signal equipment
•
Connection with RGB analog signal equipment
•
Connection with RS-232C equipment
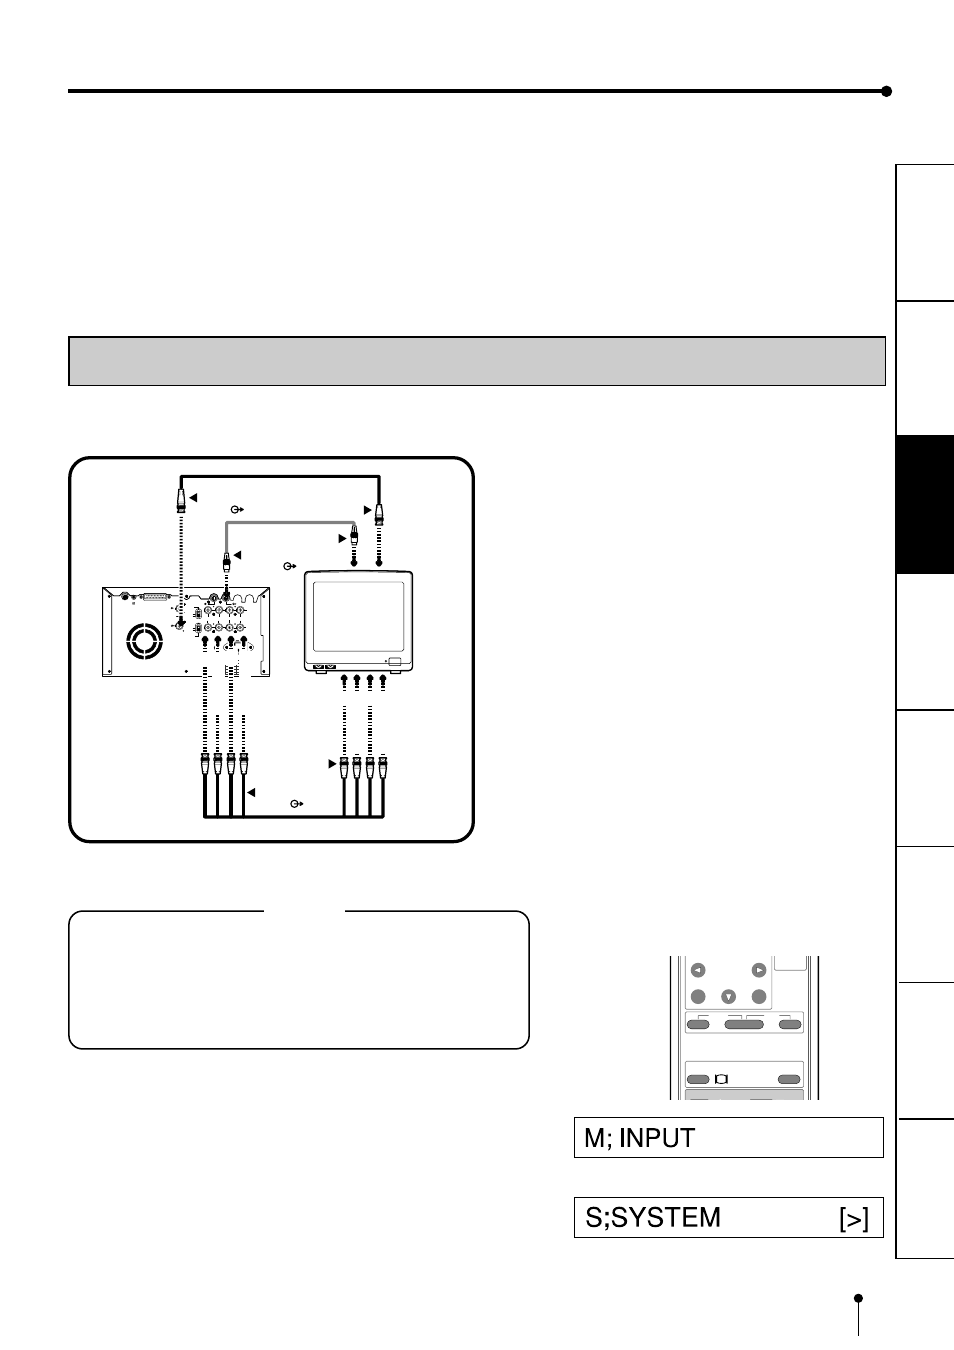
Connect this unit with a monitor to check the images to be printed and the images stored in memory.
The following examples show the connections with a video signal, S-video signal,RGB analog signal and RS-232C equipment.
Connect with the necessary signal equipment.
Make sure to turn off the power of the unit and connecting equipment before connection.
CONNECTION WITH A MONITOR
Make sure to turn off the power before setting.
(EXAMPLE)
REMOTE
RS-232C
S-VIDEO IN
S-VIDEO OUT
R
G/G+SYNC
B
Y/SYNC
IN
VIDEO
75
Ω
75
Ω
/HIGH
AC LINE
OUT
75
Ω
/HIGH
75
Ω
75
Ω
75
Ω
75
Ω
HIGH
HIGH
HIGH HIGH
ON
OFF
POWER
HIGH
IMPEDANCE
RGB
75
Ω
75
Ω
/HIGH
HIGH
SYNC
R
G/G+SYNC.
B
H+V-SYNC.
R
G/G+SYNC.
B
H+V-SYNC.
To VIDEO OUT terminal
VIDEO ( )
To VIDEO IN terminal
To S-VIDEO OUT terminal
S-VIDEO ( )
To S-VIDEO IN terminal
To RGB analog OUT
terminal( )
To RGB analog
IN terminals
Monitor
VCP
NOTE
When the sync. polarity or sync. signal of a monitor to be connected
is not adjusted to the initial setting of this unit, the image may not be
displayed correctly. In this case, adjust the sync. polarity and sync.
signal output to the monitor. When the image is displayed correctly,
the setting is not required. (Refer to the operation manual of the
monitor as for the sync. polarity and sync. signal of the monitor.)
•
The sync. polarity and sync. signal is set by the menu displayed
on LCD.
1
1
1
1
1
Press MENU button.
MAIN MENU is displayed.
2
2
2
2
2
Press STOP button on remote control unit.
SERVICE MENU is displayed.
MENU
CLEAR
MONITOR
MEMORY
MEMORY
PAGE
STOP
SET
PRINT
Q' ty
-
rgb