Displacement pump repair – Graco Inc. 231-353 User Manual
Page 25
308-548
25
Displacement Pump Repair
11. Place a new o-ring (116*) firmly in the cylinder
groove. See Fig. 22.
12. Coat the piston rod and packings with oil. Carefully
slide the assembly
into the top of the cylinder
(115). See Fig. 22.
13. Put the manifold upside down in a vise. Fully
thread the jam nut (117) onto the cylinder (115).
Guide the rod/cylinder assembly down through the
manifold (101). Screw the cylinder (115) into the
manifold. See Fig. 22.
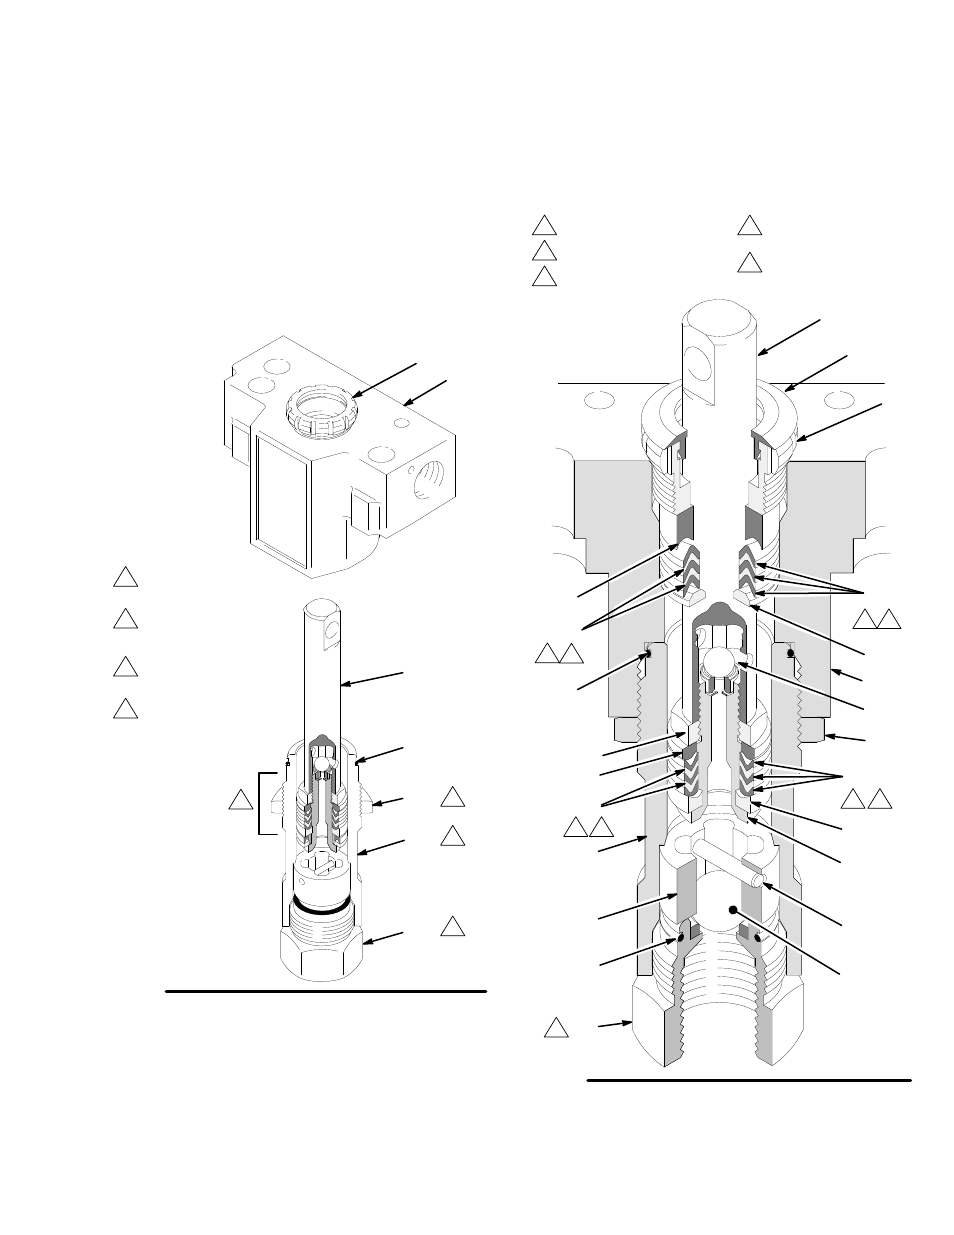
Fig. 22
1
3
2
01072A
102
101
116*
117
115
118
107
Torque jam nut (117)
to 73 ft–lb (98 N.m)
Torque cylinder (115)
into manifold (101) to
53 ft–lb (71 N.m)
Torque intake valve (116)
into cylinder (115) to
53 ft–lb (71 N.m)
1
2
3
4
Piston assembly
4
14. Place the ball guide (120), stop pin (122) and ball
(121*) in the cylinder (115). Screw the intake valve
into the cylinder and torque to 53 ft-lb
(71 N.m). This will also properly torque the cylinder
into the manifold. See Fig. 23.
15. Torque the cylinder jam nut (117) to 73 ft-lb
(98 N.m). See Fig. 22.
16. Install the pump. See page 22.
Fig. 23
1
3
4
2
01073
107
123
102
104*
106*
101
117
112*
114*
108*
122*
121*
109*
*103
*105
*116
111
*113
115
120
*119
118
Leather packings
Poly packings
Lips of V–packings
must face down
Lips of V–packings
must face up
5
Torque to 53 ft–lb
(71 N.m)
1
3
2
3
2
4
1
4
5
110