Frymaster H17 User Manual
Page 9
1-5
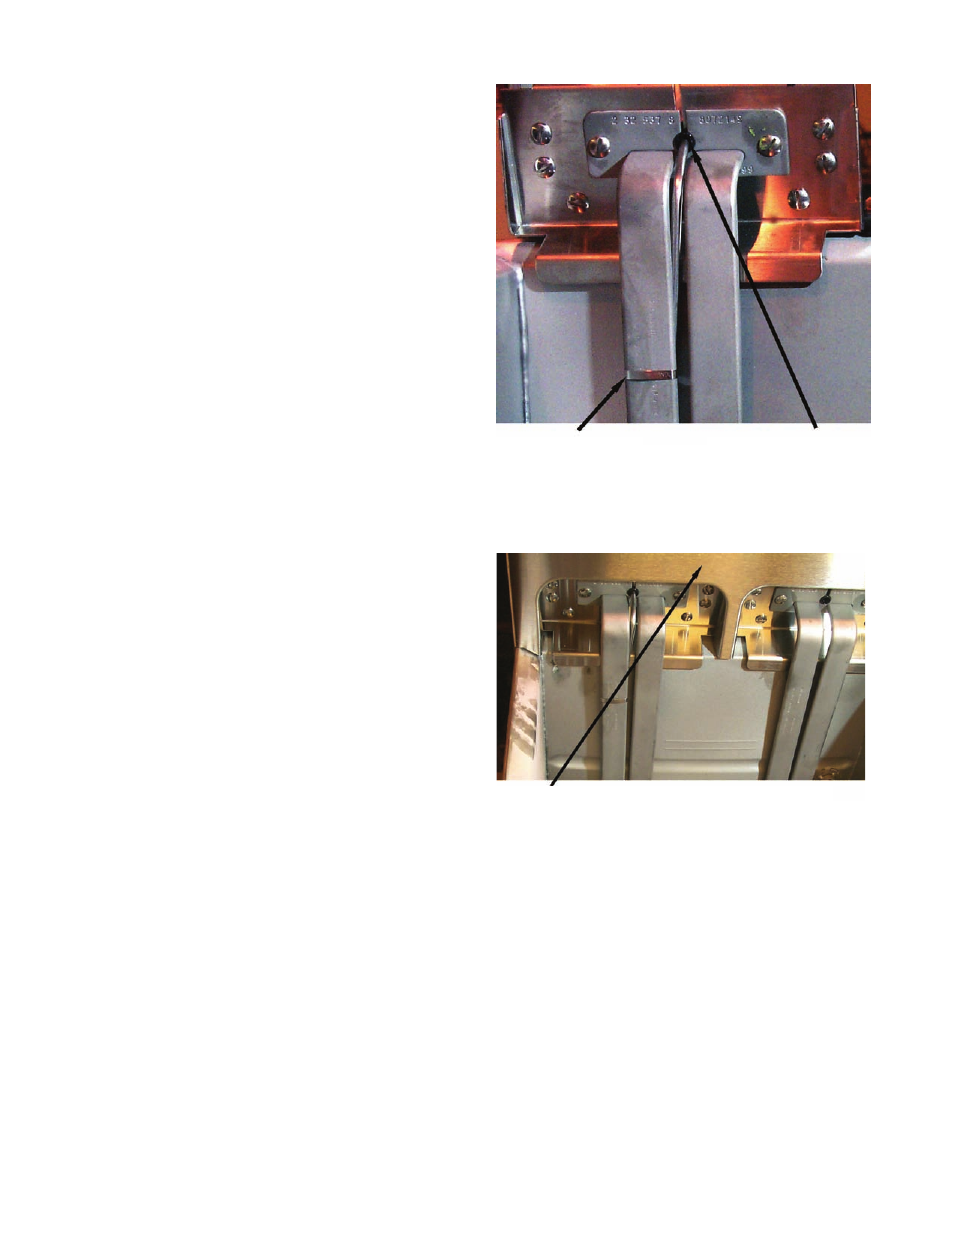
11. Place the new temperature probe assembly
onto the element and secure with the screws
removed earlier. Clip the probe onto the rear
of the element. The temperature probe
assembly should be oriented in the same
manner as the probe being replaced.
12. Thread the probe wires into the harness
connector as removed in Step 7.
13. Lower the element into the frypot.
14. Place the tilt housing cover over the tilt
housing assembly and secure with screws
15. Install the top, center and bottom back covers
and secure with screws.
Secure probe to
element with metal
wire-wrap
New probe assembly
properly installed in
tilt plate
Tilt housing cover in place
See also other documents in the category Frymaster Fryers:
- D460G (2 pages)
- J3F (88 pages)
- TB14 (60 pages)
- Universal Holding Cabinet (53 pages)
- D80 Series (44 pages)
- CF SERIES J65X (50 pages)
- HCP (30 pages)
- GF40 (2 pages)
- GF14 (24 pages)
- FOOTPRINT E4 (88 pages)
- Enodis RE17TC (2 pages)
- Dean 52 Series (39 pages)
- CFESA BKSDU (13 pages)
- JCFX (76 pages)
- GEN II LOVTM BIELA14 (86 pages)
- Enodis FPRE14-7 (2 pages)
- UHC-HD (3 pages)
- FootPrint PRO FPP545 (2 pages)
- Dean SM35 (40 pages)
- FOOTPRINT RE80 (64 pages)
- 8196606 (24 pages)
- D680G (2 pages)
- 35 Series (40 pages)
- SR62 Series (14 pages)
- FPD65 (60 pages)
- LOV BIGLA30 (88 pages)
- FPD (100 pages)
- FOOTPRINT PRO SERIES 45 (50 pages)
- 1814 (10 pages)
- LOV M3000 (50 pages)
- 14 Series (78 pages)
- HD1814 SERIES HD1814G (46 pages)
- 1824/2424G (44 pages)
- YSCF14G (26 pages)
- HLZ18 (4 pages)
- FDP65 (60 pages)
- BIGLA30 (86 pages)
- BIELA14 (26 pages)
- BIRE14 (32 pages)
- FPH55 (2 pages)
- 2424G (68 pages)
- KSCF18G (68 pages)
- Enodis PF50S (2 pages)
- MH52 (115 pages)
- SM5020G (2 pages)