Frymaster H17 User Manual
Page 11
1-7
5. Remove the element mounting-screws and
pull the element out of the frypot (split-vats).
On full-vat elements, remove the element
clamps and hardware before removing
mounting-screws and nuts on the defective
element.
6. Install the replacement element in the frypot
and secure with the mounting screws
removed in Step 5.
7. Re-install the temperature probe and probe-
securing components onto the replacement
element.
8. Route the element leads (terminals) to the
rear of the fryer. Ensure that chafing guards
are in place to prevent wire chafing while
raising and lowering elements.
Front
Back
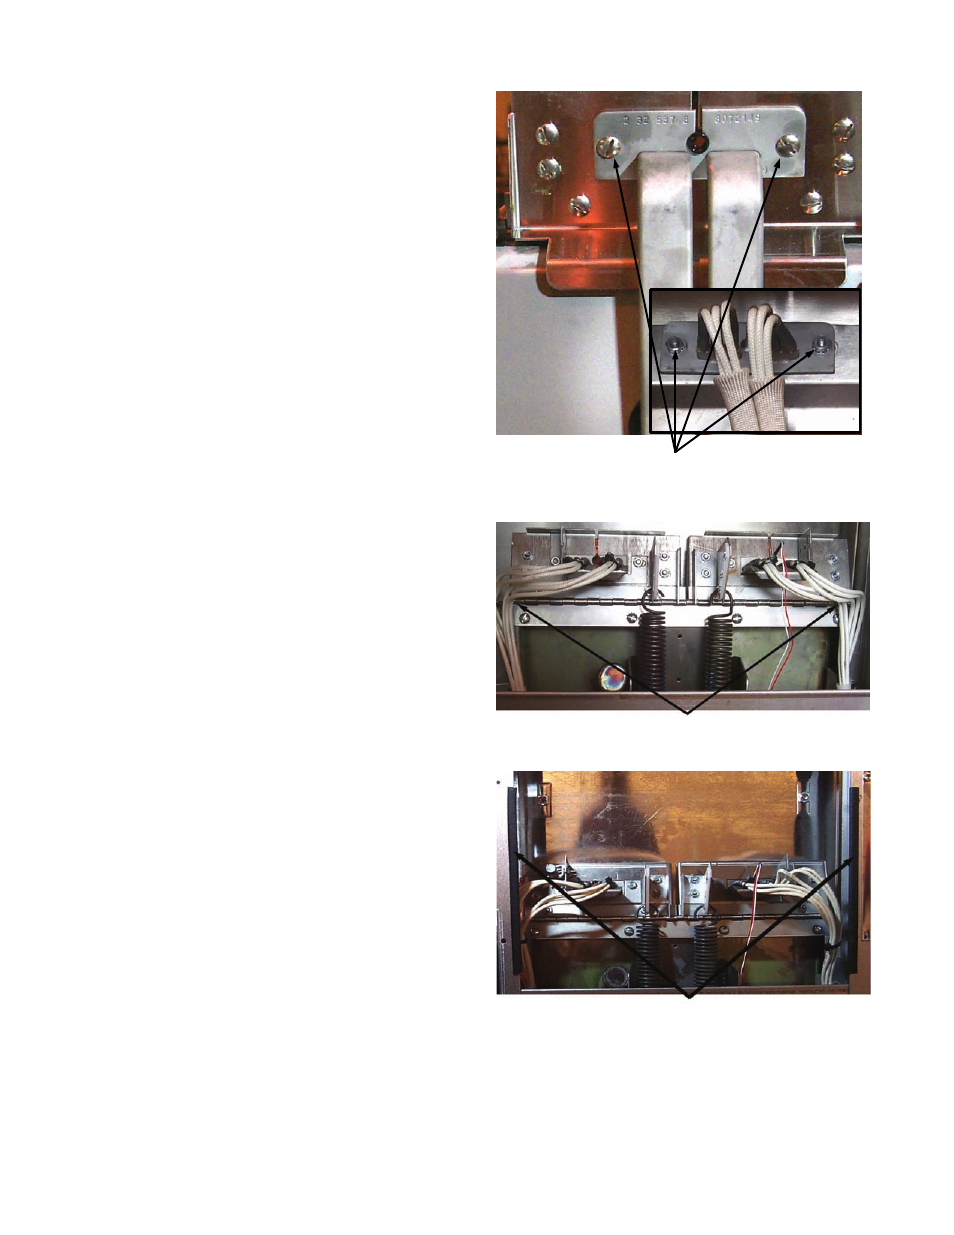
Element mounting-screws and nuts. (Inset Photo-
back of tilt plate)
Proper element-wire routing is essential to prevent
wire chafing while raising and lowering elements.
Chafing guards on cabinet edges also help prevent
wire chafing while raising and lowering elements.
- D460G (2 pages)
- J3F (88 pages)
- TB14 (60 pages)
- Universal Holding Cabinet (53 pages)
- D80 Series (44 pages)
- CF SERIES J65X (50 pages)
- HCP (30 pages)
- GF40 (2 pages)
- GF14 (24 pages)
- FOOTPRINT E4 (88 pages)
- Enodis RE17TC (2 pages)
- Dean 52 Series (39 pages)
- CFESA BKSDU (13 pages)
- JCFX (76 pages)
- GEN II LOVTM BIELA14 (86 pages)
- Enodis FPRE14-7 (2 pages)
- UHC-HD (3 pages)
- FootPrint PRO FPP545 (2 pages)
- Dean SM35 (40 pages)
- FOOTPRINT RE80 (64 pages)
- 8196606 (24 pages)
- D680G (2 pages)
- 35 Series (40 pages)
- SR62 Series (14 pages)
- FPD65 (60 pages)
- LOV BIGLA30 (88 pages)
- FPD (100 pages)
- FOOTPRINT PRO SERIES 45 (50 pages)
- 1814 (10 pages)
- LOV M3000 (50 pages)
- 14 Series (78 pages)
- HD1814 SERIES HD1814G (46 pages)
- 1824/2424G (44 pages)
- YSCF14G (26 pages)
- HLZ18 (4 pages)
- FDP65 (60 pages)
- BIGLA30 (86 pages)
- BIELA14 (26 pages)
- BIRE14 (32 pages)
- FPH55 (2 pages)
- 2424G (68 pages)
- KSCF18G (68 pages)
- Enodis PF50S (2 pages)
- MH52 (115 pages)
- SM5020G (2 pages)