Furuno FR-2125V User Manual
Page 54
4-13
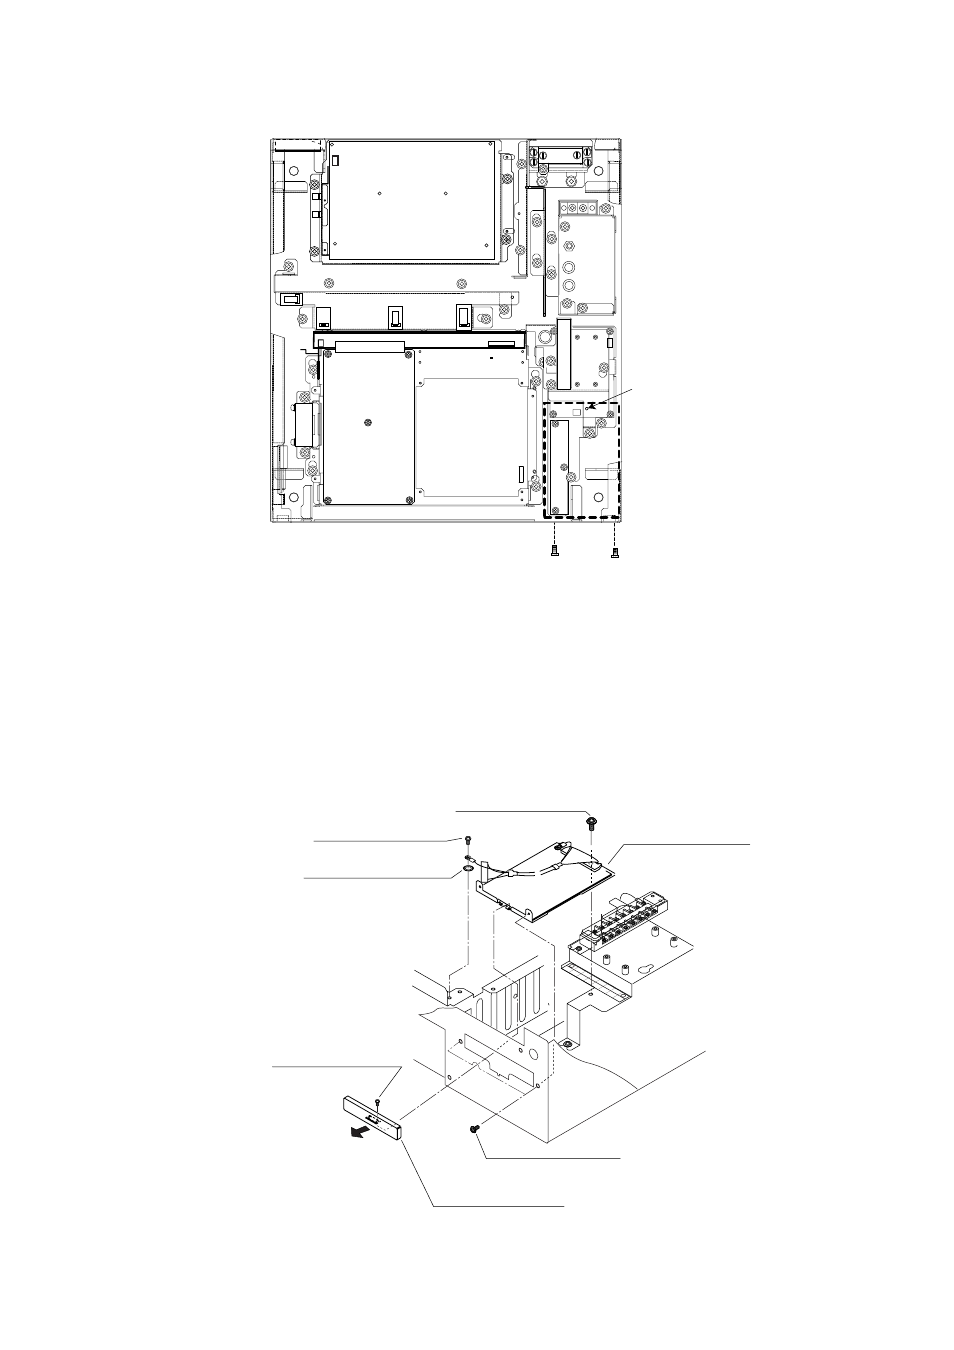
1. Open the monitor and fix it with the stay. See page 1-5 for instructions.
2. Fasten the M-card base assy. with one M4X8 pan-head screw as below.
Fasten with
M4 x 8 screws.
Fasten with M3 x 8
screws (2 pcs.)
Figure 4-12 Display unit, inside view
3. Fasten the ground wire with the M3X8 pan-head screw and M3 teethed lock
washer.
4. Fix the M-card case assy. with two M3X8 pan-head screws.
5. Set the M-card case cover to the hole in the front panel and fix with two M2.6X5
pan-head screws.
1
7
3
4
5
2
8
6
1
8
M-card case cover
Pan-head screw
M2.6X5, 2 pcs.
Pan-head screw B
M3X8, 2 pcs.
Pan-head screw A
M3X8
M-card base assy.
Pull forward
and fix.
Teethed lock washer
M3
Pan-head screw B
M4X8
Figure 4-13 Display pedestal, front view
See also other documents in the category Furuno Sports and recreation:
- FAR-2805 Series (169 pages)
- FR-8062 (2 pages)
- FR-8122 (56 pages)
- CH-37 (71 pages)
- CH-37 (90 pages)
- FAR-2XX7 (4 pages)
- FAR-2XX7 (2 pages)
- FELCOM16 (4 pages)
- FRS-1000B (8 pages)
- FRS1000 (8 pages)
- Ls4100 (48 pages)
- 520 (73 pages)
- Marine Radar (24 pages)
- 1944C-BB (233 pages)
- 1733C (260 pages)
- FR-2105 (197 pages)
- FMD-8010 (50 pages)
- GD-1900C (260 pages)
- Black Box Video Sounder FCV-1200BB (2 pages)
- FR-1505 MARK-3 (4 pages)
- 1762 (252 pages)
- NAVnet DRS12A (44 pages)
- FAR-2137S (8 pages)
- FAR-2127 (136 pages)
- FA30 (6 pages)
- Satellite Compass SC-50/110 (30 pages)
- 1715 (2 pages)
- 1715 (48 pages)
- 1734C (55 pages)
- GD-1720C (53 pages)
- Mu 120c (2 pages)
- NAVNET GD-1920C (239 pages)
- CI-80 (41 pages)
- FAR-28x7 Series (299 pages)
- FAR-2837S (8 pages)
- BBWX1 (2 pages)
- 851 MARK-2 (37 pages)
- 851 MARK-2 (47 pages)
- BBFF3 (1 page)
- CSH-53 (106 pages)
- CSH-53 (108 pages)
- FCV295 (53 pages)
- FR1500 Mk3 (79 pages)
- FI-50 Series (2 pages)
- FCV-1150 (32 pages)