Install the switch in a 19” rack – FUJITSU XG2600 User Manual
Page 36
XG2600 Hardware Guide
Chapter 2 Installation
Installation of the switch
36
Install the switch in a 19” rack
The switch can be installed and operated in the EIA standard 19" rack.
Prepare the following rack mounting components attached.
•
Rack Mounting Rails (1 set): Rails for mounting the switch in a rack.
•
M6 Countersunk Screws (Qty 4)
•
M6 Machine Screws (Qty 6)
Precautions
• Pay attention to control temperature inside and outside of the rack so that guaranteed operating temperature can be
maintained properly for the switch.
• Reserve certain space for air cooling in accordance with the cooling structure of the switch.
• Ensure physical stability of the whole rack when the switch is installed.
• Check if power supply capacity (Rated Current) is sufficient from the power supply equipment such as power strip,
service outlet from other devices or rack.
• High Touch Current may flow through power strip earthing conductor, if power supply cord of this unit is connected
to power strip.
Earth connection essential before connecting supply.
If the power supply cord is not directly connected to branch circuit, Power Strip which has Industrial Type
Attachment Plug should be used.
Installation procedure is described below.
Be sure to keep sufficient front and rear space for safe installation service.
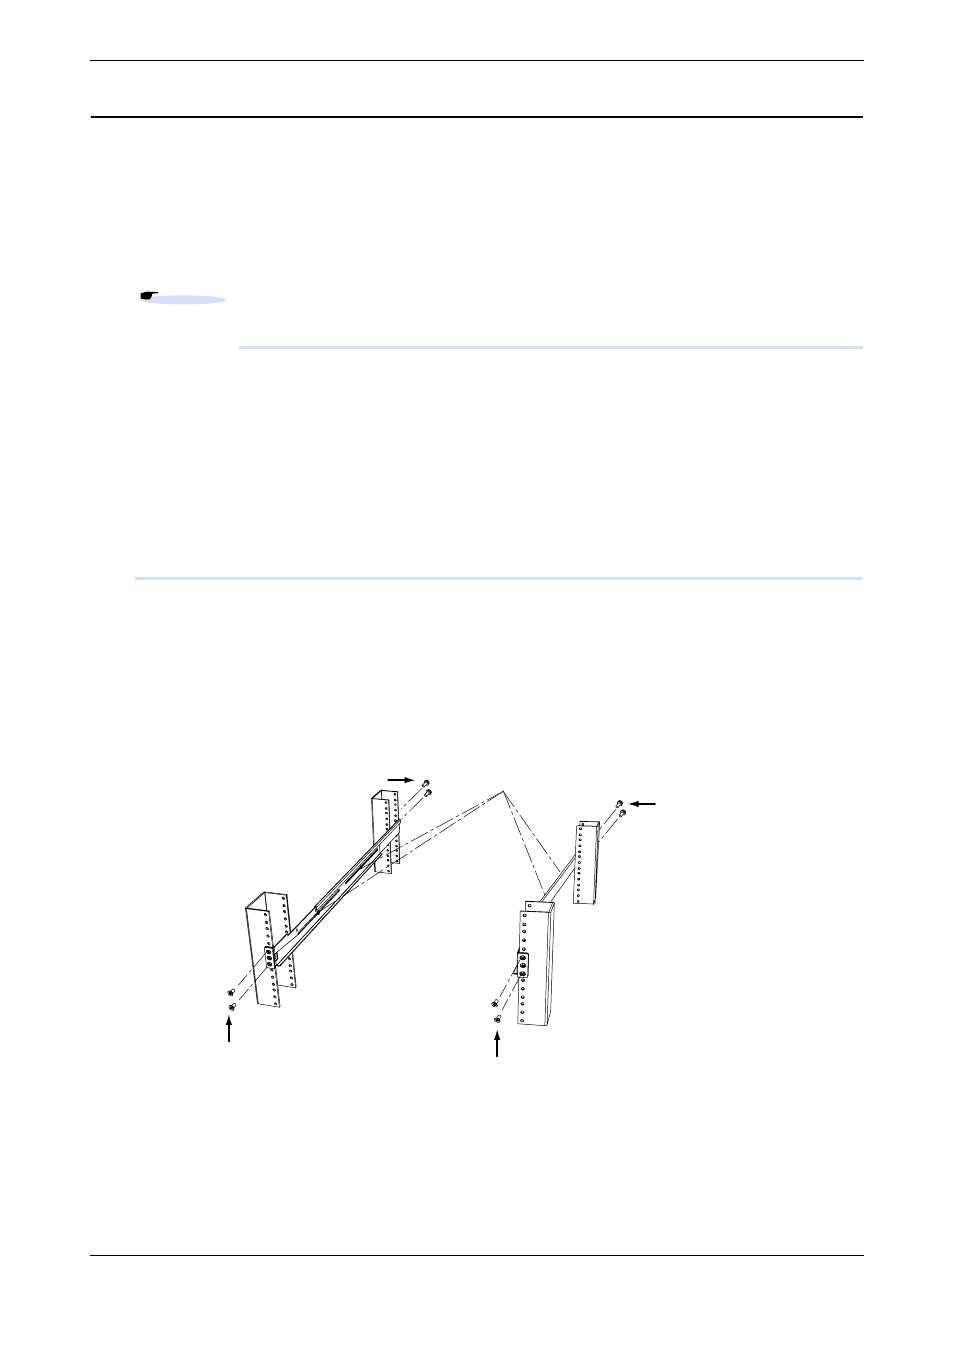
1.
Fix rack mounting rails to the rack posts.
Loosen four M4 screws which are originally fixed to rails, adjust length of the screws, and fix the rails to the rack.
Once the rails are fixed to the rack, fasten again the four M4 screws.
Reference "1.1.1 Parts List" (pg.18)
M4 Machine Screws
M6 Countersunk Screws
M6
Machine Screws
M6 Countersunk Screws
M6
Machine Screws