Swapping a hard drive – AltiGen MAXCS 7.0 Telephony Hardware User Manual
Page 65
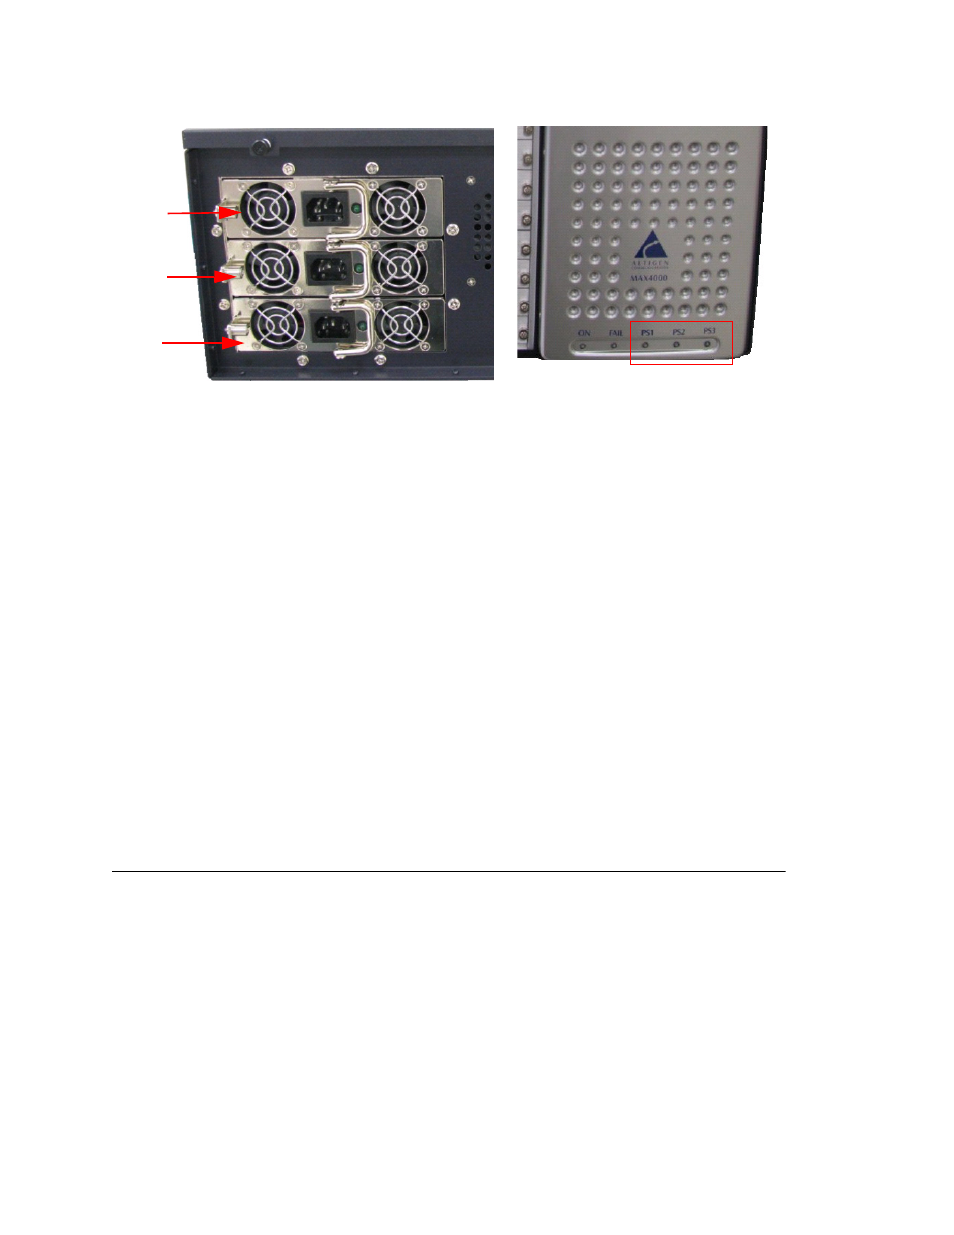
3 power supplies are located in the
back of the unit.
Front door of the unit labels the
LEDs for power supplies 1, 2,
and 3 (PS1, PS2, PS3).
Power
supply 3
Power
supply 2
Power
supply 1
MAX4000 Server and Vision Boards
Telephony Hardware Manual 59
Figure 8. MAX4000 has three hot-swappable power supplies
To remove a power supply,
1. Unplug its power cord.
A warning tone sounds, and the red “Fail” LED (located behind the front door of the
MAXCS) turns red. In addition, the corresponding green LED on the front of the unit
turns off. To turn off the warning sound, you can press the red square button
located behind the door on the front of the system.
2. Unscrew the captive screw at the left of the power supply (the screw does not come
out, it simply loosens).
3. Pull out the power supply, using the power supply handle.
To add a power supply,
1. Slide the power supply into place, making sure the connector in the back is at the
bottom.
2. Tighten the captive screw at the left of the power supply.
3. Insert the power supply’s plug into the back of the unit in its corresponding
receptacle.
The red LED located in front of the unit turns off, and the corresponding green LED
turns on.
Swapping a Hard Drive
The MAX4000 has two redundant hard drives that mirror each other and a third drive
that takes over the job of mirroring, if one of the other two drives goes down. When a
hard drive is being used for mirroring and is working properly, its LED is green. The spare
hard drive LED is orange.
The hard drives are located behind the door at the front of the system.