5 elevated platform removal, Levated, Latform – IEI Integration PPC-51xxA-H61 User Manual
Page 80: Emoval, Figure 4-2: so-dimm module installation
PPC-51xxA-H61 Panel PC
Page 65
Step 3:
Release the SO-DIMM module by pulling both the spring retainer clips outward
from the socket.
Step 4:
Grasp the SO-DIMM module by the edges and carefully pull it out of the socket.
Step 5:
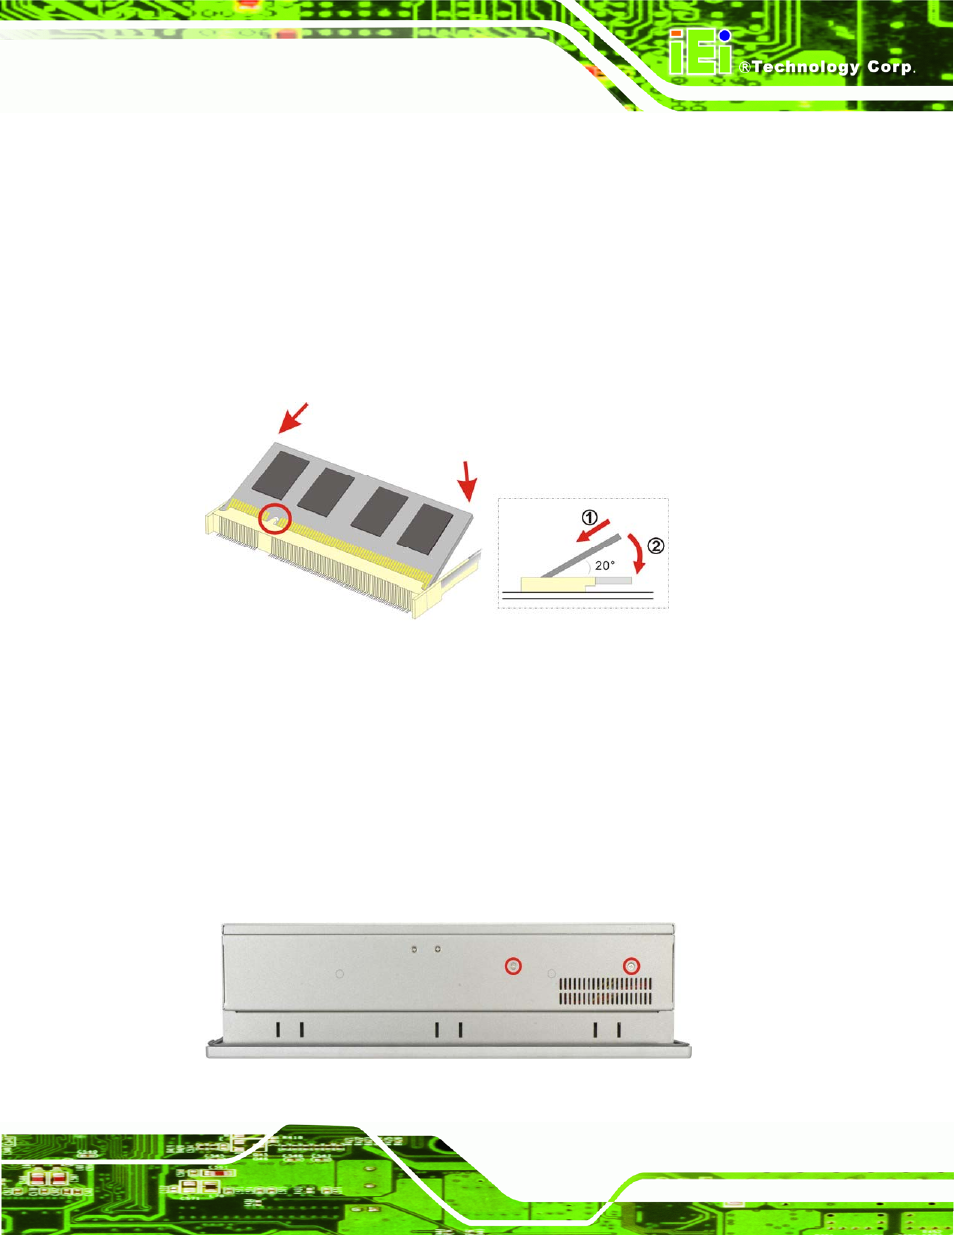
Install the new SO-DIMM module by pushing it into the socket at an angle
(Figure 4-2).
Step 6:
Gently push the rear of the SO-DIMM module down (Figure 4-2). The spring
retainer clips clip into place and secure the SO-DIMM module in the socket.
Figure 4-2: SO-DIMM Module Installation
Step 7:
Push the new DIMM module until it engages and the white plastic end clips click
into place. Make sure the end clips are fully secured after installation.
Step 0:
4.5 Elevated Platform Removal
The elevated platform supports the optical drive and the hard drive. It is not necessary to
remove the hard drive bracket to remove the elevated platform.
Step 1:
Unfasten the elevated platform screws on the top panel (
7
Figure 4-3
).
Figure 4-3: PPC-5150A-H61 Top Panel Elevated Platform Screws