Removing/installing the back canes – Invacare Adjustable ASBA Seat User Manual
Page 58
SECTION 10—JUNIOR BACKS
58
Removing/Installing the Back Canes
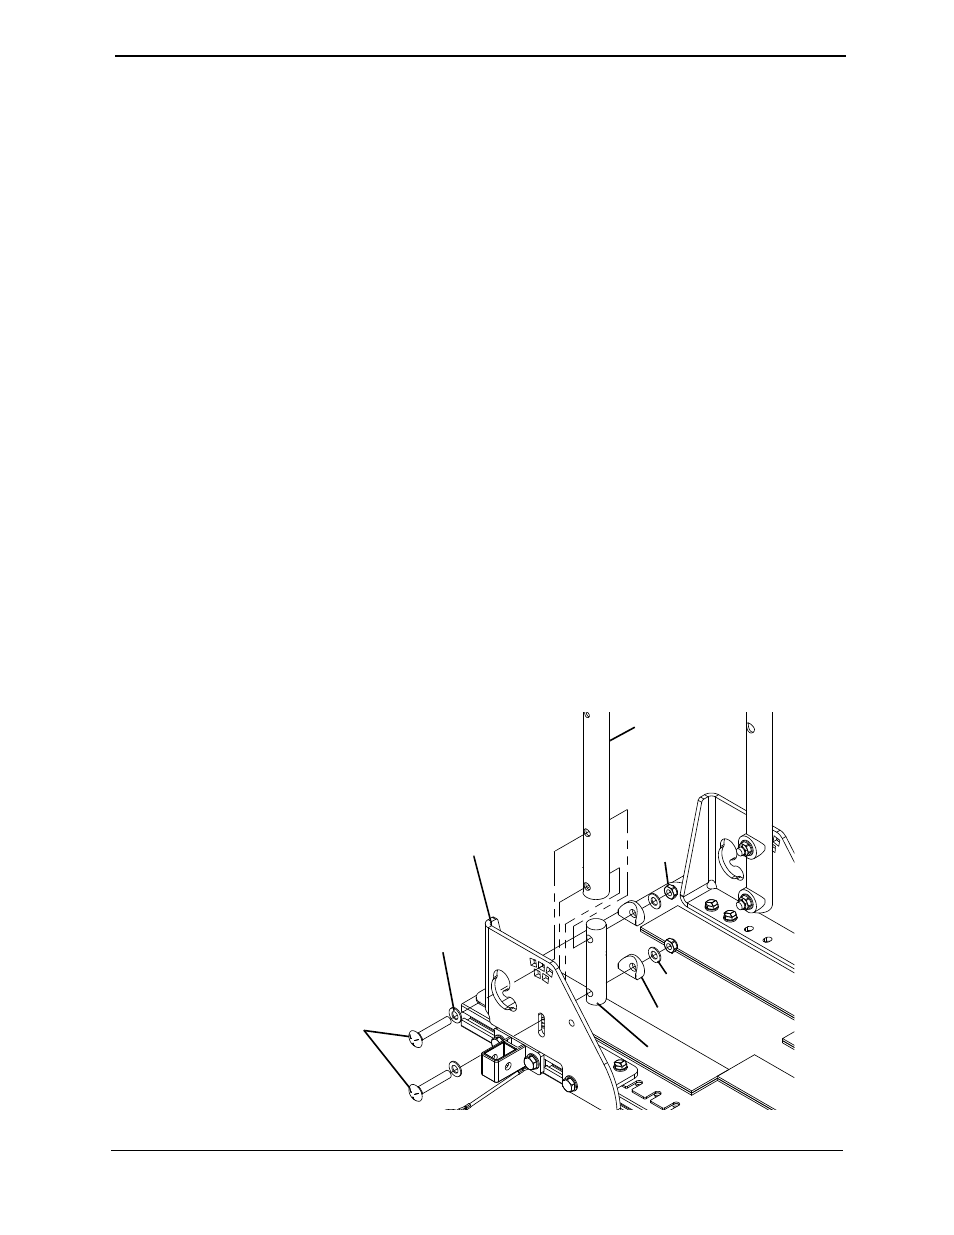
NOTE: For this procedure, refer to FIGURE 10.3.
NOTE: Existing hardware will be reused.
NOTE: Take note of position and orientation of mounting hardware for reinstallation.
Removing
1. Remove the two mounting screws, washers*, coved washers and locknuts securing the
cane brackets to the back canes and inserts.
*NOTE: Non‐TRRO wheelchairs have four washers and TRRO wheelchairs have two washers.
NOTE: The insert will fall out of the bottom of the back cane. Retain it for proper installation.
2. Remove the back cane from the back cane brackets.
3. Repeat STEPS 1‐2 for the opposite side.
Installing
1. Position the insert in the bottom of the back cane.
2. Rotate the insert until the mounting holes align with the back cane mounting holes.
3. Align the mounting holes in the back canes and inserts with the mounting holes in the
cane brackets.
4. Install the two mounting screws, washers*, coved washers and locknuts to secure the cane
brackets to the back canes.
*NOTE: Non‐TRRO wheelchairs have four washers and TRRO wheelchairs have two washers.
5. Torque the locknuts to 156 in‐lbs ± 20%.
6. Repeat STEPS 1‐5 for the opposite side.
FIGURE 10.3 Removing/Installing the Back Canes
Back Cane
Locknut
Washer
Coved Washer
Washer*
Mounting
Screws
Back Cane
Bracket
Insert
*NOTE: These washers are
only present on non‐TRRO
wheelchairs.
NOTE: TRRO back cane
bracket shown.