Warning – Hearth and Home Technologies Direct Vent Room Heater 839-1460 User Manual
Page 31
September 1, 2008
Page 31
Quadra-Fire · Sapphire · 250-7233H
Figure 8.9
Remove burner by sliding the shutter to the right,
lifting up the left side of the burner and sliding it the the left.
Figure 8.10
Remove the main burner orifice using a 5/8 in.
wrench.
PROPANE NATURAL
GAS
.059 (53 DMS)
.096 (41(DMS)
NOTE: If the venting configuration has no vertical rise, a
derating orifice must be installed. The derating orifices
are supplied with the rear vent conversion kit.
Reinstall the burner. Slide the burner neck into the shutter
and over the orifice. Refer to Figure 8.10.
Reinstall the burner pan locators on the left and right side
of the burner. Secure with one screw to each side.
Install logs, referring to instructions on page 33.
Replace glass door and front.
Top grill cover is shipped with the appliance and is an
optional use item. It may be used with rear or top venting.
Primarily its purpose is to hide the interior of the top of the
appliance from being viewed through the top grill piece. Its
use will also increase the efficiency of the blower, if a blower
is installed on the appliance.
To prepare the part for use you will need tin snips, pliers and
a hammer.
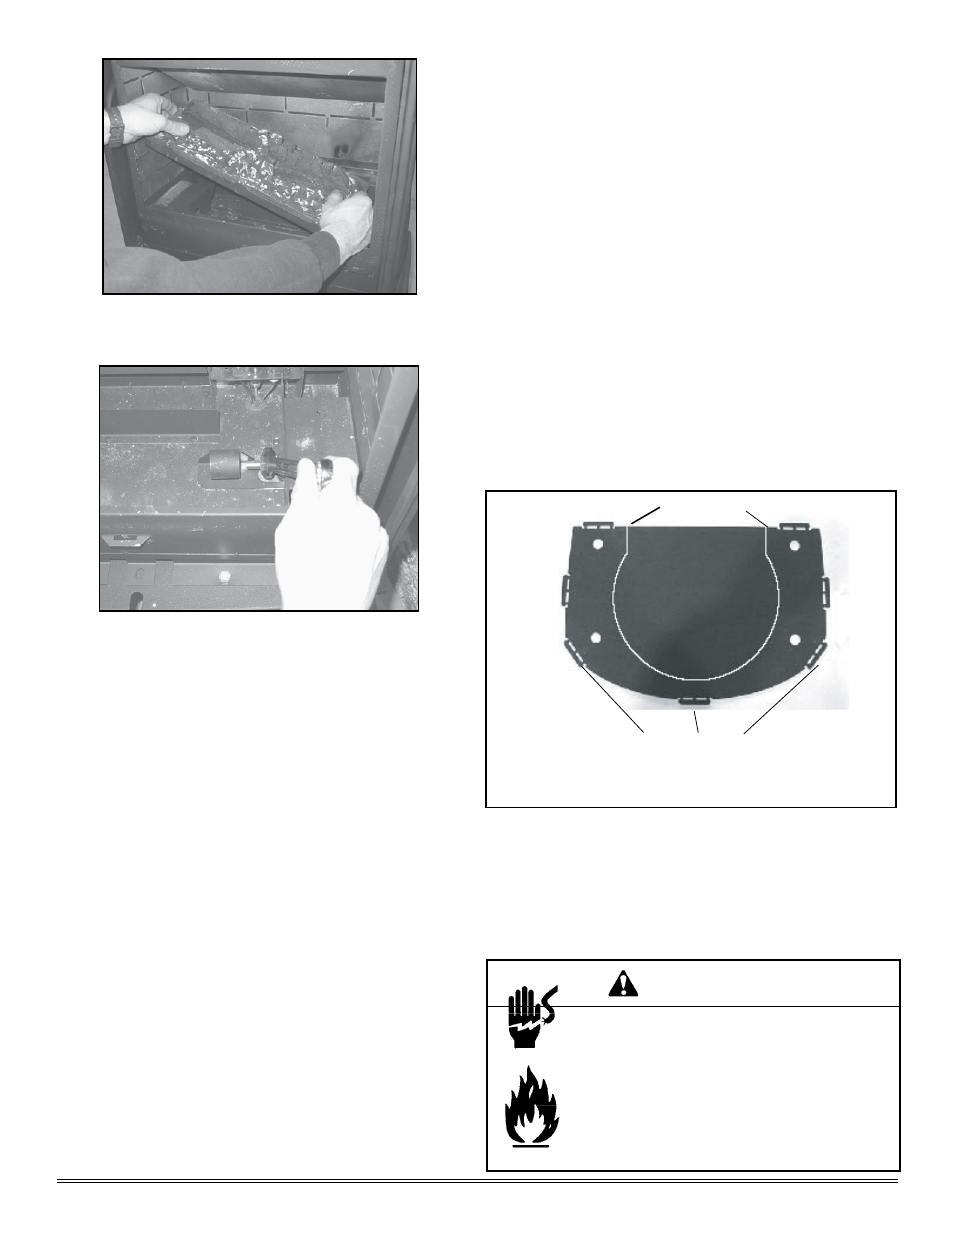
1, For use with top venting: See Figure 8.11, below.
Use the tin snips to cut the straight edges.
2. Gently bend the piece until the two attached sections of
the circular area snap apart. Discard this piece.
3. Bend the tabs up towards the black painted side.
4. With the top grill lying face down, set the black painted
side of grill cover onto the grill.
5. Use the hammer to tap on the four speed nuts (also
supplied with the appliance.)
6. For use with rear venting: Follow steps 3 through 5,
leaving the cover piece intact.
SNIP HERE
BEND 7 TABS
TOWARDS
PAINTED SIDE
C. Grille Cover Plate Installation
Figure 8.11
Replace the orifice with the proper size as indicated for your
gas type.
D. Accessories
Install approved accessories per instructions included with
accessories. Refer to Section 12 for appropriate accesso-
ries.
Shock or fire risk.
Use ONLY optional accessories approved for
this appliance.
• U s i n g n o n - l i s t e d a c c e s s o r i e s v o i d s
warranty.
• Using non-listed accessories may result in a
safety hazard.
• Only Hearth & Home Technologies approved
accessories may be used safely.
WARNING