Installing sensor – Heath Zenith SL-6105 User Manual
Page 2
2
595-4881-09
Typical Installation
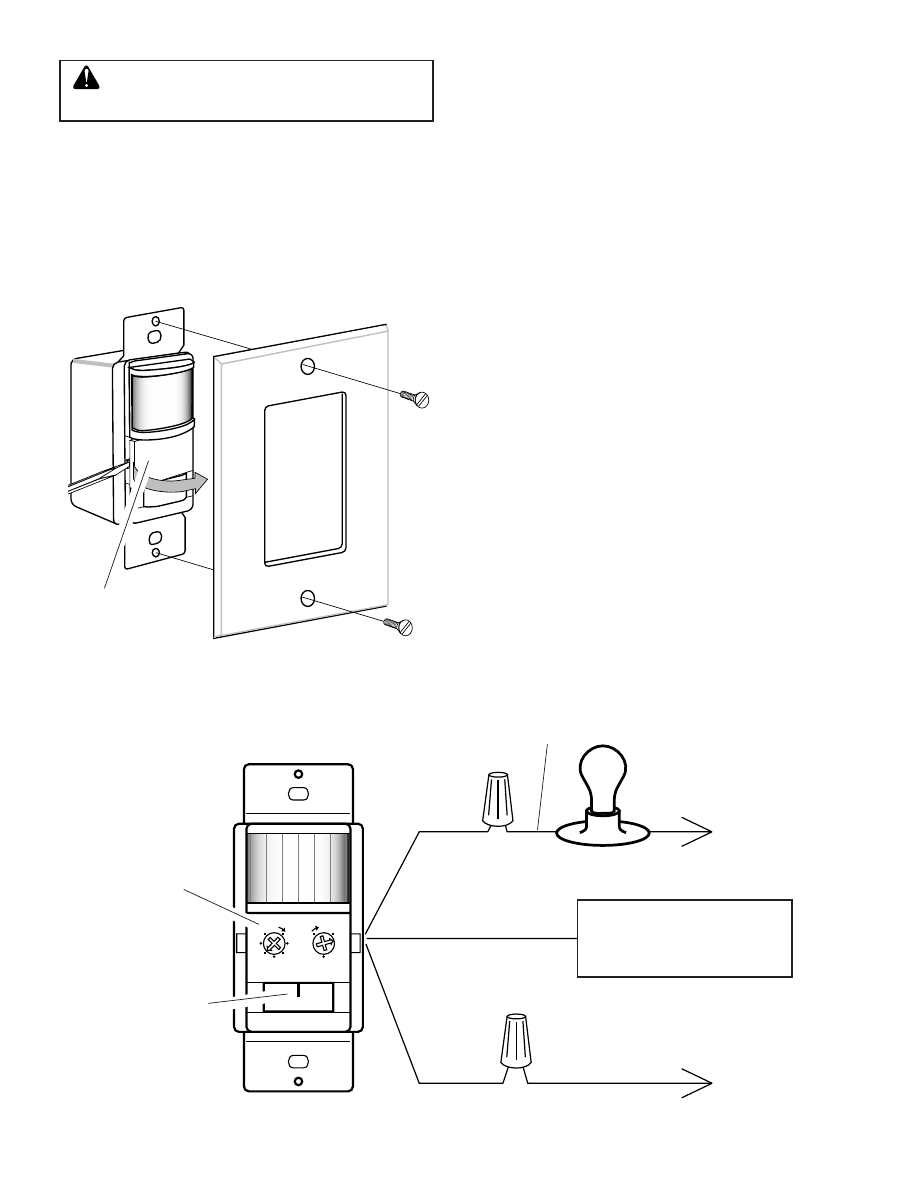
1. Remove existing wall switch from junction
box.
2. Connect electrical leads of sensor as shown
in Figure 3. Before installing sensor into
junction box, make sure there is no wire
exposed at each connection.
3. Mount sensor into junction box using two
large mounting screws provided.
4. For test purposes, use a small screwdriver to
turn the TIME control fully counterclock-
wise and the LIGHT control fully clockwise.
Turn the power back on at the circuit breaker.
5. Set mode selection switch to the AUTO
position. When unit stabilizes (about 1
minute), the sensor is ready to detect motion.
If sensor detects motion, the lights will turn
on. The lights will turn off 5 seconds after
motion is no longer detected.
OFF
N
O
AUT
O
T I M E
L I G H T
+
+
Green ground wire to
junction box screw or
grounding wire.
Black
Black
Line
“Hot”
Neutral
Return
Lighting Load
WARNING: Turn power off at the
circuit breaker before wiring.
INSTALLING SENSOR
Removing Control Panel Cover
1. Remove the decorative cover plate (secured
by two small screws).
2. Press in with screwdriver as shown in Figure 2.
Swing control panel cover out to remove.
Mode
Selection
Switch
Control
Panel
Control Panel
Cover
Figure 2 - Removing Control Panel Cover
Figure 3 - Connecting Electrical Leads of Sensor
To Lighting Load