Installation – Heath Zenith SH-5511 User Manual
Page 2
2
598-1159-06
INSTALLATION
For easy installation, select an existing light operated
by a wall switch for replacement.
For best performance, mount the fixture about 8 feet
(2.4 m) above the ground.
NOTE: If fixture is mounted
higher than 8 ft. (2.4 m), aiming the sensor down will reduce
coverage distance.
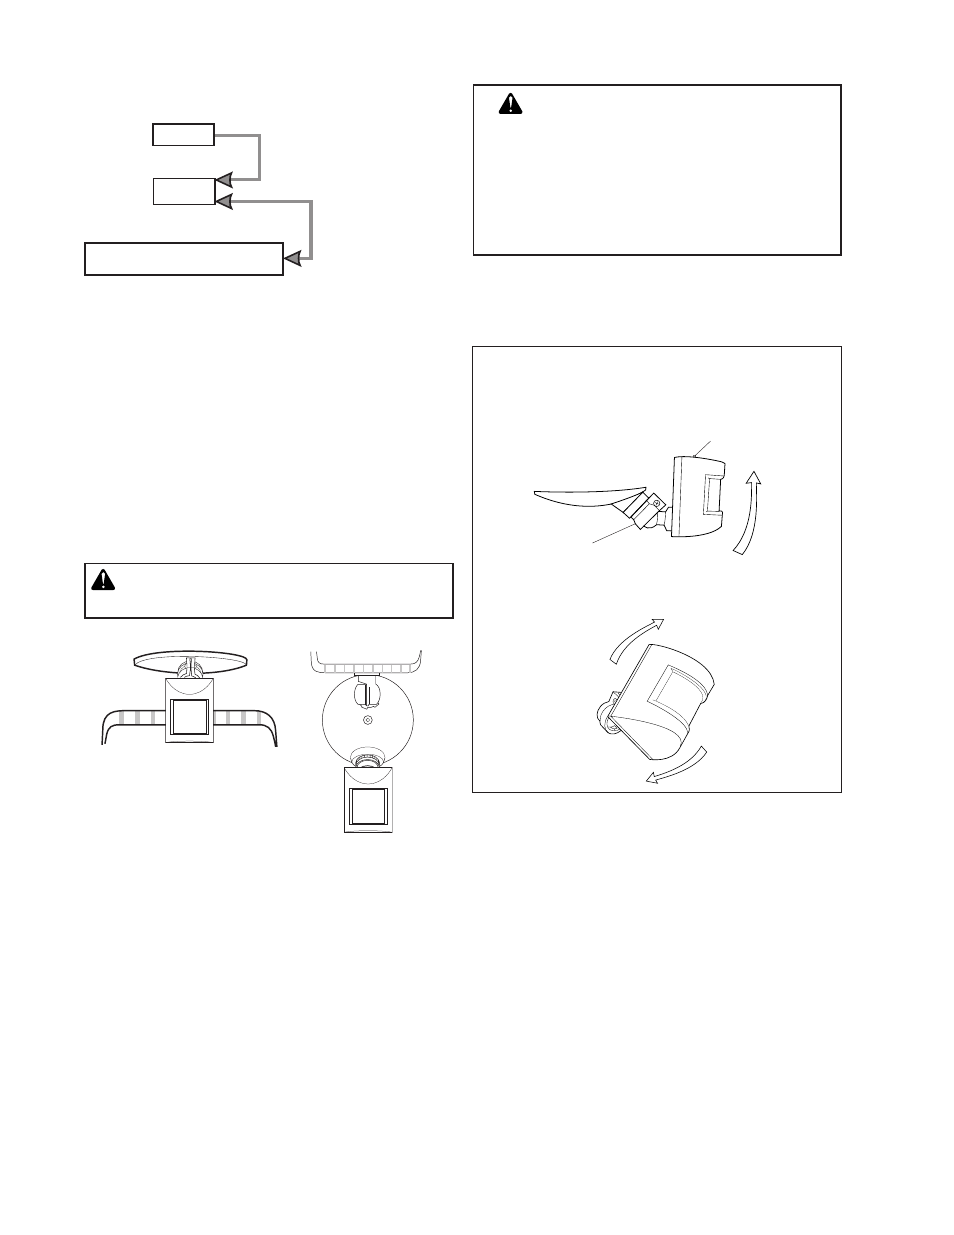
For eave mount only:
For under eave installation, the sensor head must
be rotated as shown in the next two steps for proper
operation and to avoid the risk of electrical shock.
❒
Rotate the sensor head towards the clamp screw
joint.
❒
Then rotate the sensor head clockwise 180° so the
controls face down.
Control Switch
Joint Clamp
Move ON-TIME Switch
to 1, 5, or 10 minutes
Mode Switching Summary
Flip light switch
off for one second
then back on*
MANUAL MODE
AUTO
TEST
* If you get confused while switching modes, turn the
power off for one minute, then back on. After the cali-
bration time the control will be in the AUTO mode.
CAUTION to avoid fire or burn hazards:
• Allow fixture to cool before touching. The bulb
and fixture operate at high temperatures.
• Keep fixture at least 2" (5 cm) from combustible
materials. Do not aim at objects closer than 3 feet
(1 m).
• Re-lamp with type T 150W (or less) halogen 120
VAC lamp only.
Wall Mount
Eave Mount
CAUTION: The sensor must be mounted
below the lamp housing for wall installations.