Viewfinder bright, color and tint control, Replacing the dc camera light bulb – Hitachi VM-E220A User Manual
Page 41
Advanced Techniques
- 41 -
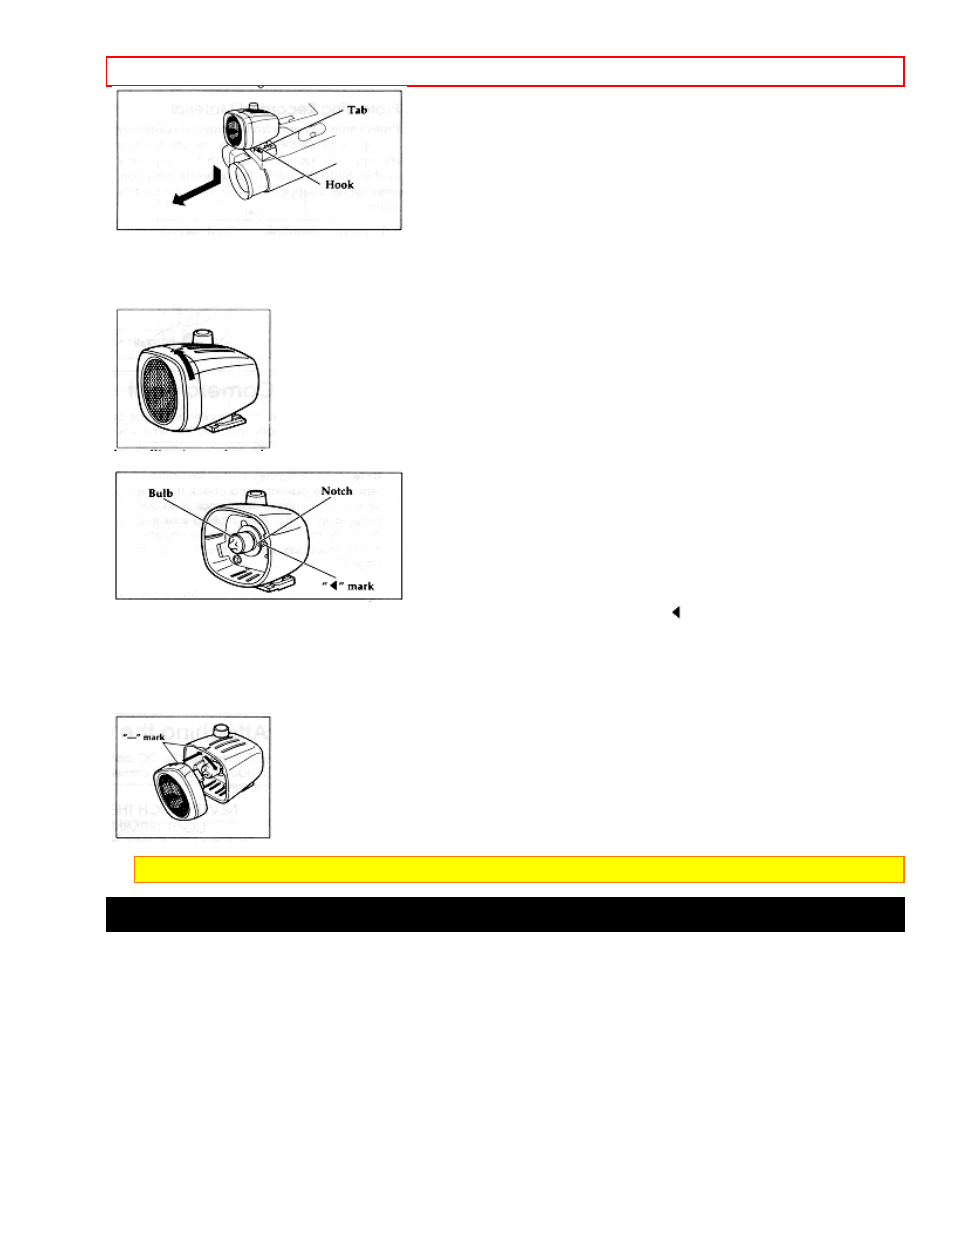
Replacing the DC Camera Light Bulb
1. Turn the front of the case counter-clockwise and remove it.
2. Remove the bulb by pulling it out through the opened case.
3. Install the new bulb by aligning the notch in the rim of the bulb's base with the "
" mark outside the socket.
Avoid touching the bulb directly with your fingers. It may shorten the life of the bulb.
4. Reattach the front of the case by placing the bulb in the hole of the reflective plate, lining up the smaller "-"
mark on the front of the cover with the "-" mark on the DC camera light, and turning the front of the cover
clockwise till the larger "-" mark on the front of the cover aligns with the "-" mark on the DC camera light. Check
that the front of the camera light is attached properly before turning the light on.
Note: Only replace the camera light bulb with VM-CP4L (optional) to reduce the risk of fire.
Viewfinder Bright, Color and Tint Control
This small "BRIGHT", "COLOR" and "TINT" controls are set at the factory and should require no adjustment. If
they ever require adjustment, use a plastic screwdriver. Make the adjustments with caution to prevent damaging
the miniature controls.