System configuration – Harman-Kardon AVR 445 User Manual
Page 33
SYSTEM CONFIGURATION 33
ENGLISH
System Configuration
SPEAKER
will appear in both the lower third
of the video display and the Main Information
Display ˜.
Within five seconds, either press the
‹
/
›
buttons
7 $ on the front panel or the
⁄
/
¤
buttons
E on the remote to select a different speaker
position, or press the Set Button @
F to
begin the adjustment process for the front left
and right speakers.
When the Set button @
F has been pressed
and the system is ready for a change to the front
speaker setting, the on-screen display and Main
Information Display ˜ will read
FRONT
LARGE
or
FRONT SMALL
depending on
the current setting. Press the
‹
/
›
buttons 7 $
on the front panel or the
⁄
/
¤
buttons
E on
the remote until the desired setting is shown,
using the instructions for “large” or “small”
shown earlier, then press the Set button @
F.
If another speaker position needs to be changed,
press the
‹
/
›
buttons 7 $ on the front panel
or the
⁄
/
¤
buttons
E on the remote to
select a different speaker position, press the Set
button @
F and then the
‹
/
›
buttons 7 $
on the front panel or the
⁄
/
¤
buttons
E on
the remote until the correct speaker setting is
shown and press the Set button @
F again
to confirm the selection.
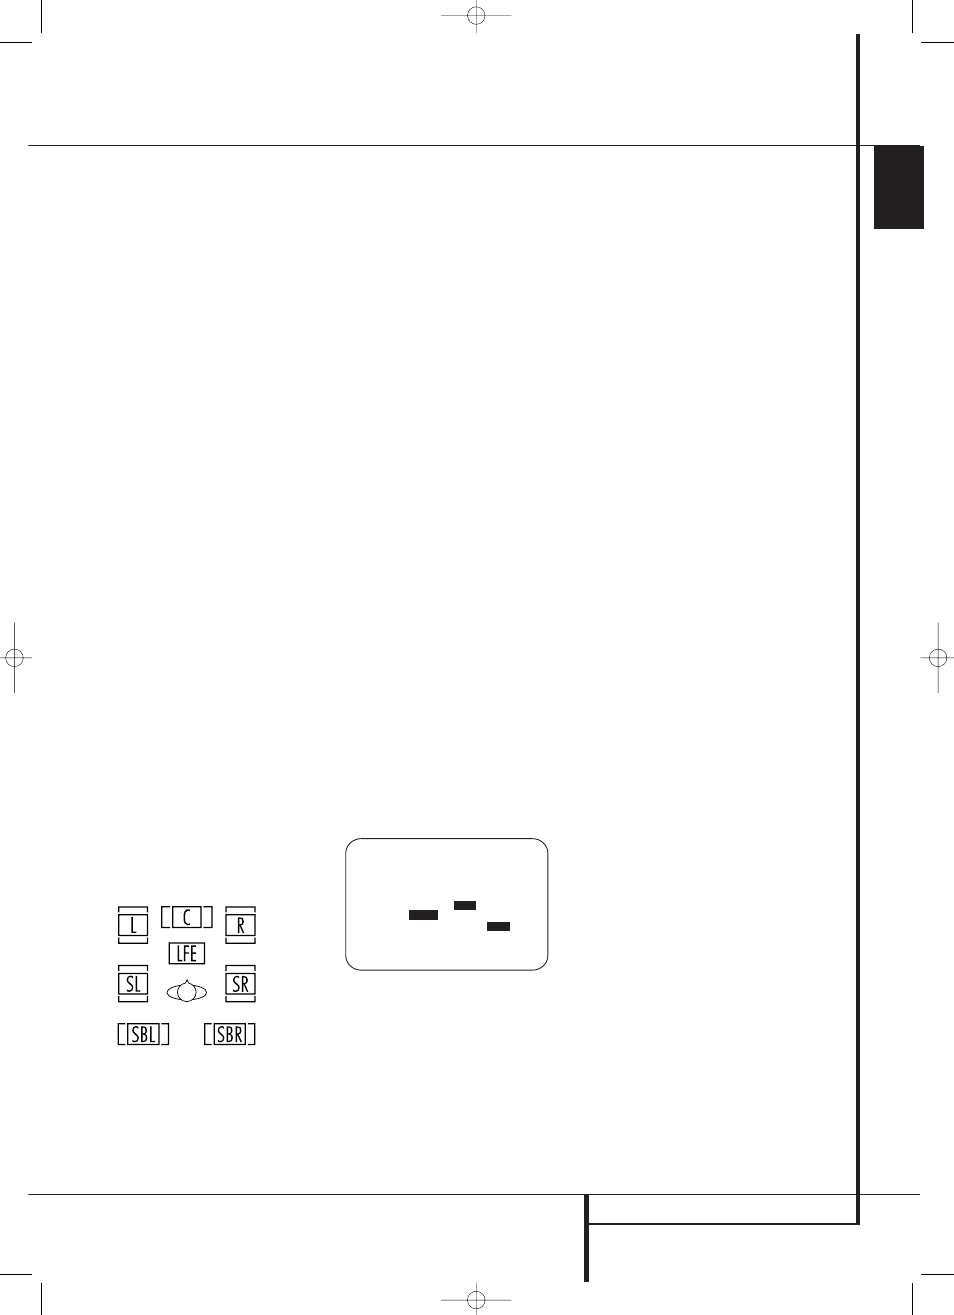
To assist in making these settings, the icons in
the Speaker/Channel Input Indicators Ú
will change as the speaker type is selected at
each position. When only the inner icon box is lit,
the speaker is set for “small.” When the inner box
and the two outer boxes with circles inside them
are lit, the speaker is set for “large." When no
indicator appears at a speaker location, that
position is set for “none” or “no” speaker.
Note: These icons are available only when
making setup changes without the use of the full
OSD mode.
As an example, in the Figure below, all speakers
are set for “large,” and a subwoofer is set.
Delay Settings
Due the different distances between the listening
position for the front channel speakers and the
surround speakers, the amount of time it takes
for sound to reach your ears from the front or
surround speakers is different. You may
compensate for this difference through the use of
the delay settings to adjust the timing for the
specific speaker placement and acoustic
conditions in your listening room or home
theater.
To re-synchronize the front, center and surround
channels at first measure and note the distance
from the listening/viewing position to the front,
center, surround and surround back (if any)
speakers in meters.
If you have already calibrated your system using
Ezset/EQ the delay settings shown will reflect the
results of the measurements made by Ezset/EQ.
No further changes are needed unless you wish
to change an item to reflect your taste or a
nonstandard system configuration. To change the
settings, follow the instructions below to enter
the distance between the speaker’s location and
your main listening position. The measurements
need not be accurate to the inch, as the system is
designed to accommodate typical listening rather
than a specific “sweet spot” position.
The Delay setting for all speakers configured for
your system will be available only (with 5.1 or
with 6.1/7.1 configuration) when any Dolby sur-
round mode is selected (except Dolby-3-Stereo).
In addition they are selectable with these modes
only, with all other modes the delay times are
fixed. Note that the Delay settings are "Global"
for all inputs, using those Dolby modes, and need
not to be repeated with any input.
To view or change the current delay settings,
make sure the
EZSET/EQ MAIN
menu
(Figure 17a) is on the screen. Press the
⁄
/
¤
Navigation Button
EF to move the
cursor to
DELAY ADJUST
and then press
the Set Button
FQ. The
DELAY
ADJUST
menu (Figure 21) will appear on the
screen.
Figure 21
Next move the
➞ cursor to the
UNIT
line and
select the unit for distances you prefer to enter,
feet or meter. Then move the
➞ cursor to the
F L
line where the first adjustment is made. Now
press the
‹
/
›
Buttons
EF until the
distance from the front left speaker to the
preferred listening position is entered. Next press
the
¤
Button
EF once to move to the next
line.
If you wish to reset all delay settings to the
factory defaults, as shown in Figure 21, press the
⁄
/
¤
Navigation Button
EF until the
cursor is pointing to the
DELAY RESET
line.
Next, press the
‹
/
›
Navigation Button
EF so that
O N
is highlighted in reverse
video. The settings will reset, and you may now
continue to make any needed changes following
the instructions shown below. Once you make
the first change to the default settings, the
setting on the
DELAY RESET
line will return
to
OFF
, indicating that the factory defaults are
no longer in effect.
Now the
➞ cursor will be at the
CEN
line so
that the delay for the center speaker may be set.
Press the
‹
/
›
Buttons
EF until the
distance from the main listening position to the
center speaker is entered. Repeat the procedure
for all active speaker positions by pressing the
¤
Button
EF again and use the
‹
/
›
Buttons
EF to change the setting.
If you have already run Ezset/EQ, return to the
settings established by the automated system by
pressing the
⁄
/
¤
Navigation Button
EF
until the cursor is pointing to the
EZSET
SETTINGS
line. Next, press the
‹
/
›
Navigation Button
EF so that
O N
is
highlighted in reverse video. The settings will be
resent to the values calculated by Ezset/EQ, and
the menu will be locked so that the settings may
not be changed. To go back into the menu and
make any manual changes to one or more
channels, you must first return the cursor to the
EZSET SETTINGS
line and press the
‹
/
›
Navigation Button
EF so that
OFF
is
highlighted in reverse video. This will unlock the
menu to allow changes.
When the delay time for all speaker positions has
been set you may return to the master menu by
pressing the
⁄
/
¤
Navigation Button
EF
until the
➞ cursor is pointing to
BACK T O
MANUAL SETUP
and then pressing the Set
Button
FQ.
Note that the delay settings may also be
adjusted at any time when the Dolby Digital or
Dolby Pro Logic II modes are in use by pressing
the Delay button on the remote
Z. Then press
the
⁄
/
¤
E buttons on the remote to select
the Center or Rear channels for adjustment,
followed by a press of the Set button
F. Next,
press the
⁄
/
¤
buttons
E on the remote until
the desired figure appears in the Main
Information Display ˜ and press the Set
button p twice to confirm the setting and
return to the normal display.
When the delay settings are complete, press the
¤
Button
EF once so that the cursor is
next to the
BACK T O MANUAL SETUP
menu line and press Set Button
FQ to
return to the
MANUAL SETUP
menu.
* D E L A Y A D J U S T *
→
F L : 1 2 f t S B R : 1 0 f t
C E N : 1 2 f t S B L : 1 0 f t
F R : 1 2 f t S L : 1 0 f t
S R : 1 0 f t S U B : 1 2 f t
D E L A Y R E S E T :
O F F
O N
U N I T :
F E E T
M E T E R
E Z S E T S E T T I N G S :
O F F
O N
B A C K T O M A N U A L S E T U P
30362_AVR445_ENG 20/11/06 14:56 Side 33