Zone ii remote control functions – Harman-Kardon AVR 445 User Manual
Page 14
14 ZONE II REMOTE CONTROL FUNCTIONS
Zone II Remote Control Functions
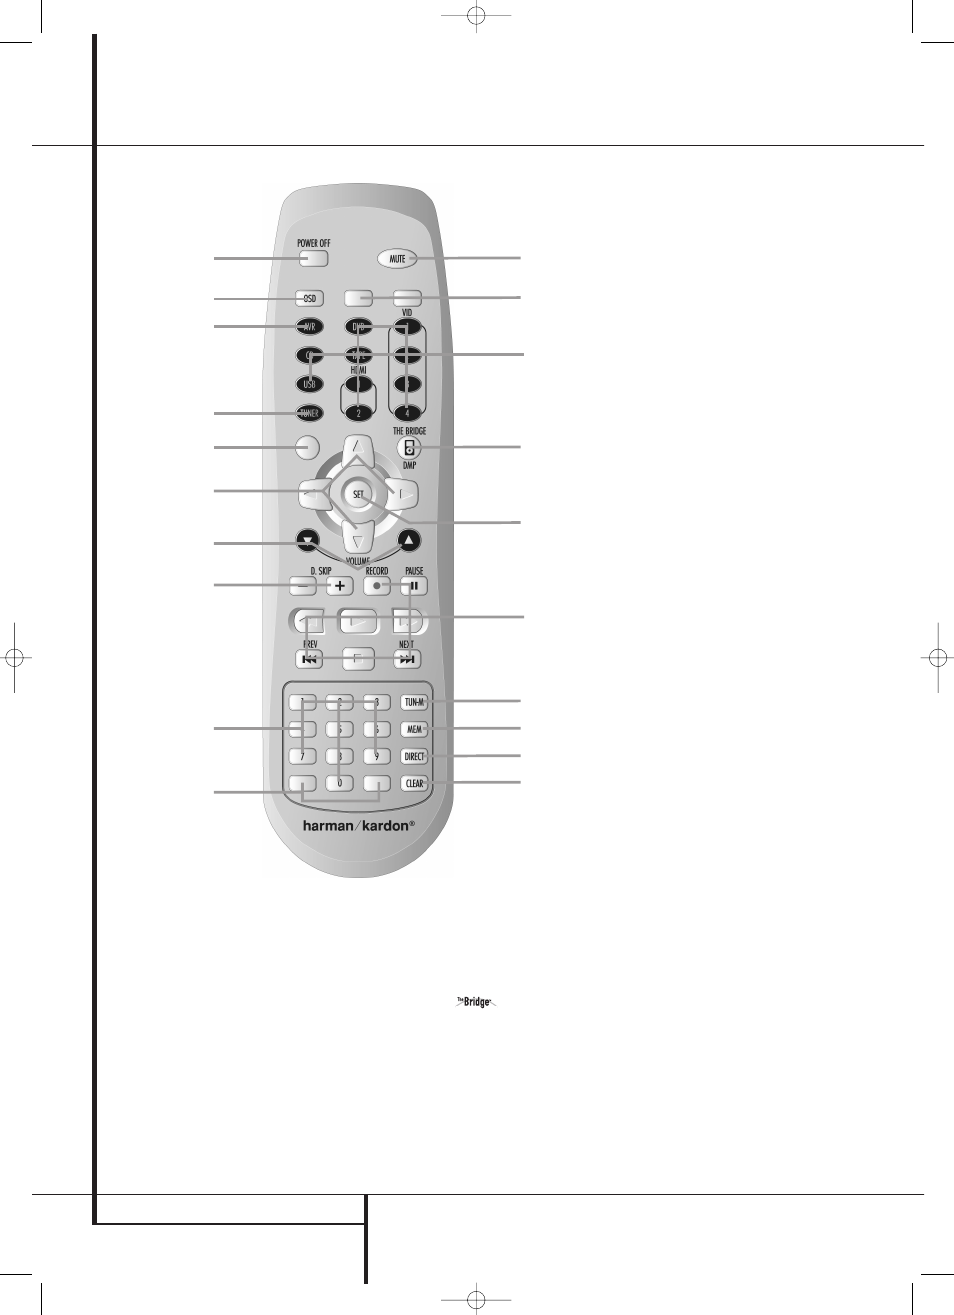
A Power Off
B AVR Selector
C AM/FM Tuner Select
D Input Selectors
E OSD Button
F Navigation Controls
G Numeric Keys
H Disc Skip
I Volume Up/Down
J Blank Buttons
K Mute
L Clear Button
M Direct Button
N Memory Button
O Tuner Mode Button
P Transport Controls
Q Set Button
The Bridge
/DMP Selector
NOTE: The Zone II remote may be used in either
the same room where the AVR is located, or it
may be used in a separate room with an
optional infrared sensor that is connected to the
AVR’s Multi IR input jack f. When it is used in
the same room as the AVR, it will control the
functions of the AVR or any compatible
Harman Kardon products in that room. When it
is used in a separate room via a sensor
connected to the Multi IR Jack f, the buttons
for power, input source, volume and mute will
control the source and volume for the second
zone, as connected to the Multi Out Jacks •.
(See page 47 for complete information on using
the Multiroom system.)
The Zone II remote may be used in either the
same room where the AVR is located, or it may
be used in a separate room with an optional
infrared sensor that is connected to the AVR’s
Multi IR input jack
O.
We strongly recommend that the ZR 10 remote
be used for the initial configuration and setup
process for the AVR 445.
A Power Off: When used in the room where
the AVR is located, press this button to place the
unit in Standby. When it is used in a remote room
with a sensor that is connected to the Multi IR
jack
O, this button turns the Multi-Room system
off.
B AVR Selector: Press this button to turn on
the AVR. The input in use when the unit was last
on will be selected.
C AM/FM Tuner Select: Press this button to
select the Tuner as the input to the Multiroom
system. Press it again to change between the AM
and FM bands.
D Input Selectors: When the AVR is off,
press one of these buttons to turn the unit on
and to select a specific input. When the unit is
already in use, pressing one of these buttons will
change the input.
E OSD Button: Press this button to activate
the On Screen Display (OSD) system used to set
up or adjust the AVR’s parameters.
F Navigation Controls: Depending on the
menu or function in use, pressing these buttons
will navigate through menus, scroll through
option lists or configuration choices, or move the
cursor position. Press the left, right, up or down
button, as appropriate to the adjustment being
made.
K
O
N
M
L
Q
J
D
P
J
G
H
I
F
J
C
B
E
A
30362_AVR445_ENG 20/11/06 14:56 Side 14