Advanced operations (video dubbing), Video dubbing – Hitachi VT-UX605A User Manual
Page 68
Advanced Operations (Video Dubbing)
- 68 -
Advanced Operations (Video Dubbing)
Video Dubbing
Video dubbing is a procedure whereby you can replace sections of video on your tape
with new video information. The dubbing erases the old video while laying new video in
its place. During video dubbing the Hi-Fi audio section will be erased but dubbing will
not affect the audio recorded onto the linear track. (See page 27 "Choosing a Mode for
Audio Playback" for more information)
The new video information can come from either a camcorder, another VCR, or any
other device that can generate a video signal.
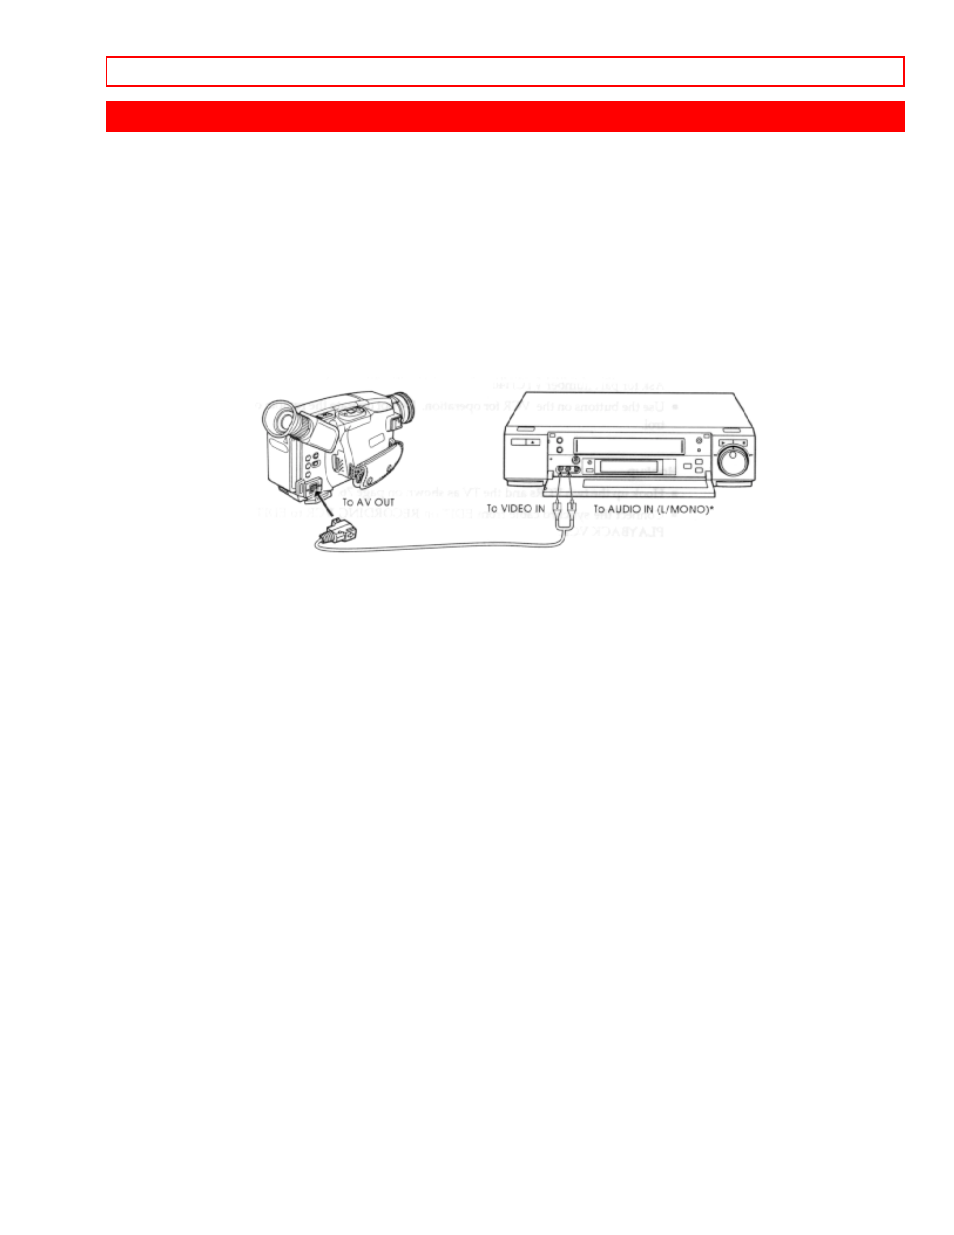
* When an audio cable is connected to the AUDIO IN jacks, new audio signals can be
recorded on the Hi-Fi tracks.
To begin dubbing
First connect the video source (camcorder, VCR, etc.) to the input jacks on the front
of your VT-UX605A. (See example above)
Press the AVX button (located on the remote control) to select L2 (Line 2) which
appears in the VCR's channel display.
Find the place on the tape which will become the start point for your video dub. This
can be done using the PLAY button and the SHUTTLE dial. Pause the tape when you
reach your start point.
Press the DISPLAY button (located on the remote control) to display the counter
reading in the VCR's display. The number shown will be your "start point".
To find the "end point" of your video dub play or search through the tape until you find
the place where the video dub will stop.
Press CLEAR (located on the remote control) and the VCR display will read "0:00:00".
Rewind the tape to the "start point" using the SHUTTLE dial. By using the Shuttle dial
you can find the exact spot you wish the dubbing to start.
Press V.DUB button on the remote control. Then press the PAUSE button to begin
video dubbing. The VCR will stop automatically when the counter reads "0:00:00" (the
"end point").