5 rack mounting, 6 bench mounting, 7 case removal – Honeywell SC1000 User Manual
Page 28
page 28 008-0608-00
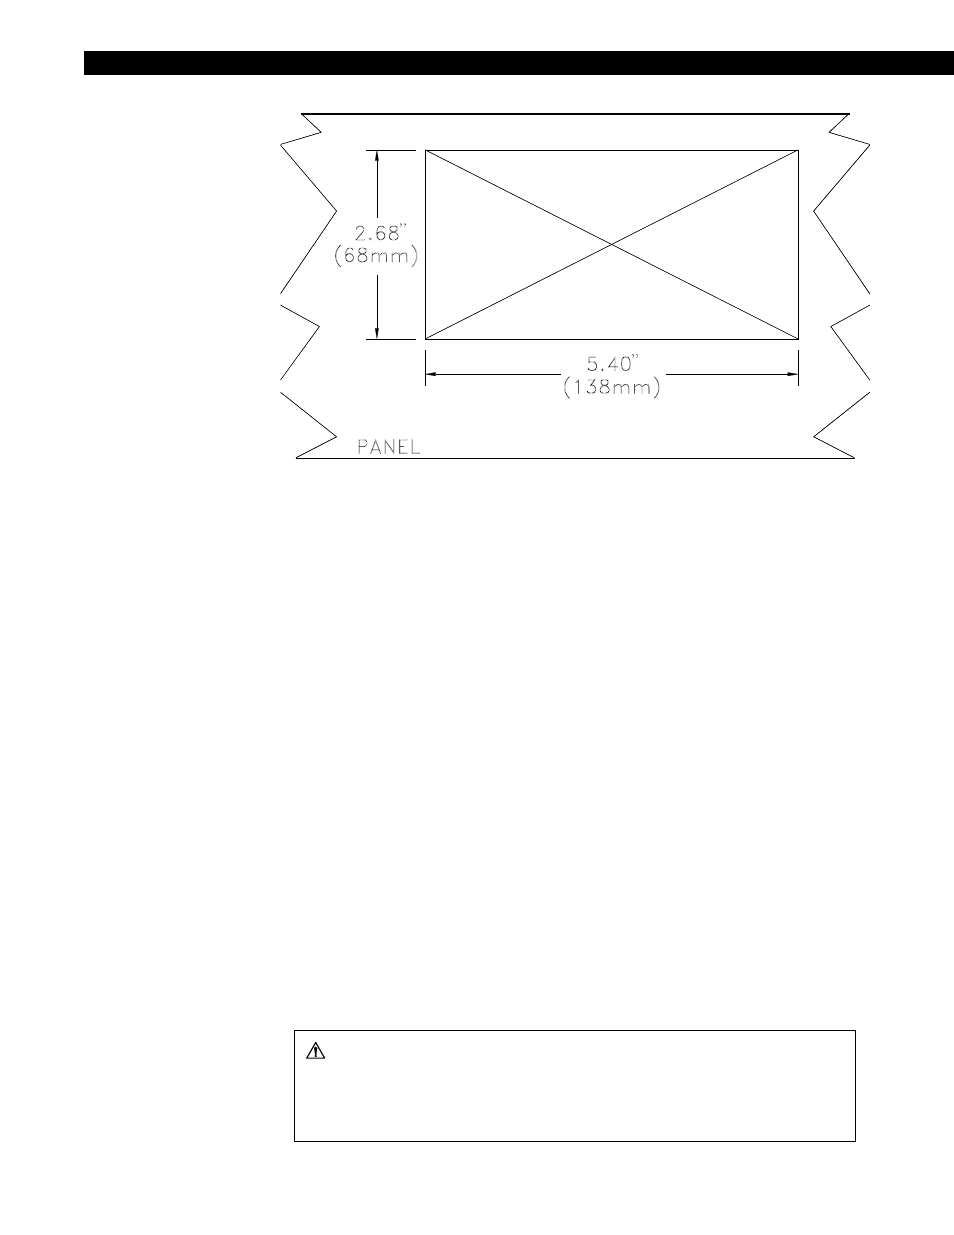
Figure 4-2: Panel Cutout Drawing for SC1000 & SC2000 (not to scale)
Step 1: In the panel or rack, cut a hole as shown above. The panel may be up to 1/4”
in thickness.
Step 2: Use an 0.062" Allen wrench to remove two set screws that hold the Panel-
Mounting Jacks to the case. To do this, insert the wrench into the side slots at
the rear. Remove the screws completely.
Step 3: Remove the Panel-Mounting Jacks by sliding them toward the rear. If the jacks
don't slide easily, tap them gently.
Step 4: Put the instrument through the hole in the panel.
Step 5: Reinsert the Panel-Mounting Jacks into the slide slots. Slide them as far
toward the panel as possible.
Step 6: Reinsert the setscrews and tighten them. This will force the Panel-Mounting
Jacks toward the rear side of the panel, drawing the instrument tightly into
place.
4.3.5 Rack Mounting
A Rack Mounting Kit (order code AA934) is available for mounting a single SC1000 or
SC2000 into a 19”, 2U rack. It includes the Panel-Mounting Jacks described above as
well as the 19” rack panel.
4.3.6 Bench Mounting
If bench mounting the instrument, you may want the optional carrying handle/bench
stand (order code AA926).
4.3.7 Case Removal
WARNING
Disconnect the power cord and all cables from the instrument before attempt-
ing to remove the case.
Failure to comply with these instructions could result in death or serious
injury.