Removing the adf, Removing the adf -6 – HP ScanJet Scanners User Manual
Page 23
Removing the ADF
3-6
..
....
...
....
....
...
....
...
....
....
...
....
....
...
....
...
....
....
...
....
....
...
....
....
...
....
...
....
....
...
....
....
...
....
...
..
..
....
...
....
....
...
....
....
...
....
...
....
....
...
....
....
...
....
...
....
....
...
....
....
...
....
...
....
.
R e m o v i n g t h e A D F
To remove the ADF:
1 Unplug the scanner’s
power cord from the
electrical outlet.
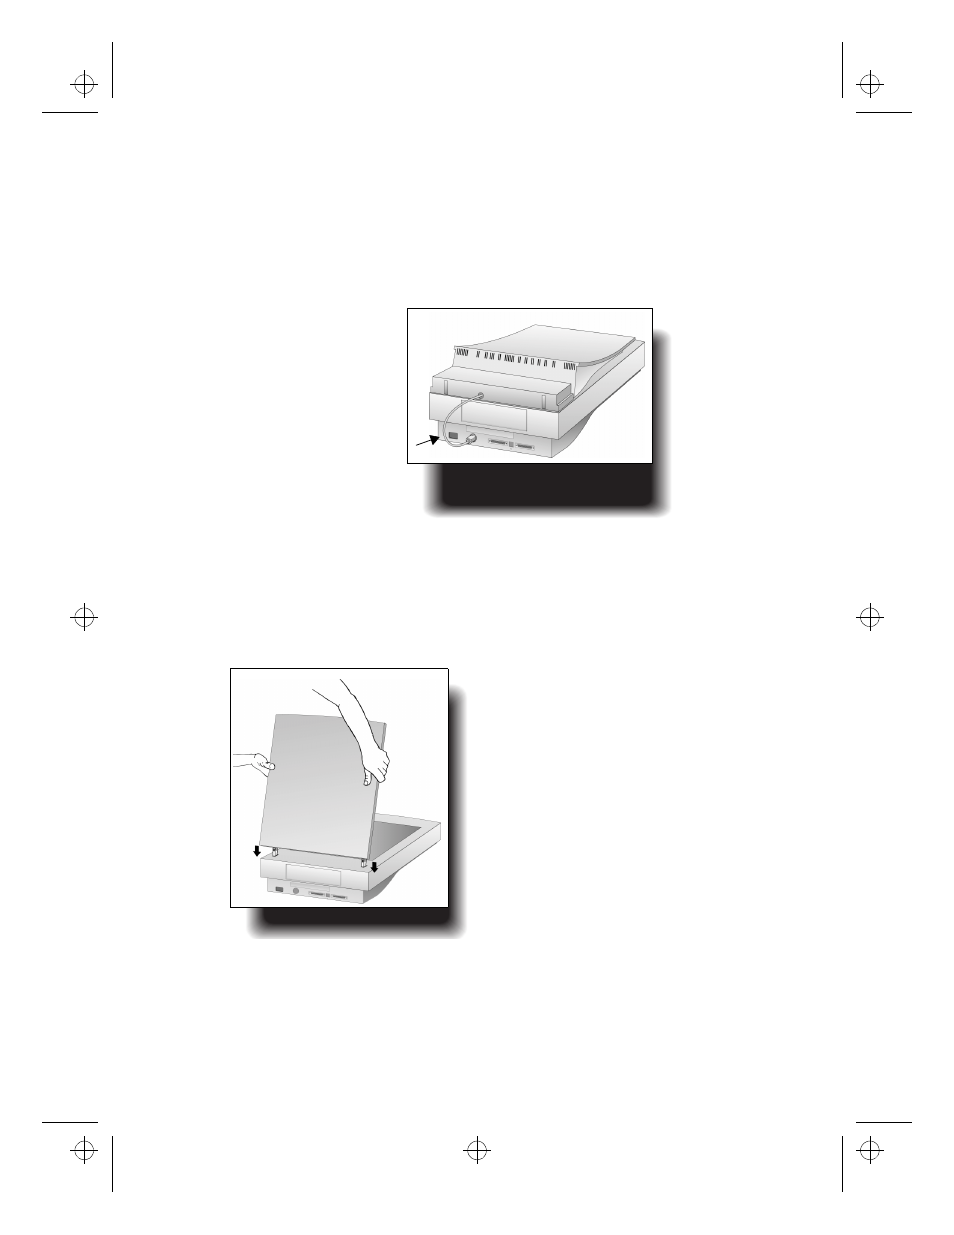
2 Disconnect the ADF
connector cable from the
back of the scanner.
3 Lift the ADF off the rear of
the scanner. Lift firmly
using your fingers to
separate the rear bracket
from the scanner.
Store the ADF in its
original box for protection.
4 Replace the scanner cover:
a Insert the mounting posts into the corresponding
slots at the rear of the scanner body.
b Lower the scanner cover until the mounting posts
are seated firmly in the scanner.
c Make sure both posts are in the same position.
Replacing the scanner cover
Disconnecting the ADF
connector cable
Adf.bk : MAINTN.FM5 Page 6 Sunday, December 21, 1997 4:50 PM