Source, Wi-fi, Engine lighting – Denon DJ DJ SC6000M Prime Dual-Layer Media Player with 10.1" Multi-Touch Display User Manual
Page 19: Control center > wi-fi
19
Source
The Source menu allows you to select a connected media device, streaming service, or cloud service for use with your
SC6000M PRIME. All connected media sources will be shown in the top part of the display, and available streaming and
cloud service partners at the bottom of the display.
Tap the device name
to select it as your media source. The currently selected source device, if any, will show
Source
next to its name. The currently selected recording device, if any, will show
Rec
next to its name.
Tap the streaming or cloud service name
to select it as your media source. If you have not set up a connection to the
service yet, you will be prompted to sign in with your username and password or given a web link and code in order
to activate your device. Once signed in or activated, you can use the streaming or cloud service to browse and add
tracks. Streaming and cloud services may be enabled or disabled in the
menu.
Tap the Wi-Fi icon
at the top of the display to open the
connection menu.
Tap the computer icon
at the top of the display to switch your SC6000M PRIME to computer mode. In computer
mode, you can use your SC6000M PRIME to send and receive MIDI messages to and from your computer.
Tap the eject icon
next to a drive name to eject that source. If a track from the selected source is currently in use, an
alert will appear to note that the tracks will be unloaded. Tap
Eject Anyway
to continue or tap
Cancel
to return to the
Source menu.
Tap the X
to exit the Source menu.
Wi-Fi
The Wi-Fi menu allows you to connect to a local internet network so you can browse connected streaming and cloud
services.
Tap the Wi-Fi icon
at the top of the page to enable Wi-Fi. Once enabled, a list of local networks will appear on the display.
Tap the desired network name
to establish a connection. If a password is required, you will be prompted to enter it.
Once a connection is established,
Connected
will appear next to the network name.
Tap the gear icon
next to the network name to view information about the network.
Tap the Auto Connect On/Off buttons
to enable or disable automatic connection to the network
Tap Forget
to forget the network login credentials.
Tap Close
or anywhere outside the menu to close the Wi-Fi information menu.
You can also disable Wi-Fi from within this menu by tapping the icon at the top of the display again.
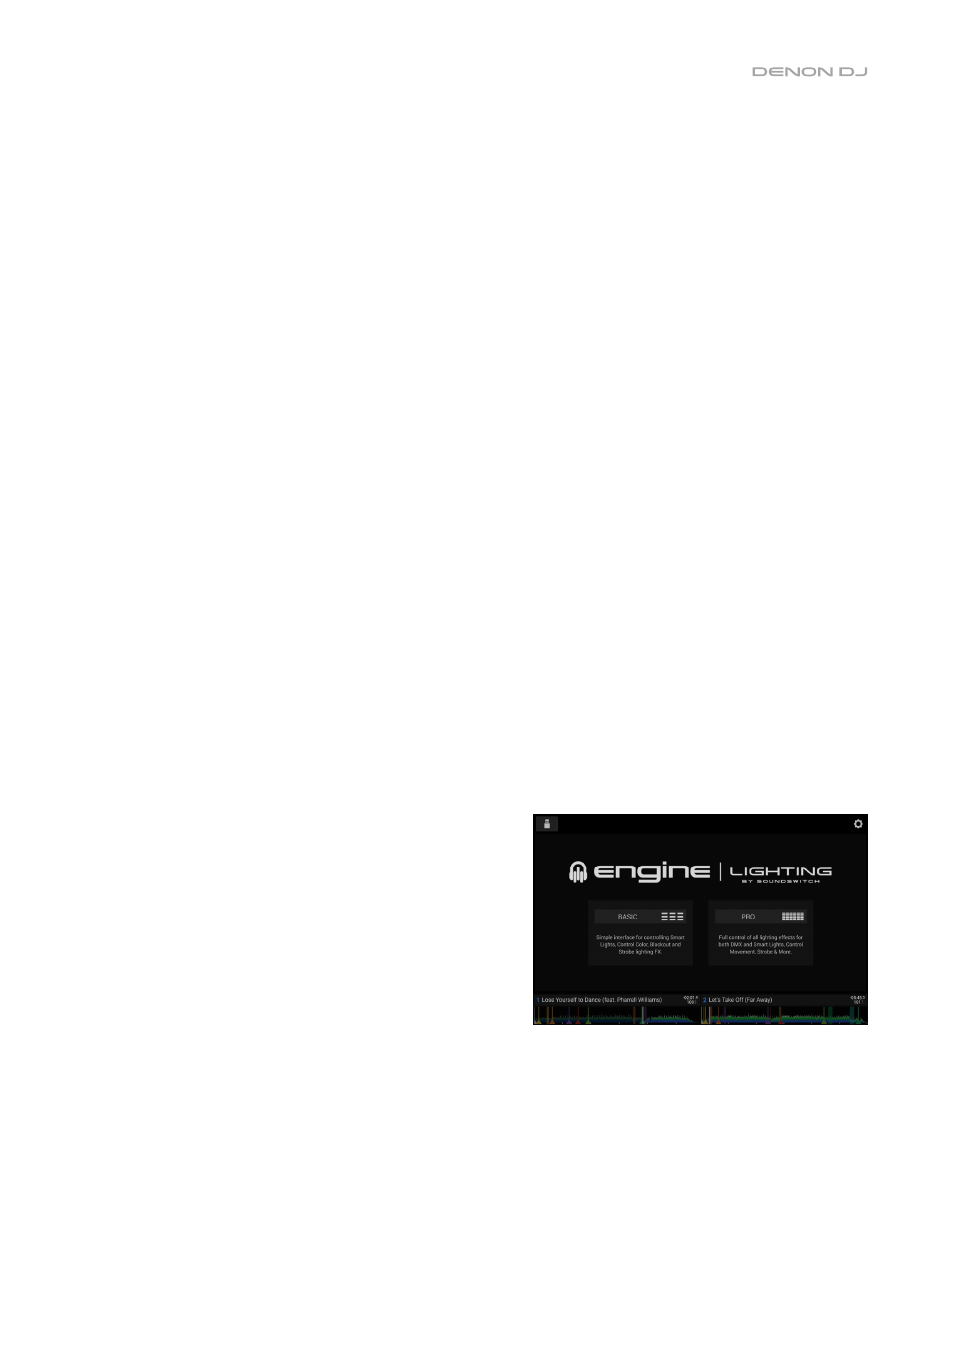
Engine Lighting
The Engine Lighting menu allows you to control connected
lighting devices such as DMX fixtures and Smart Lights using
SoundSwitch to seamlessly sync your music and lights.
To enable Engine Lighting,
make sure the
Engine Lighting
option under
Services
in the hardware
menu is
set to
On
. Once Engine Lighting is enabled, you can tap
the
gear icon
in the Settings menu to open the lighting
control page. You can also access this page after enabling
it by double-pressing the
View
button.
The first time you use Engine Lighting, you can select a
Basic
or
Pro
layout for performing:
Basic:
A simple interface for controlling Smart Lights, Control
Color, Blackout and Strobe Lighting FX.
Pro:
Full control of all lighting effects for both DMX and
Smart Lights, Control Movements, Strobe and more.
You will also be prompted if you want to connect Philips Hue
Smart Lights when you first use Engine Lighting. This can also be
configured later through the Engine Lighting
menu.
for more information on using SoundSwitch
lighting controls with your SC6000M PRIME.