Front view, Side view, Rear view – Philips NeoPix Easy 2+ HD LCD Projector User Manual
Page 7: Remote control
6
Philips · NeoPix Easy 2
+
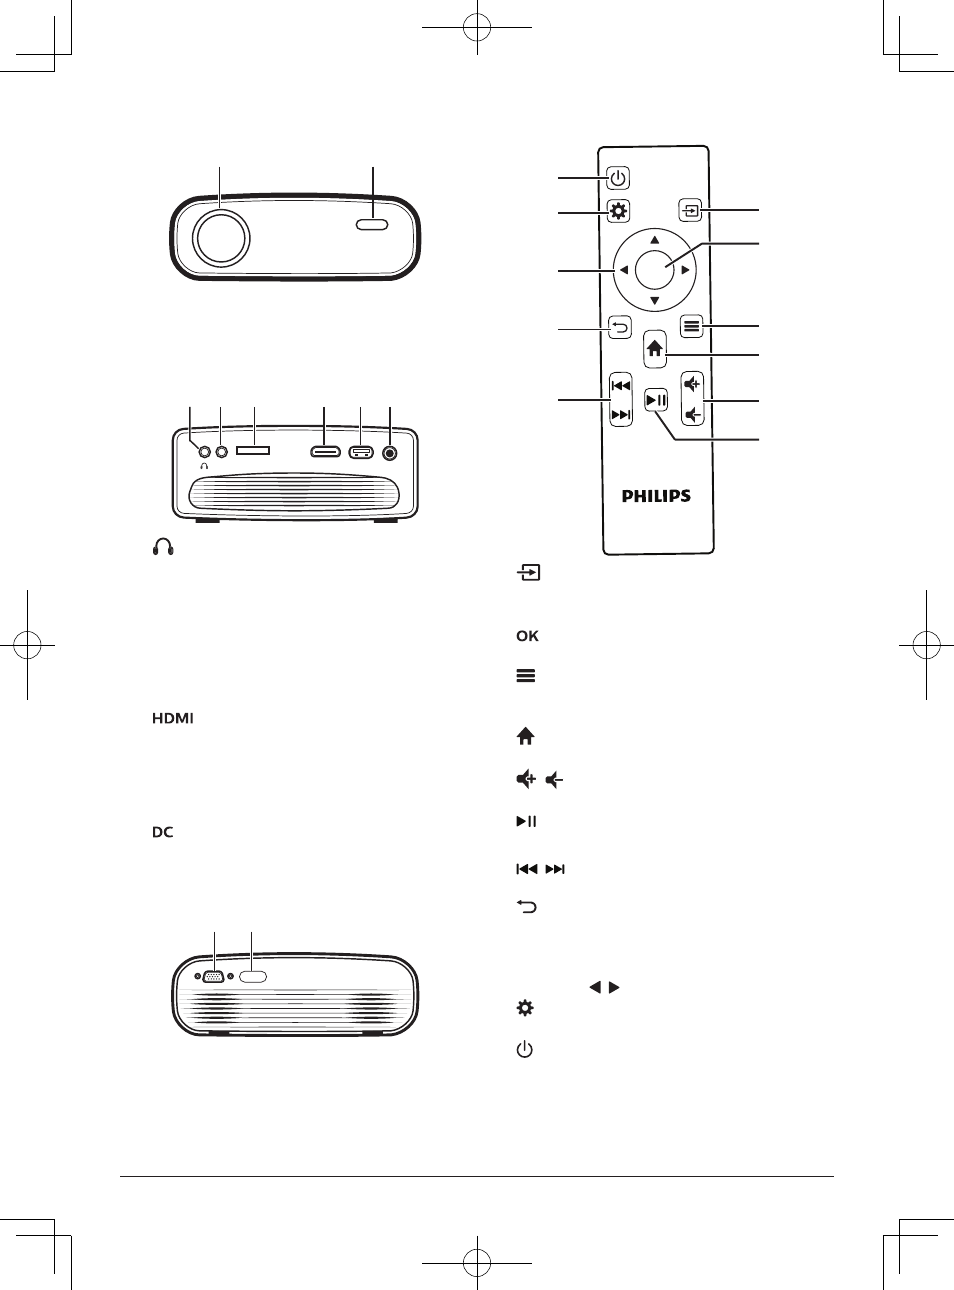
Front view
a
b
a
Projection lens
b
Front IR sensor
Side view
MICRO SD
HDMI
USB
DC
AV
a b c
d e f
a
3.5 mm audio output; connect to external
speakers or headphones.
b
AV
3.5 mm audio/video input; connect to the
analogue audio jacks and/or composite
video jack on a playback device.
c
Micro SD card slot
Connect to a Micro SD card for media play.
d
Connect to the HDMI output on a playback
device.
e
USB port
Connect to a USB storage device for media
play.
f
Connect to the power supply.
Rear view
a b
a
VGA port
Connect to the VGA port on a computer.
b
Rear IR sensor
Remote control
OK
a
b
c
d
e
f
g
h
j
i
k
a
• Access the home menu.
• Access input source list.
b
Confirm a selection or entry.
c
• When playing media, access more
options.
d
Access the home menu.
e
/
Increase or decrease volume.
f
Start, pause or resume media play.
g
/
Skip to the previous/next media file.
h
Return to a previous menu screen.
i
Navigation buttons
• Navigate menu options.
• Press / to change a selection.
j
Access the settings menu.
k
• Switch the projector on or to standby.
• When the projector is switched on, the
LED turns green. When the projector is
in standby, the LED turns red.