Replacing the covering, Covering size – Roland KD-140 V-Kick Trigger Pad (Black Chrome) User Manual
Page 9
9
• Do not apply excessive force to the sensor and
cushion located under the head. Doing so can
interfere with accurate detection, and may damage it.
• When replacing the covering, avoid touching any
parts other than the wing bolts, and be careful that
no foreign matter enters the interior of the unit.
Otherwise, you risk causing malfunction.
• Be careful not to hurt your fingers on the corners or
points of the metal parts.
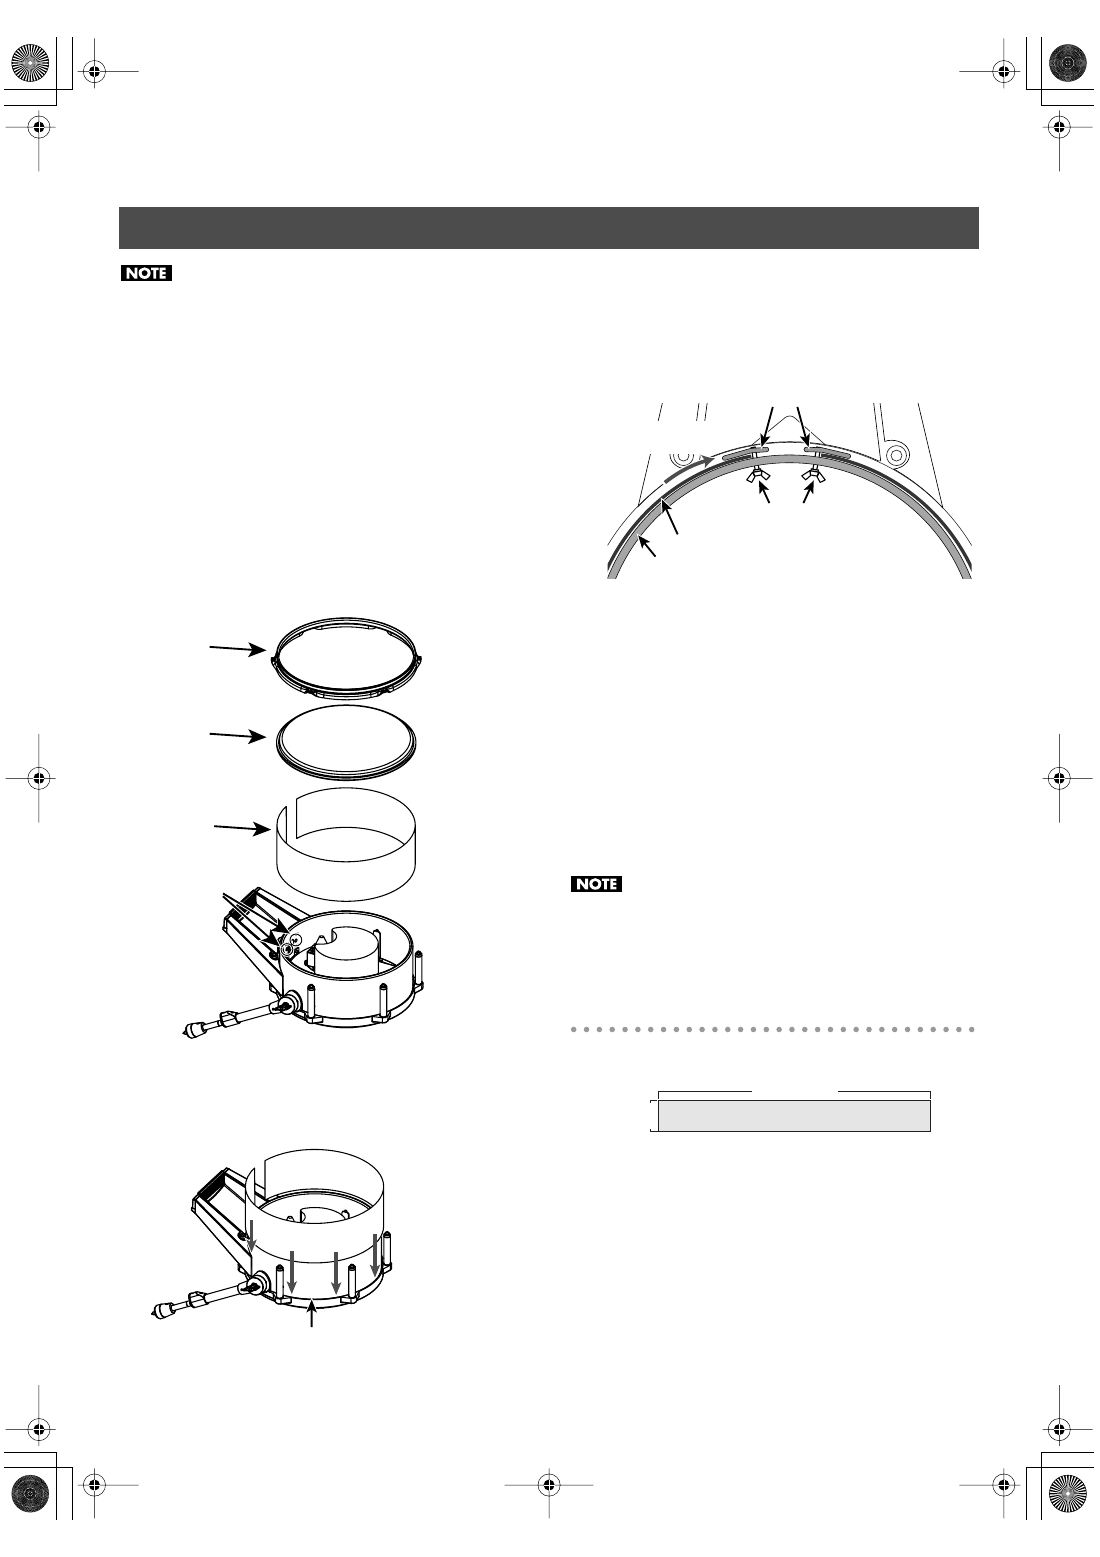
1.
Loosen all tuning bolts, and remove the hoop and
head.
2.
Loosen the two wing bolts, and remove the
covering.
3.
Insert the new covering.
Fit the lower part of the covering into the groove so that the
covering is not floating or slack.
4.
Move one end of the covering as far as it will go,
and then tighten the wing bolt to securely fasten
that end.
Edge of the covering will fit into the gap between the shell
and plate shown in the illustration.
5.
Pull the other end of the covering so that there is
no slack, and then tighten the other wing bolt to
securely fasten that end.
Edge of the covering will fit into the gap between the shell
and plate.
6.
Attach the hoop and head, and tighten the tuning
bolts.
7.
Adjust the tension of the head. Refer to “Adjusting
Fully tightening a tuning bolt at only a single location
will produce uneven tensioning, which will make it
impossible to achieve correct strike response and may
also cause malfunctions.
Covering size
• 120 (Width) x 1040 (Length) mm
• Maximum Thickness: 1 mm
Replacing the Covering
Covering
Wing bolts
Head
Hoop
Groove
Shell
Covering
Plates
Wing bolts
Move one end of
the covering
120 mm
1040 mm
KD-140_e.book 9 ページ 2021年7月15日 木曜日 午後6時5分