Assembling the kd-140, Adjusting the leg tips – Roland KD-140 V-Kick Trigger Pad (Black Chrome) User Manual
Page 5
5
• Each leg’s foot has a very sharp spike at the tip. Please
handle with care!
• During assembly, take care that the weight of the
trigger pad unit does not pinch your hand or foot.
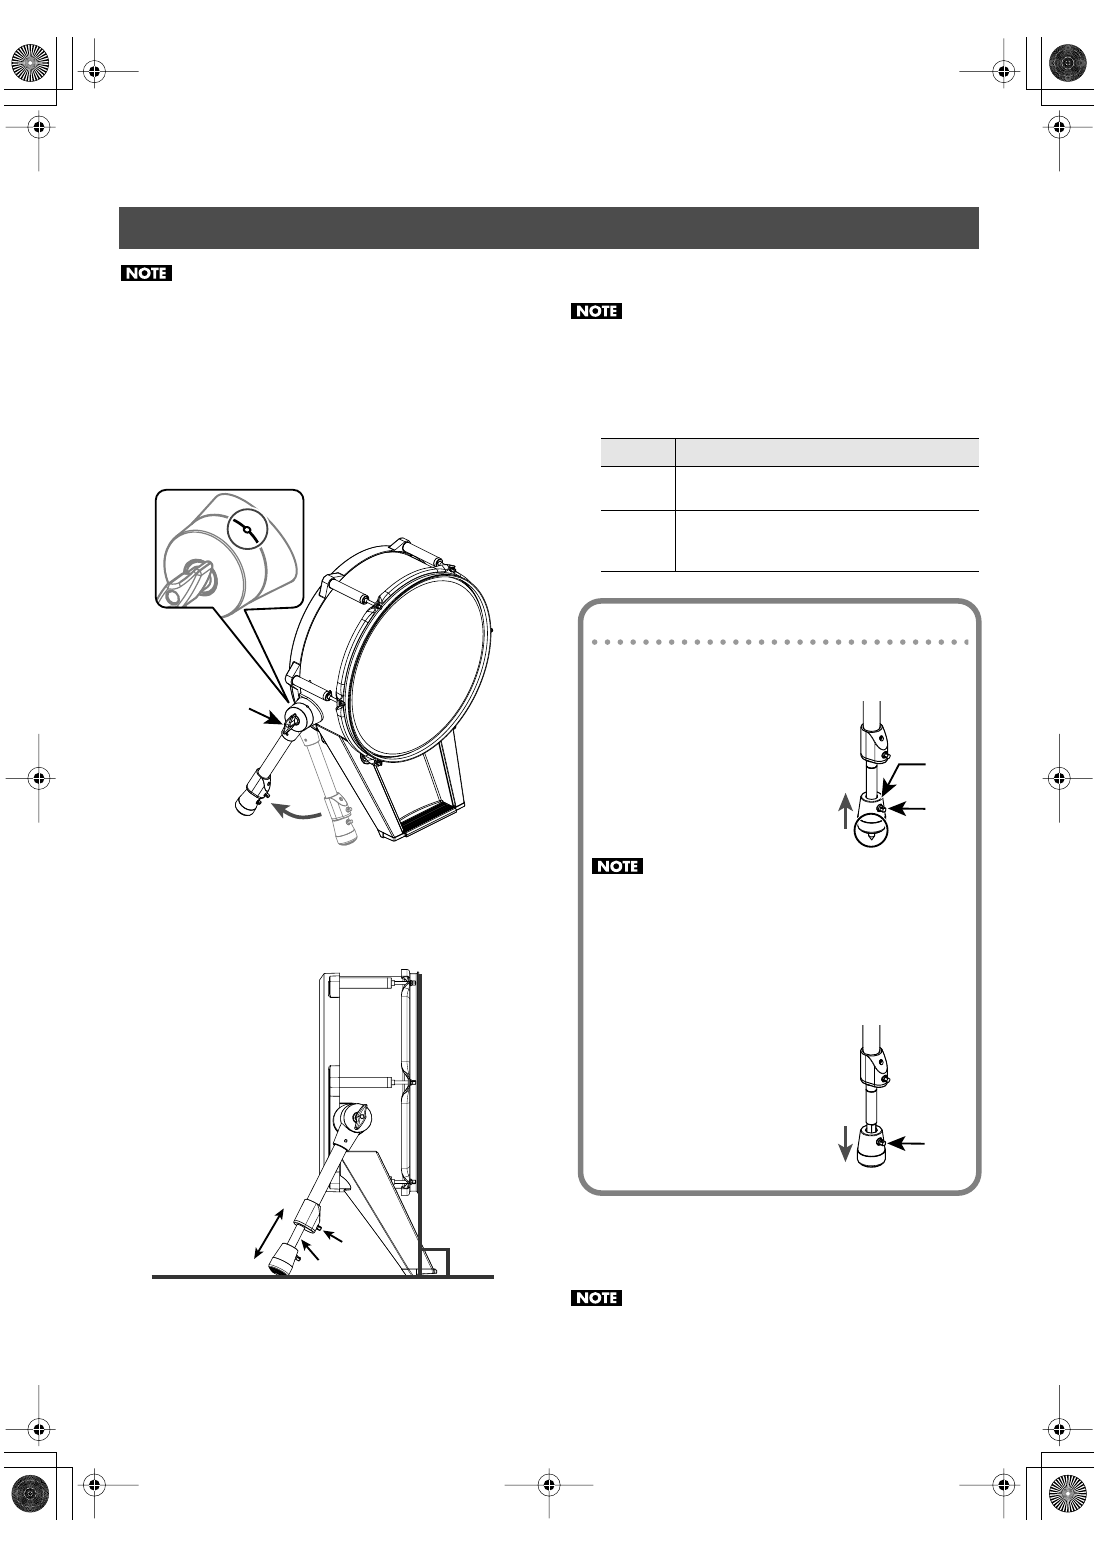
1.
Loosen the knobs that fasten legs and adjust the
angle of the legs.
Align the notches as shown in the illustration.
fig.07-e.eps
2.
Loosen bolt ‘A’ of the leg, extend the rod, and
adjust it so that the unit is approximately vertical
relative to the floor.
fig.09-e.eps
3.
Tighten bolt ‘A.’
Firmly tighten bolt ‘A’ so that the rod is securely
fastened.
4.
Adjust the tip of the legs appropriately for the
surface on which you’re placing the KD-140.
5.
Mount the included plastic beater on the kick
pedal.
The mesh head can wear down a felt beater. We
recommend using a plastic beater.
Assembling the KD-140
Adjust the angle
of the leg
Knob that
fastens leg
Align the notches
Vertical
Bolt A
Rod
Tip
Floor surface
Spike
Soft floor
Rubber mat, carpet, etc.
Rubber
Hard floor
V-Drums Mat TDM series (sold separately),
wood flooring, concrete, etc.
Adjusting the leg tips
Using the spike leg tips
1.
Loosen the foot bolt ‘B.’
2.
Move the foot all the way
upward, and then tighten
bolt ‘B.’
The spike will protrude from the
foot.
• The tip of the spike is sharp; handle it with care.
• Using the spike leg tips on wood flooring may
damage the floor; the rubber leg tips should be
used on wood flooring.
Using the rubber leg tips
1.
Loosen the foot bolt ‘B.’
2.
Move the foot all the way
downward, and then
tighten bolt ‘B.’
Bolt B
Foot
Spike
Bolt B
KD-140_e.book 5 ページ 2021年7月15日 木曜日 午後6時5分