Covering size, Connecting to the percussion sound module, Pd-108 – Roland PD-108 V-Pad 10" (Black Chrome) User Manual
Page 9
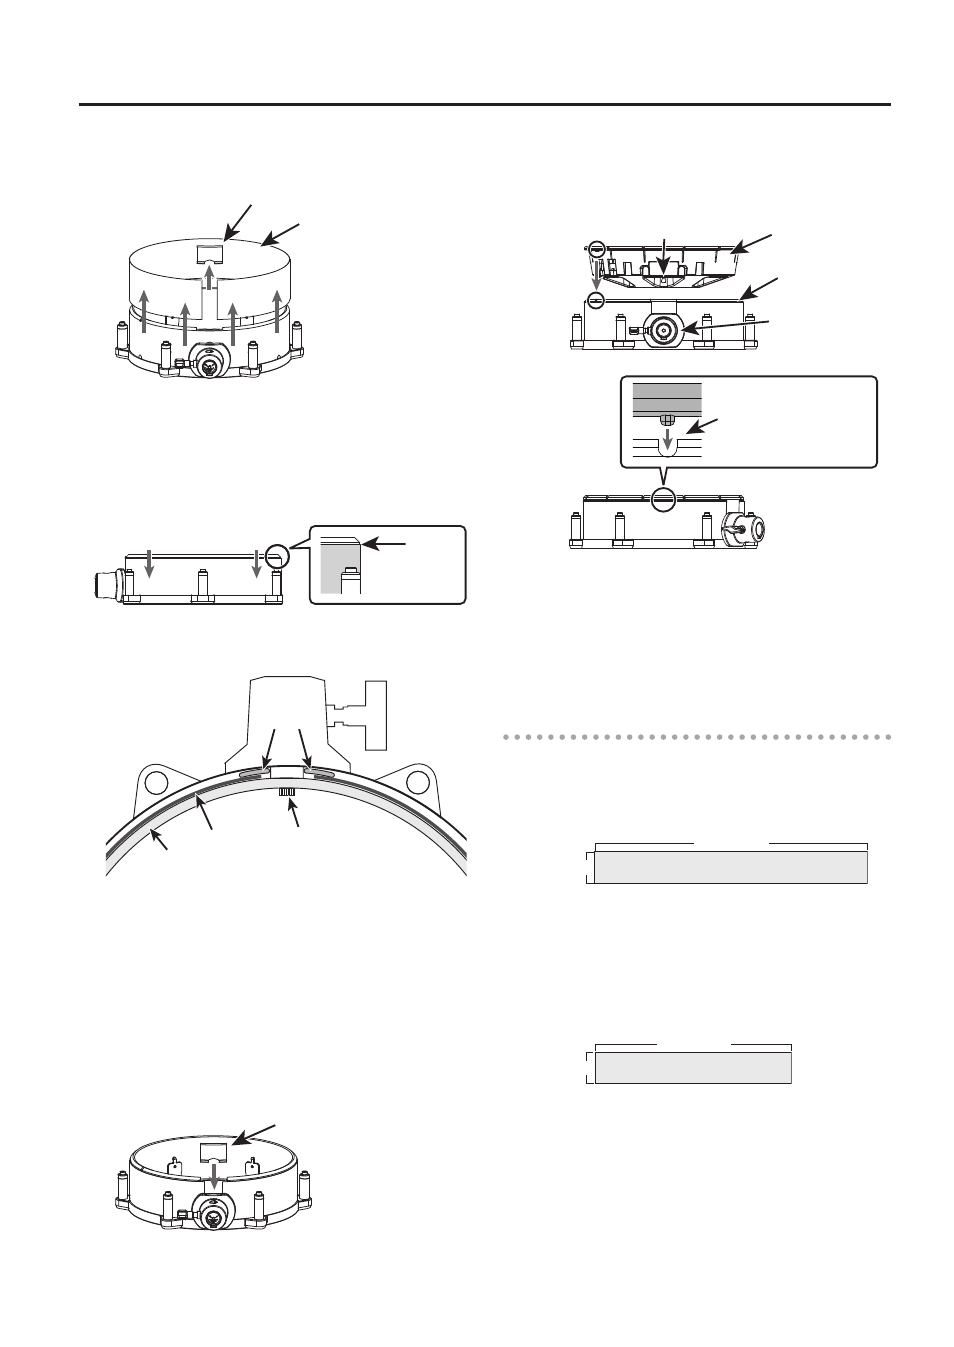
Connecting to the Percussion Sound Module
9
4.
Pull the fastening clip upward and out, and
remove the covering.
Fastening Clip
Covering
5.
Attach the new covering.
Insert the lower part of the covering into the rubber
groove so that the upper edge of the covering is in the
position shown in the illustration.
The upper edge
of the covering
Both edges of the covering will fit into the gap between
the shell and plate.
Plate
Shell
Covering
Screw
6.
While pulling on both ends of the covering so as
to eliminate any slack, finger-tighten the screw
that holds the covering in place.
7.
Using a Phillips screwdriver, securely fasten the
screw that holds the covering in place.
8.
Attach the fastening clip in the location shown in
the illustration, as if to pinch the two ends of the
covering.
Fastening clip
9.
Install the frame in the shell.
The frame’s output jack will be pointing in the same
direction as the bracket.
Protrusion
Groove
Output jack
Frame
Shell
Bracket
Match up the protrusion on
the frame with the groove
on the shell.
10.
Attach the hoop and head, and tighten the
tuning bolts.
11.
Adjust the tension of the head.
Refer to “Adjusting the Head Tension” (p. 7).
Covering size
PD-128S/PD-128
• 77 (Width) x 927 (Length) mm
77 mm
927 mm
• Maximum Thickness: 1 mm
PD-108
• 77 (Width) x 767 (Length) mm
77 mm
767 mm
• Maximum Thickness: 1 mm