ProSoft Technology PS69-DPS User Manual
Page 26
Start Here
PS69-DPS ♦ CompactLogix or MicroLogix Platform
User Manual
Profibus DP Slave Communication Module
Page 26 of 108
ProSoft Technology, Inc.
May 9, 2014
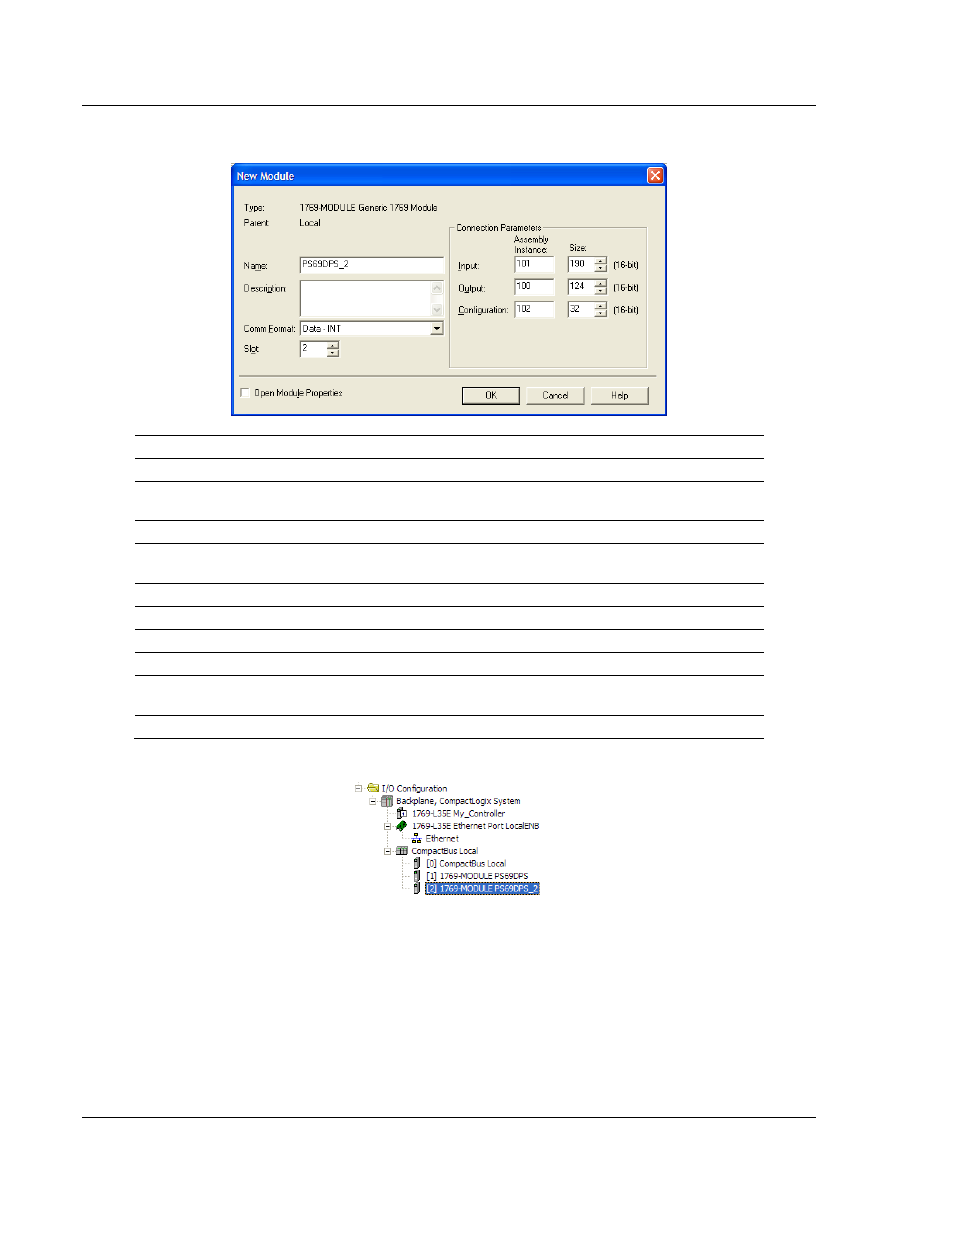
3 Fill the module properties as follows:
Parameter
Value
Name
Enter a module identification string. Example: PS69DPS_2
Description
Enter a description for the module. Example: Profibus DP Slave
Communication Module
Comm Format
Select Data-INT
Slot
Enter the slot number in the rack where the PS69-DPS module will
be installed.
Input Assembly Instance
101
Input Size
190
Output Assembly Instance
100
Output Size
124
Configuration Assembly
Instance
102
Configuration Size
32
4 Click OK
to confirm. The new module is now visible:
5 Expand the T
ASKS
folder, and then expand the M
AIN
T
ASK
folder.
6 On the M
AIN
P
ROGRAM
folder, click the right mouse button to open a shortcut
menu. On the shortcut menu, choose N
EW
R
OUTINE
. As an alternative to
creating a separate New Routine, you could skip to Step 8 and import the
AOI for the second module into the same routine you created for the first
module.
7 In the N
EW
R
OUTINE
dialog box, enter the name and description of your
routine, and then click OK.