Image adjustments, Image level select, Image level select (direct) – Eiki LC-HDT10 User Manual
Page 32: Image level select (menu), Display adjust
32
IMAGE ADJUST MENU
Move a red frame pointer to
item to be selected and then
press SELECT button.
IMAGE ADJUST
Menu icon
IMAGE ADJUSTMENTS
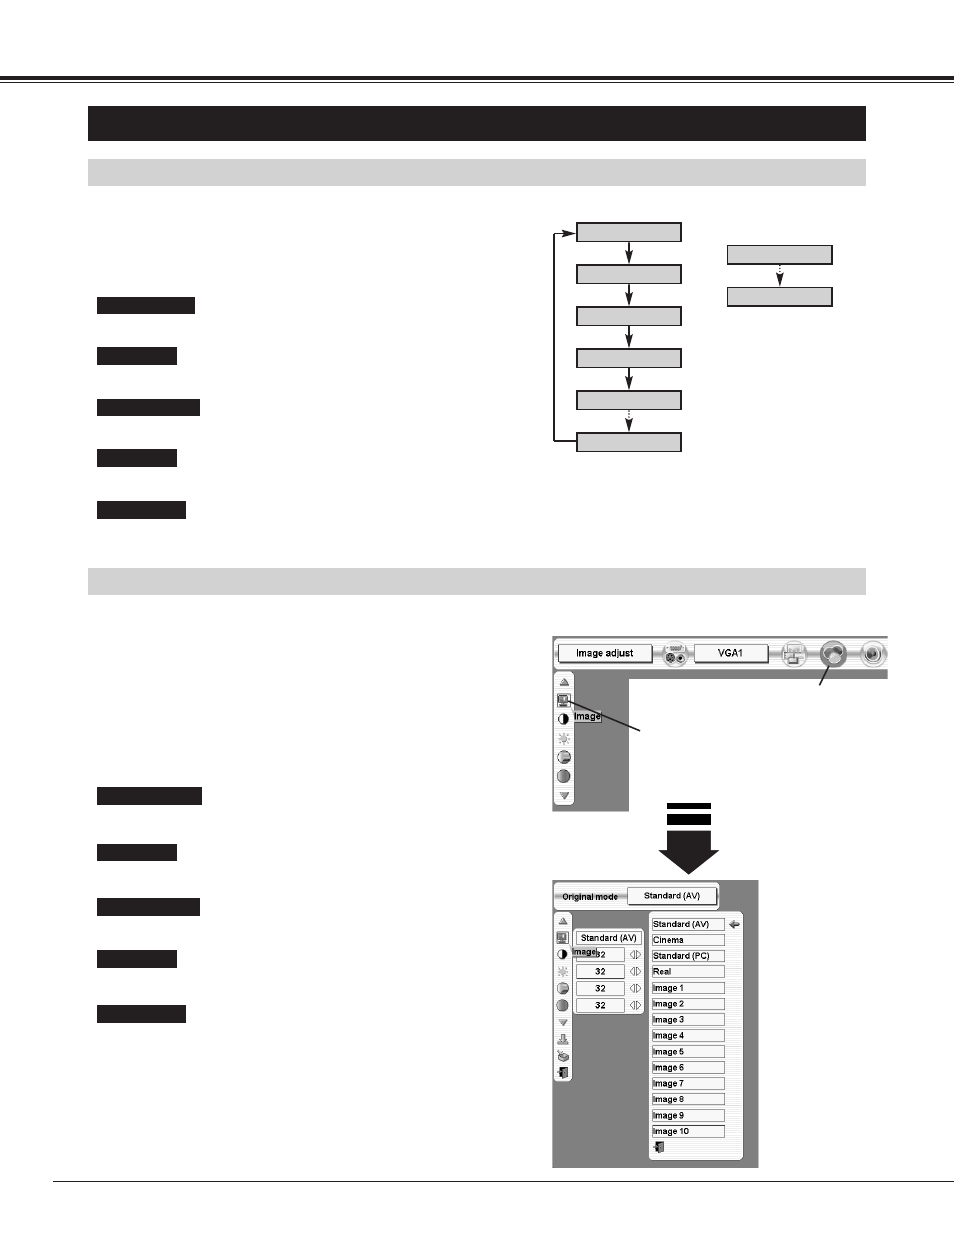
Press MENU button and ON-SCREEN MENU will appear. Press
POINT LEFT/RIGHT button to move a red frame pointer to
IMAGE ADJUST Menu icon.
1
3
Press POINT UP/DOWN button to move a red arrow to level that
you want to set and then press SELECT button.
Normal picture level preset on this projector for AV mode.
Standard (AV)
Picture level with improved halftone for graphics.
Real
Normal picture level preset on this projector for PC mode.
Standard (PC)
Picture level adjusted for picture with fine tone.
Cinema
User preset picture adjustment in IMAGE ADJUST Menu (P33, 34).
IMAGE 1~10
IMAGE LEVEL SELECT (DIRECT)
Select image level among Standard (AV), Cinema, Standard (PC),
Real and Image 1 ~ Image 10 by pressing IMAGE button on Side
Control or on Remote Control Unit.
Select image level Image 1 ~ Image 10 by pressing IMAGE 1 ~
IMAGE 10 buttons on Remote Control Unit.
IMAGE button
Standard (AV)
Cinema
Standard (PC)
Real
Image 1
Image 10
Normal picture level preset on this projector for AV mode.
Standard (AV)
Picture level adjusted for picture with fine tone.
Cinema
IMAGE 1 ~ IMAGE 10
buttons
Image 1
Image 10
Normal picture level preset on this projector for PC mode.
Standard (PC)
Picture level with improved halftone for graphics.
Real
User preset picture adjustment in IMAGE ADJUST Menu (P33, 34).
IMAGE 1~10
IMAGE LEVEL SELECT (MENU)
2
Press POINT UP/DOWN button to move a red frame pointer to
image icon and then press SELECT button.
DISPLAY ADJUST