2 rack-mounting installation – PLANET XGS3-42000R User Manual
Page 6
3.2 Rack-mounting Installation
During the installation, please take care and avoid crash, that may
cause the device damage or any harm to the installer due to the
device falling or drop.
Please make sure the hardware had been located on the rack prop-
erly. If the hardware drops down after the installation, it is possible
make someone hurt. Please check the hardware again after the
installation.
To install the XGS3-42000R in a
19-inch standard rack, follow the instructions
described below.
Step1 Place your XGS3-42000R on a hard flat surface, with the front panel
positioned towards your front side.
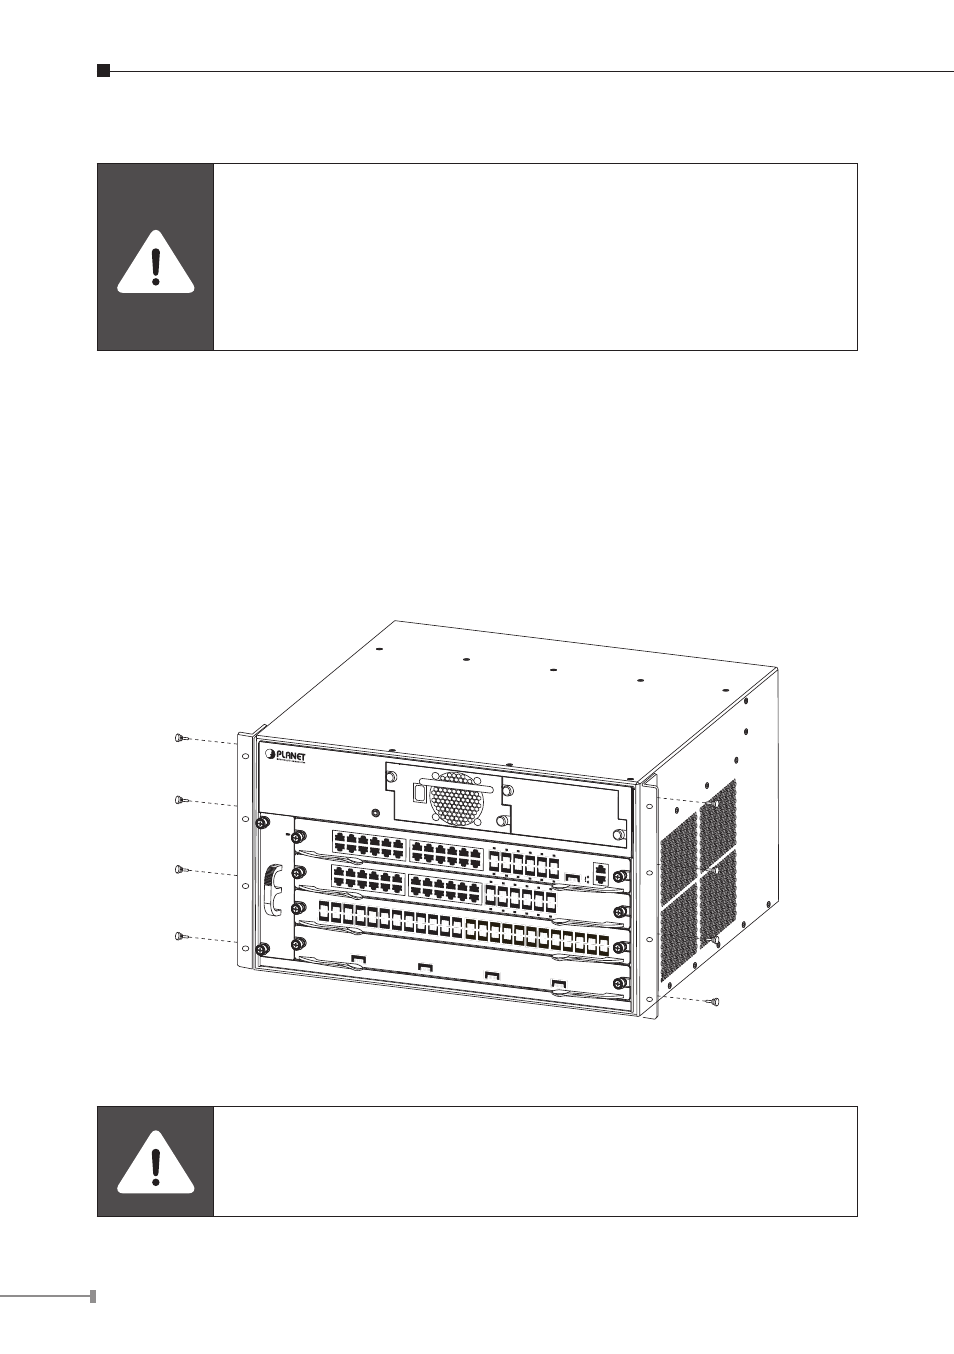
Step2 Attach a rack-mount bracket to each side of the XGS3-42000R with
supplied screws attached of the package. Figure 3-1 shows how to attach
brackets to one side of the XGS3-42000R.
2
1
3
4
XGS3-42000R
Layer 3 4-Slot Chassis Switc
h
O
I
XGS3-PWR-AC
ON
OFF
Fault
Output good
XGS3-M24GX
2
PWR RUN
Master FAN
1
4
3
6
5
8
7
10
9
12
11
14
13
16
15
18
17
20
19
22
21
24
23
25
XFP
25
Ethernet
LNK
ACT
Console, 9600, N, 8, 1
XGS3-S24G
2
PWR RUN
1
4
3
6
5
8
7
10
9
12
11
14
13
16
15
18
17
20
19
22
21
24
23
14
13
16
15
18
17
20
19
22
21
24
23
XGS3-S48GF
2
1
4
3
6
5
8
7
10
9
12
11
14
13
16
15
18
17
20
19
22
21
24
23
26
25
28
27
30
29
32
31
34
33
36
35
38
37
40
39
42
41
44
43
46
45
48
47
PWR RUN
XGS3-S4XG
1
LNK
ACT
2
LNK
ACT
3
LNK
ACT
4
XFP
XFP
XFP
XFP
LNK
ACT
14
13
16
15
18
17
20
19
22
21
24
23
Figure 3-1 Installation XGS3-42000R Rack-mounting Brackets
You must use the screws supplied with the mounting brackets.
Damage caused to the parts by using incorrect screws would
invalidate your warranty.