MEDC Weatherproof FernTel IP User Manual
Page 10
Page 10
Short manual FernTel IP / IP150
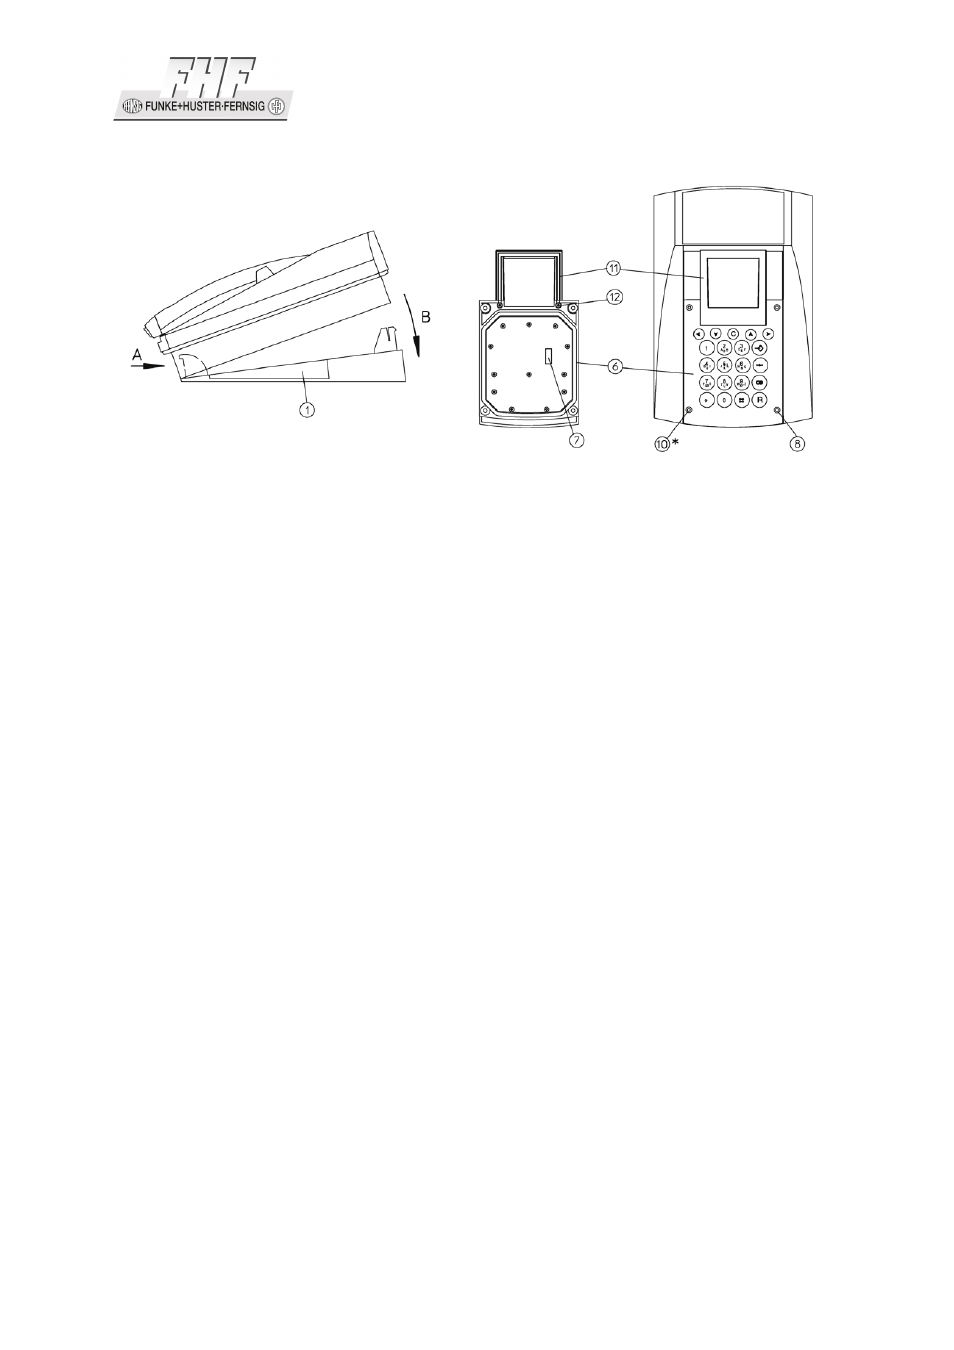
Side view
Bottom view
keypad
Top view
*depending on version
Figure 6: Desktop Mounting
The standard handset accommodation (for the wall version) (9) can be replaced for
the table version.
After loosening the two screws (12) on the bottom of the keypad plate you can
remove the standard handset accommodation.
Fasten the table version handset accommodation (11) to the keypad plate by using
the included screws (12).
Plug the ribbon cable onto the pin contact strip (7) of the keypad plate.
Tighten the keypad plate (6) using four screws (8).
The fixing screws (8) are provided with sealing plugs (10). A bag of sealing plugs
(10) is included in the device.
Lay the telephone cord according to the instructions, in order to prevent accidents.
1.3.3 LAN-Connections
The telephone has 2 LAN-connections
LAN-cable, used for plug into the telephone FernTel IP / IP150, have to be adapted
with a connector from Phoenix contact, to preserve the IP65 degree of protection. A
LAN cable connector belongs to the as-delivered condition.
The LAN-lead wire has to be connected to the connector (Position 4 in Figure 5). Die
LAN lead wire has to be with PoE (Power over Ethernet). The LAN connector at the
right side of the telephone can only be used for continuing the LAN, to connect for
example a pc. This connector doesn’t support PoE. It is impossible to connect an