Installing the photoconductor unit – Epson EPL-C8200 User Manual
Page 23
Assembling the Printer
15
R4C4450 Setup G.
Rev. C
A5 size
SAFETY.FM
7/18/00
Pass 0
R
Proof Sign-off:
ABE K.Tsuno H.Kimura_______
H.Kimura
_______
ABE J.Holmes
_______
Installing the Photoconductor Unit
Before installing the photoconductor unit, read the following
handling precautions:
❏ When installing the photoconductor unit, avoid exposing it
to room light any longer than necessary.
❏ Be sure not to scratch the surface of the drum. Also, avoid
touching the drum, since oil from your skin may permanently
damage its surface and affect print quality.
❏ Keep the photoconductor unit out of the reach of children.
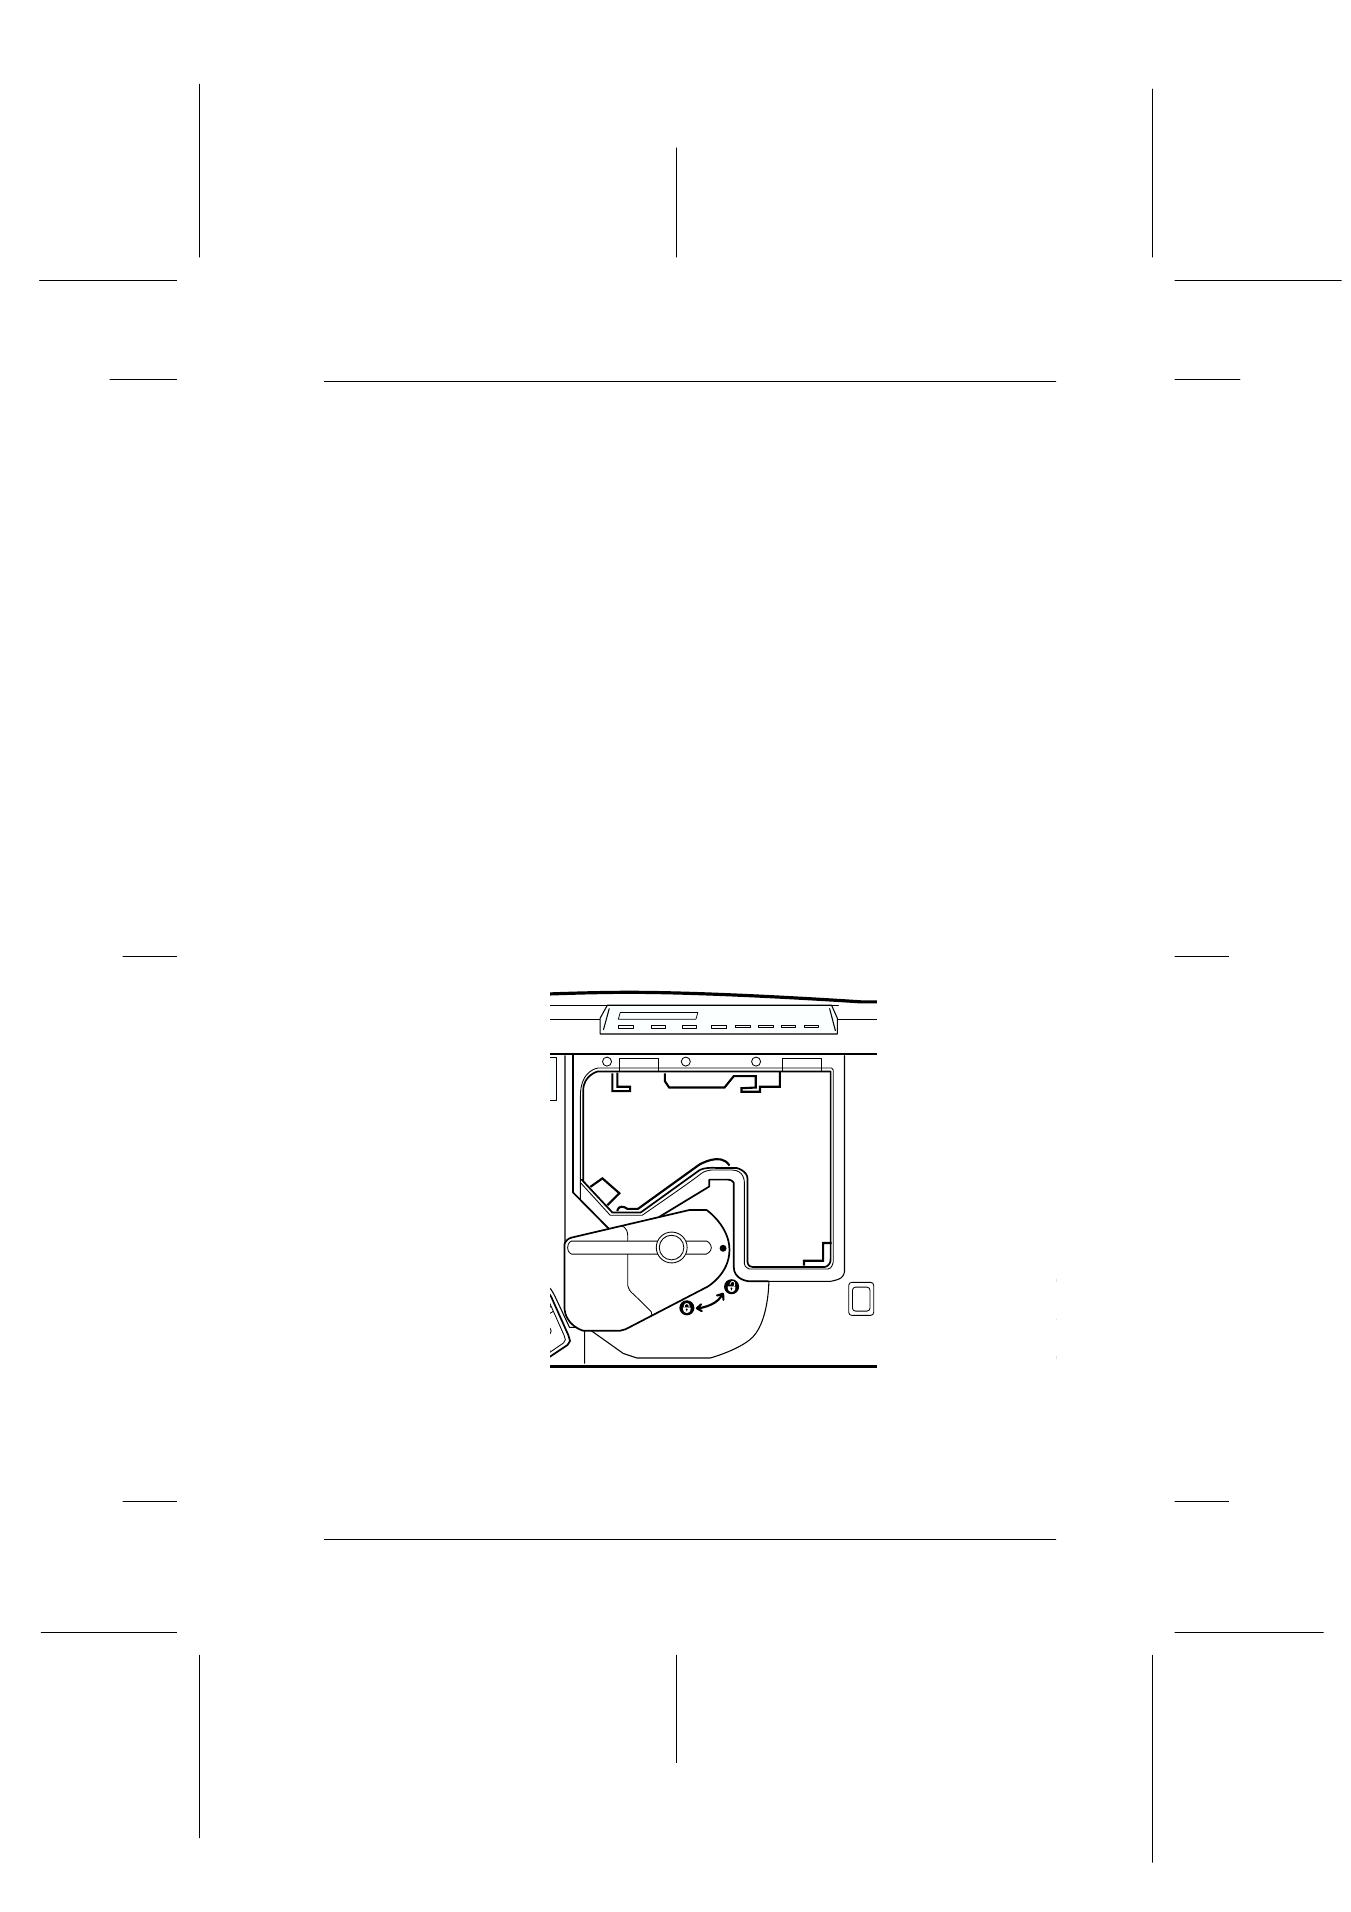
To install the photoconductor unit:
1. Open the front cover.
2. Turn the large lever counterclockwise 90 degrees.
See also other documents in the category Epson Printers:
- Stylus Pro 7800 (11 pages)
- Stylus Pro 4000 (49 pages)
- Stylus Photo R300 (2 pages)
- Stylus Pro 7000 (147 pages)
- AcuLaser C3000 (316 pages)
- Stylus Pro 7900 (24 pages)
- Stylus Pro 4450 (21 pages)
- 1000 (272 pages)
- T034120 (4 pages)
- T580300 (4 pages)
- 300 (91 pages)
- B 510DN (190 pages)
- B 510DN (218 pages)
- Stylus NX510 (8 pages)
- Stylus Photo RX580 (95 pages)
- T549300 (4 pages)
- B 500DN (168 pages)
- AculaserCX11NF (5 pages)
- 480SXU (24 pages)
- 4500 (317 pages)
- STYLUS RX500 (99 pages)
- 2100 (13 pages)
- Stylus NX215 (2 pages)
- T098320 (4 pages)
- T041020 (4 pages)
- R210 (8 pages)
- All-In-One Stylus Photo RX600 (164 pages)
- 777I (53 pages)
- T033120 (4 pages)
- Stylus CX7000F (8 pages)
- 60 (113 pages)
- T034220 (4 pages)
- WorkForce 40 Series (36 pages)
- T054220 (4 pages)
- Stylus CX3200 (11 pages)
- Stylus CX7800 (18 pages)
- T060220 (4 pages)
- 2500 (180 pages)
- AcuLaser CX11N (4 pages)
- AcuLaser CX11N (32 pages)
- 2000P (16 pages)
- T606600 (4 pages)
- Stylus CX6000 (18 pages)
- FS-4000DN (2 pages)
- MSDS T544700 (4 pages)