Epson 1200 User Manual
Page 21
15
8. Check the following settings:
■
Make sure the Media Type is set to
Plain paper
. (If you load a different type
of paper, select the corresponding setting for it, as described on page 21. For
instructions on loading special paper, see page 18.)
■
Make sure Ink is set to
Color
if you want to print in color.
■
Set the Mode option to
Automatic
. This is the easiest way to get good
printing results for all kinds of documents, on all types of paper.
■
Move the Quality/Speed slider to the
Quality
setting. This selects a high
quality setting for the paper you’re using.
9. Click the
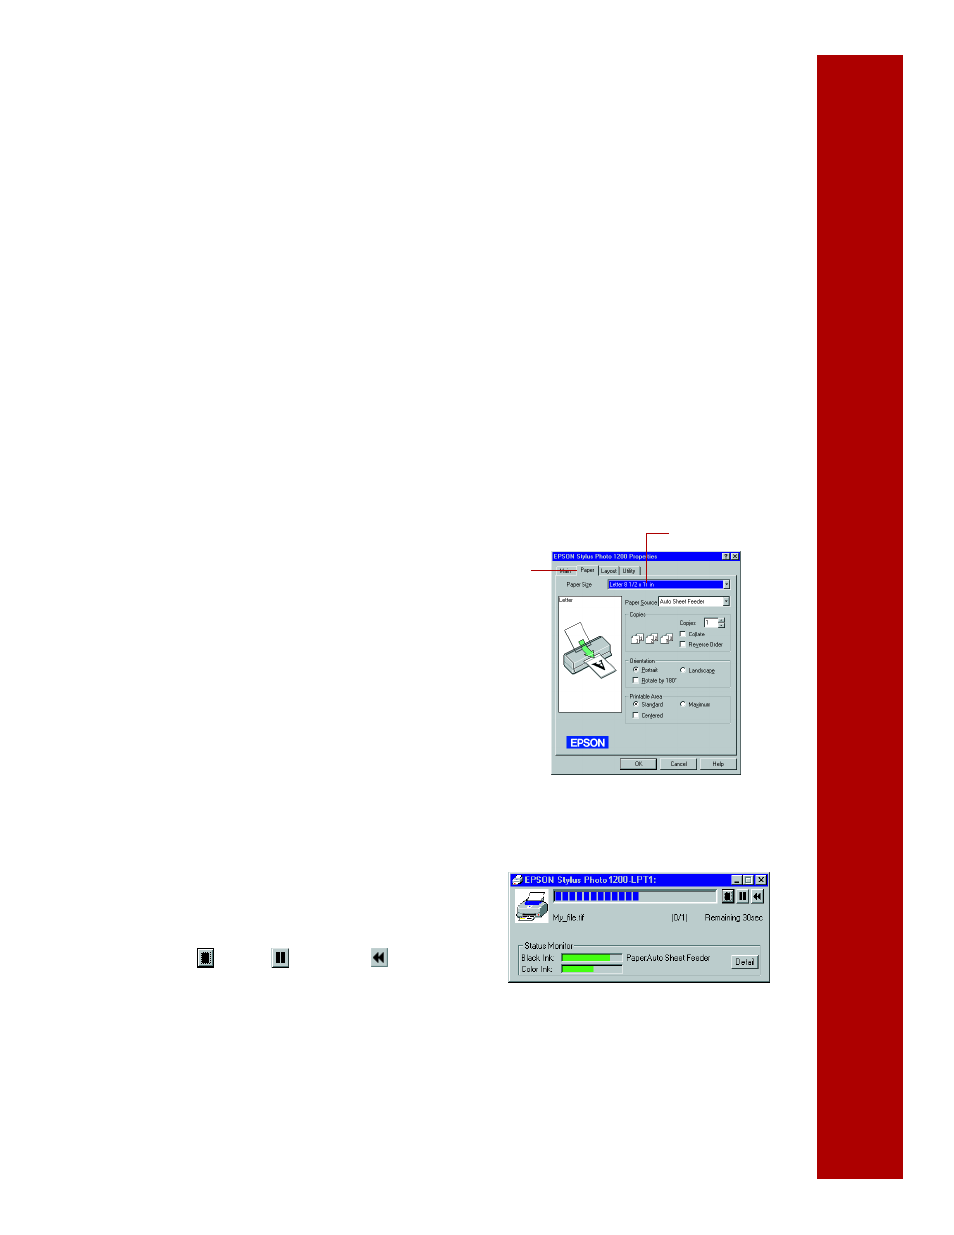
Paper
tab at the top of
the dialog box if you need to
change the paper size, paper
source, number of copies, or page
orientation.
10. Click the
Layout
tab if you want to
reduce or enlarge your printed
image, print multiple pages on one
sheet of paper, or add a watermark.
11. Click
OK
until you see the Print
dialog box again.
12. Click
OK
to start printing. After a
moment, the Progress Meter appears
while your document is printing to
show you its progress. You can cancel
, pause
, or restart
your print
job as necessary.
For more information on printing, see the electronic EPSON Stylus Photo 1200
Manual. See page 11 for instructions on viewing the manual.
Paper Size setting
Paper tab