Epson AcuLaser C9200 Series User Manual
Page 155
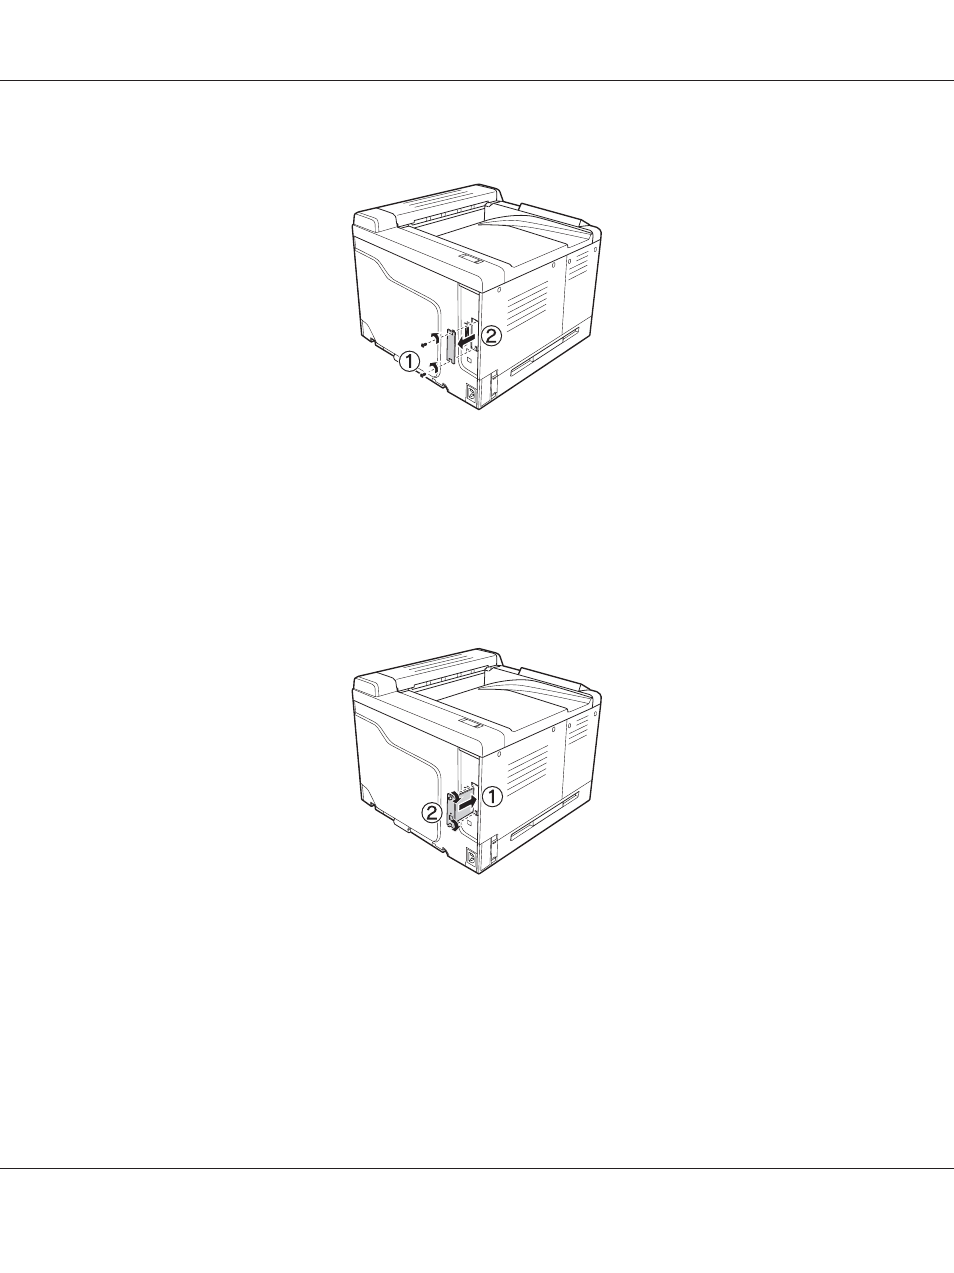
2. Remove the screws and the Type-B interface card slot cover as shown below.
w
Warning:
Removing screws and covers that are not described in the following instructions will expose
high voltage areas.
Note:
Keep the slot cover in a safe place. You will need to reattach it if you remove the interface card later.
3. Slide and push the interface card into the slot firmly, then fasten the screw as shown below.
4. Reconnect the interface cable and power cord and turn the printer on.
To confirm that the option is installed correctly, print a Status Sheet. See “Printing a Configuration
Status Sheet” on page 195.
EPSON AcuLaser C9200 Series User's Guide
Installing Options 155
See also other documents in the category Epson Printers:
- Stylus Pro 7800 (11 pages)
- Stylus Pro 4000 (49 pages)
- Stylus Photo R300 (2 pages)
- Stylus Pro 7000 (147 pages)
- AcuLaser C3000 (316 pages)
- Stylus Pro 7900 (24 pages)
- Stylus Pro 4450 (21 pages)
- 1000 (272 pages)
- T034120 (4 pages)
- T580300 (4 pages)
- 300 (91 pages)
- B 510DN (190 pages)
- B 510DN (218 pages)
- Stylus NX510 (8 pages)
- Stylus Photo RX580 (95 pages)
- T549300 (4 pages)
- AculaserCX11NF (5 pages)
- B 500DN (168 pages)
- 480SXU (24 pages)
- 4500 (317 pages)
- STYLUS RX500 (99 pages)
- 2100 (13 pages)
- Stylus NX215 (2 pages)
- T098320 (4 pages)
- T041020 (4 pages)
- R210 (8 pages)
- All-In-One Stylus Photo RX600 (164 pages)
- 777I (53 pages)
- T033120 (4 pages)
- Stylus CX7000F (8 pages)
- 60 (113 pages)
- T034220 (4 pages)
- WorkForce 40 Series (36 pages)
- T054220 (4 pages)
- Stylus CX3200 (11 pages)
- Stylus CX7800 (18 pages)
- T060220 (4 pages)
- 2500 (180 pages)
- AcuLaser CX11N (32 pages)
- AcuLaser CX11N (4 pages)
- 2000P (16 pages)
- T606600 (4 pages)
- Stylus CX6000 (18 pages)
- FS-4000DN (2 pages)
- MSDS T544700 (4 pages)