Epson 660 User Manual
Page 55
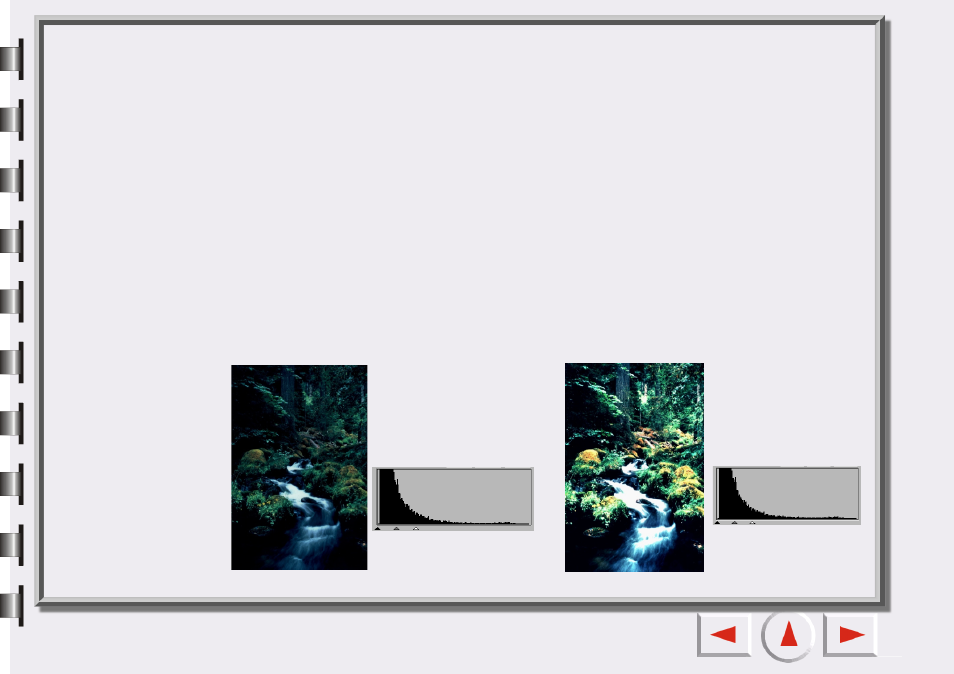
We can see that in Image 1, there is a higher contrast between the brighter and darker part of the image.
Bright and dark pixels occupy a larger portion of the total image. Therefore, in the histogram there are
higher bars in the left (darker side) and right (brighter side), and in the center the bars are relatively much
lower, which means that there are only a few midtone pixels in the image.
In image 2, pixels in objects possess greater levels of brightness and darkness. The distribution is more
even than that in Image 1 as well. Therefore, the brighter, midtone and darker pixels share evenly the
total pixels in the image. This will make the histogram for Image 2 appear smoother.
To adjust level, first choose the color channel. There are four radio boxes for the selection of channels. If
you select the Master, the level of all three color channels (red, green and blue) will be adjusted simulta-
neously. If you select one of the Red, Green, or Blue boxes, then only the selected color channel will be
adjusted.
Next, you can adjust the level by dragging the triangle under the diagrams. The Black handle (the left one)
is for the adjustment of shadow of input/output level, the gray handle (the middle one) is for mid-tone,
and the white handle (the right one) is for highlight. In addition, you can adjust the values by directly
entering the desired values in the text boxes. You can also press the "Auto" button to let EPSON Scan Tool
automatically adjust the color level according to the color of the whole image.
Below is an example of using the histogram tools to enhance the image and add detail:
Before adjustment
After adjustment