Storage – Silvercrest SMZ 400 A1 User Manual
Page 8
6
GB
Uses
CAUTION: Depending on the hardness
and consistency of the food, do not fill the
container 4 to the maximum mark as other-
wise the blade unit 5 might jam. Follow the
instructions in the section "Table of
processing times" on page 8.
•
The multi chopper is suitable for purée-
ing, for example, fruit and vegetables,
soups, dips and sauces, as well as for
mixing drinks and making milkshakes.
•
You can also use the purée disc 9 to
whip cream or egg whites.
•
The maximum capacity is 450 ml.
Preparing foodstuffs
•
Wash or wipe the foodstuff.
•
Chop the food into small cubes
(approx. 2-3 cm edge length).
•
Shell nuts. The seedcoat, such as on
almonds, may be left on as required.
•
Strip herbs from their stems and tear
them into small pieces when dry.
•
Remove bones, sinew and skin from
meat.
Chopping / blending
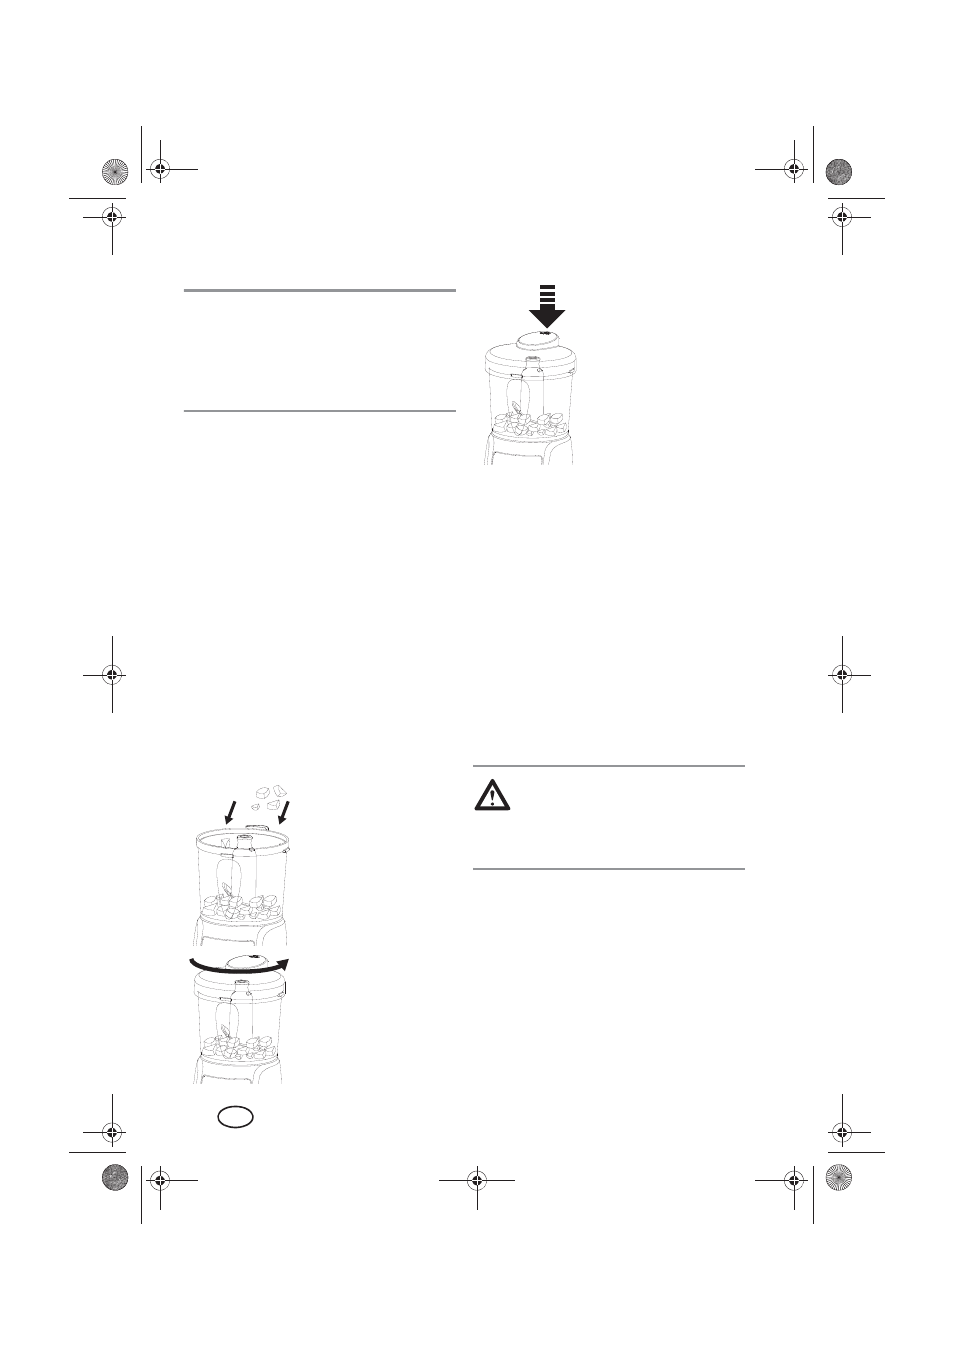
1. Fill the container 4
with the prepared
foodstuffs.
The maximum ca-
pacity is 450 ml.
2. Place the lid 3 on the
container 4. Twist the
lid 3 anticlockwise
and check that the
container 4 is proper-
ly closed.
3. Insert the power plug 7 into a wall socket.
4. Press the one-touch
button 1 and then re-
lease it. Chop / blend
the foodstuff in short
pulses (approx.
1 second). The num-
ber of pulses required
will vary according to
the amount and con-
sistency of the food-
stuff.
Check the result repeatedly after every few
pulses. Guidelines for different foodstuffs
may be found in the section "Table of
processing times" on page 8.
5. Remove the power plug 7 from the
socket after chopping.
6. Twist the container 4 clockwise, lift it off
and place it on the work surface.
7. Hold the container 4 firmly. Twist the
lid 3 clockwise and remove.
8. Carefully remove the blade unit 5 /
purée disc 9.
9. Empty the container 4.
6.
Storage
DANGER! The appliance should
be kept out of the reach of children.
•
To prevent accidents, the power plug 7
must not be plugged into a socket dur-
ing storage.
•
Choose a place where neither heat nor
moisture can affect the appliance.
•
Wrap the mains cable 7 around the
cable storage 8 provided on the bottom
of the power base 6.
__RP61714_B4.book Seite 6 Donnerstag, 3. März 2011 10:36 10