Sealey AK9635D User Manual
Page 2
4. MAINTENANCE
4.1. If the micrometer is not to be used for an extended period of time, remove the battery for storage.
Note: The LCD will flash continuously if the battery is run down.
4.2.
To remove/change the battery: Using the semi circular back of the adjustment wrench provided and unscrew the battery
compartment lid located on the back of the micrometer. Remove/replace battery (anode (+) facing outward) and screw the lid
back on.
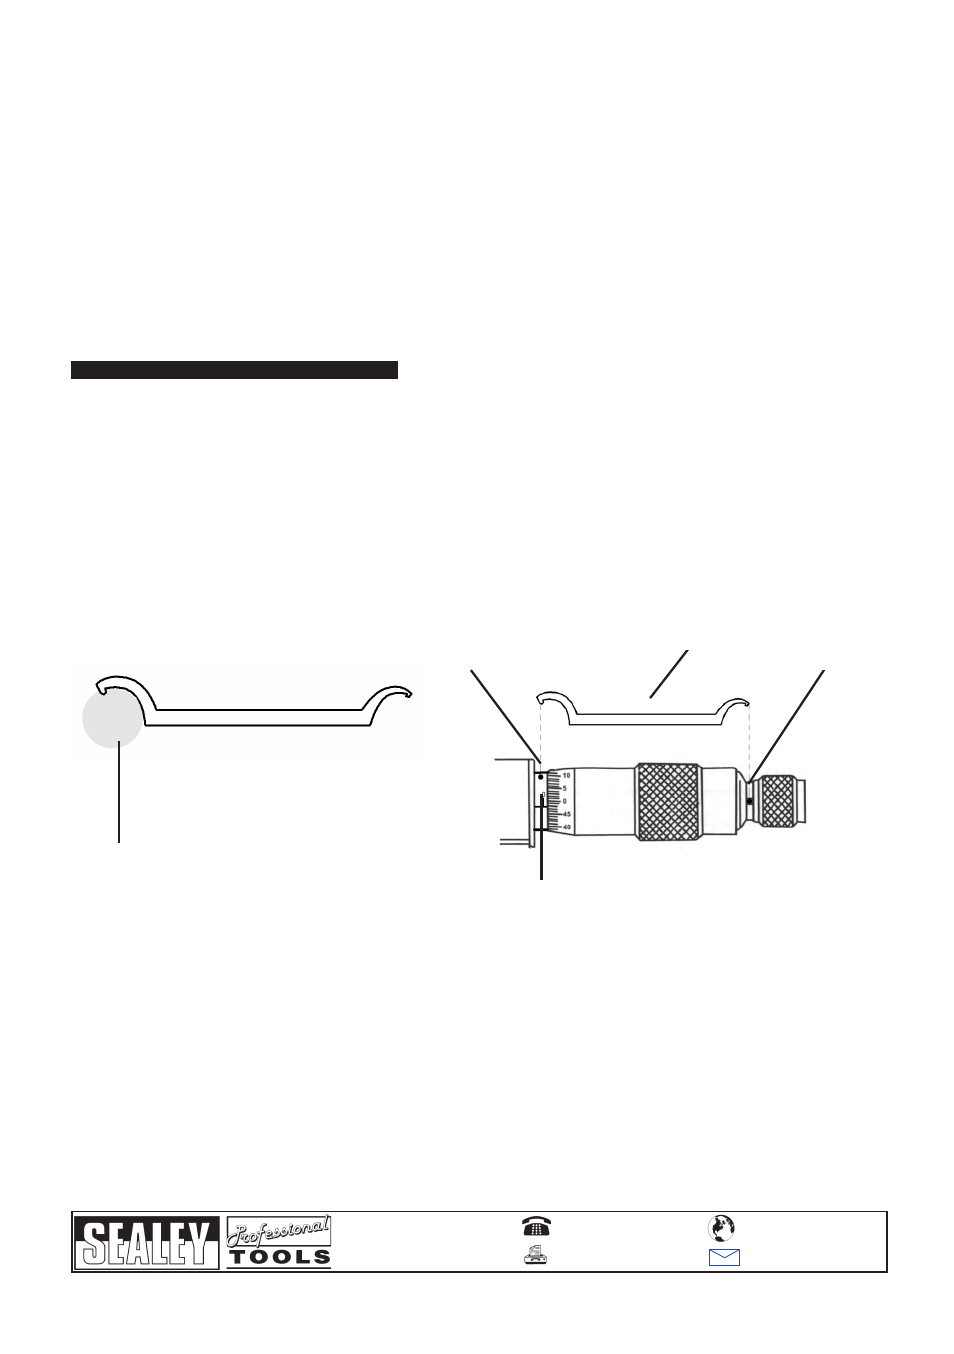
4.3. After prolonged service, the reading point may become slightly loose and misaligned. This can be corrected using the
wrench provided. Fully close the micrometer. Place the wrench as shown in Fig 2 i.e. with the small protrusion hooking the
hole at Point A. Using the wrench, alter the position of the reading point until it is once more aligned with the “0” on the barrel
scale.
4.4.
The ratchet barrel may also become lose over time. The wrench is then used in a similar fashion (i.e. with the smaller end of
the wrench hooked in Point B) to tighten the ratchet barrel.
4.5. The micrometer contains no user serviceable parts. See your authorised dealer for advice/repairs.
Wrench
Point B
Reading point
Barrel
Fig 2
NOTE: It is our policy to continually improve products and as such we reserve the right to alter data, specifications and component parts without prior notice.
IMPORTANT: No liability is accepted for incorrect use of product.
WARRANTY: Guarantee is 12 months from purchase dat e, proof of which will be required for any claim.
INFORMATION: For a copy of our latest catalogue and promotions call us on 01284 757525 and leave your full name and address, including your postcode.
AK9635D.V2 - 1 - 170108
01284 757500
01284 703534
Sole UK Distributor
Sealey Group,
Bury St. Edmunds, Suffolk.
www.sealey.co.uk
Web
Point A
Fig 1
3.5.
Metric/Imperial conversion. Press the “in/mm” button (1) to convert the display format from inches to millimetres and visa
versa.
3.6.
Data hold. This function is used to temporarily hold or fix data on the LCD display for ease of recording.
3.6.1. Once a measurement has been taken, press the HOLD button (2). The letter H will appear at the top of the display and the
data currently shown will become fixed. When the data has been recorded, press the HOLD button again to release the
display.
3.7.
Relative/Absolute measuring. To use relative measuring e.g. to determine the difference in width of two objects, measure
the first object (as explained in section 3.4), press the R/A button (the letters “REL” should appear in the LCD) and
immediately measure the second object. The LCD will display the difference between the two objects. To revert back to
absolute measuring simply press the R/A button once more.
3.8.
Tolerance setting. Use to set a tolerance e.g. for use when measuring a large number of components to check they are
within acceptable size limits.
3.8.1. Press the TOL button. “TOL up” should appear in the LCD. Turn the micrometer to set the upper level.
3.8.2. Press the TOL button again, “TOL down” should now appear in the LCD. Turn the micrometer once more to set the lower
level. Press the TOL button again to confirm the settings, “OK” should appear in the LCD.
3.8.3. To wipe the tolerance setting, press the TOL button three times in quick succession.