Sealey VS2005 User Manual
Page 2
3. ASSEMbLY
3.1. referring to the individual components in fig.1. assemble the
Injector Puller minus the force screw as shown in fig.2. overleaf. a
different configuration of the bridge legs may be needed
depending on engine.
fig.4
4. OPERATION
4.1. Before working on the fuel system, make sure that the fuel system
is
NOT pressurised. refer to the manufacturer's instruction
manual on how to de-pressurise the system.
4.1.1. Disconnect the injector wires and connections as per the
manufacturer's instructions.
4.1.2. remove any carbon build up from around the injector.
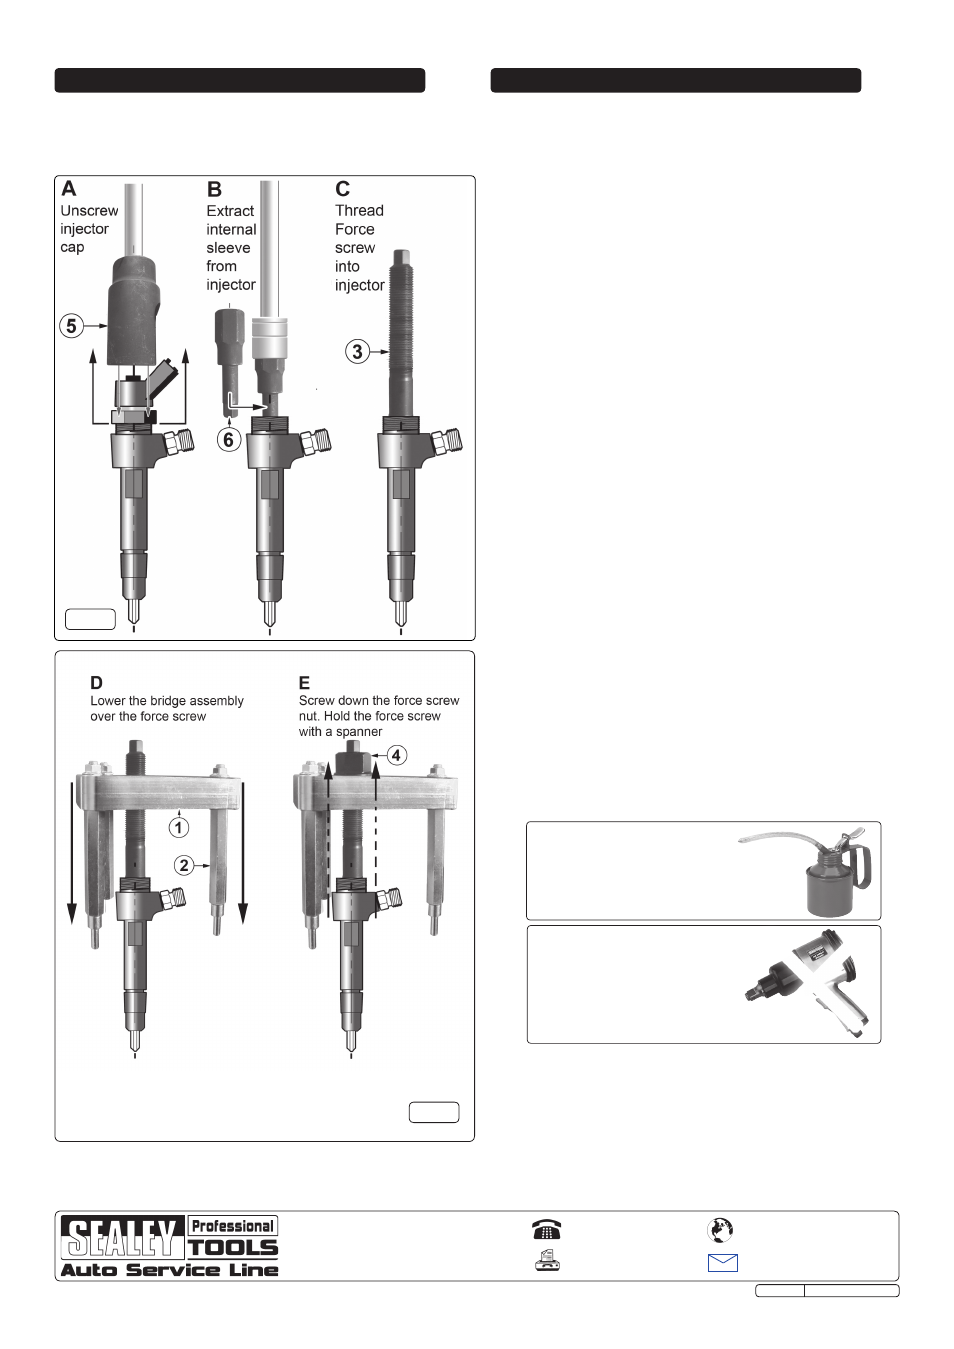
4.1.3. remove the cap from the injector using the appropriate size
socket (fig.3A).
4.2. Removing Inner Sleeve. (fig.3).
4.2.1. remove the internal parts from the injector to gain access to use
the security hex key (fig.3.6). It may be necessary to remove the
injector veins by force. Insert the security hex into the inner sleeve.
Turn the security hex anti-clockwise using a 21mm socket to
remove the inner sleeve (fig.3B).
4.2.2. Select the appropriate force screw and screw into the threads of
the injector and tighten with a suitable spanner (fig.3c).
4.3. Removing the injector. (fig.4).
It will be necessary to remove the engine cam cover and possibly
a manifold bolt, please refer to the manufacturer's manual for
instruction. The removal of certain bolts from the engine will allow
suitable space and support for the bridge legs to use.
4.3.1. Slide the bridge assembly over the force screw, inserting the legs
into the appropriate holes for a sturdy footing (fig.4D).
Note: one leg is flat and is to be used on the top of the cylinder head
and not to be inserted into a bolt hole.
4.3.2. Screw the force screw nut onto the force screw until finger tight.
4.3.3. using appropriately sized spanners, hold the force screw
securely with one spanner, and tighten the nut with the other, the
injector should gradually slide out.
Note: An approximate force of NO MORE THAN 150Nm should be
applied to the nut, and a socket should NOT be used.
Whilst applying force, constantly check the seating of the tool and
ensure that there is no twisting of the bridge assembly.
4.3.4. If the injector cannot be removed, it may be necessary to use a
suitable penetrating oil and leave for a period of time, before
applying force again. If the injector still cannot be removed, consult
a main dealer or a diesel specialist, to avoid damage to the engine.
4.3.5. When an injector has been removed, it is recommended that only a
new or refurbished injector is fitted. follow the manufacturer's fitting
and safety instructions.
NOTE: It is our policy to continually improve products and as such we reserve the right to alter data, specifications and component parts without prior notice.
IMPORTANT: no liability is accepted for incorrect use of this product.
WARRANTY: Guarantee is 12 months from purchase date, proof of which will be required for any claim.
INFORMATION: for a copy of our latest catalogue and promotions call us on 01284 757525 and leave your full name and address, including postcode.
01284 757500
01284 703534
Sole UK Distributor, Sealey Group,
Kempson Way, Suffolk Business
Park
, Bury St. Edmunds, Suffolk,
IP32 7Ar
www.sealey.co.uk
Web
Original Language Version
VS2005 Issue: 3 - 28/02/12
fig.3
ALWAYS KEEP FORCE SCREW
WELL LUbRICATED.
DO NOT USE AIR TOOLS,
IMPACT WRENCHES,
bREAKER bARS
OR SOCKETS