Sealey SMS2002C User Manual
Page 2
2. INTRODUCTION & SPECIFICATIONS
WARNING! Keep away from the grinding wheel when it is turning, and make sure no one is standing close in the line of the grinding wheel
trajectory.
DO NOT allow untrained persons to operate the saw blade sharpener.
DO NOT get the machine wet, or use in damp or wet locations or areas where there is condensation.
WARNING! DO NOT use the saw blade sharpener where there are flammable liquids, solids or gases such as paint solvents and including waste
wiping rags etc.
DO NOT operate the saw blade if any parts are missing or damaged as this may cause failure and/or personal injury.
DO NOT operate the saw blade sharpener when you are tired or under the influence of alcohol, drugs or intoxicating medication.
When not in use switch off the saw blade sharpener and remove the plug from the power supply.
Quick, easy and safe way to sharpen a chainsaw blade. Fitted with a + or - 35° tilting vice. Will bring life back to blade, enabling safer cutting,
limiting snagging, once fitted back to the machine for use.
Specifications:
Model No: . . . . . . . . . . . . . . . . . . SMS2002C
Motor Power: . . . . . . . . . . . . . . .85W - 230V
Free Speed: . . . . . . . . . . . . . . . . . . 4800rpm
Wheel Diameter:. . . . . . . . . . . . . . . . 100mm
Angle Adjustment: . . . . . . . . . . . . . .35° (+/-)
Weight: . . . . . . . . . . . . . . . . . . . . . . . . . 2.5kg
3. CONTENTS
Unpack the product and check the contents. Ensure that there is no damage. If any problem is noted, contact your supplier immediately.
Original Language Version
© Jack Sealey Limited
SMS2002C Issue: 1 26/02/14
4. ASSEMbLY
WARNING! before sharpening saw blades ensure that you wear approved safety goggles, ear defenders, and safety gloves.
All safety instructions in Section 1 must be followed.
4.1.
Use two M8 bolts (not included) to bolt securely to the workbench through the two 1/4" holes on the base. Ensure that the surface is flat
and capable of supporting the weight of the sharpener (see fig.2).
4.2.
Put the fixed base on the base (see fig.2). Adjust to the required angle and tighten the M8 nut underneath (see fig.3).
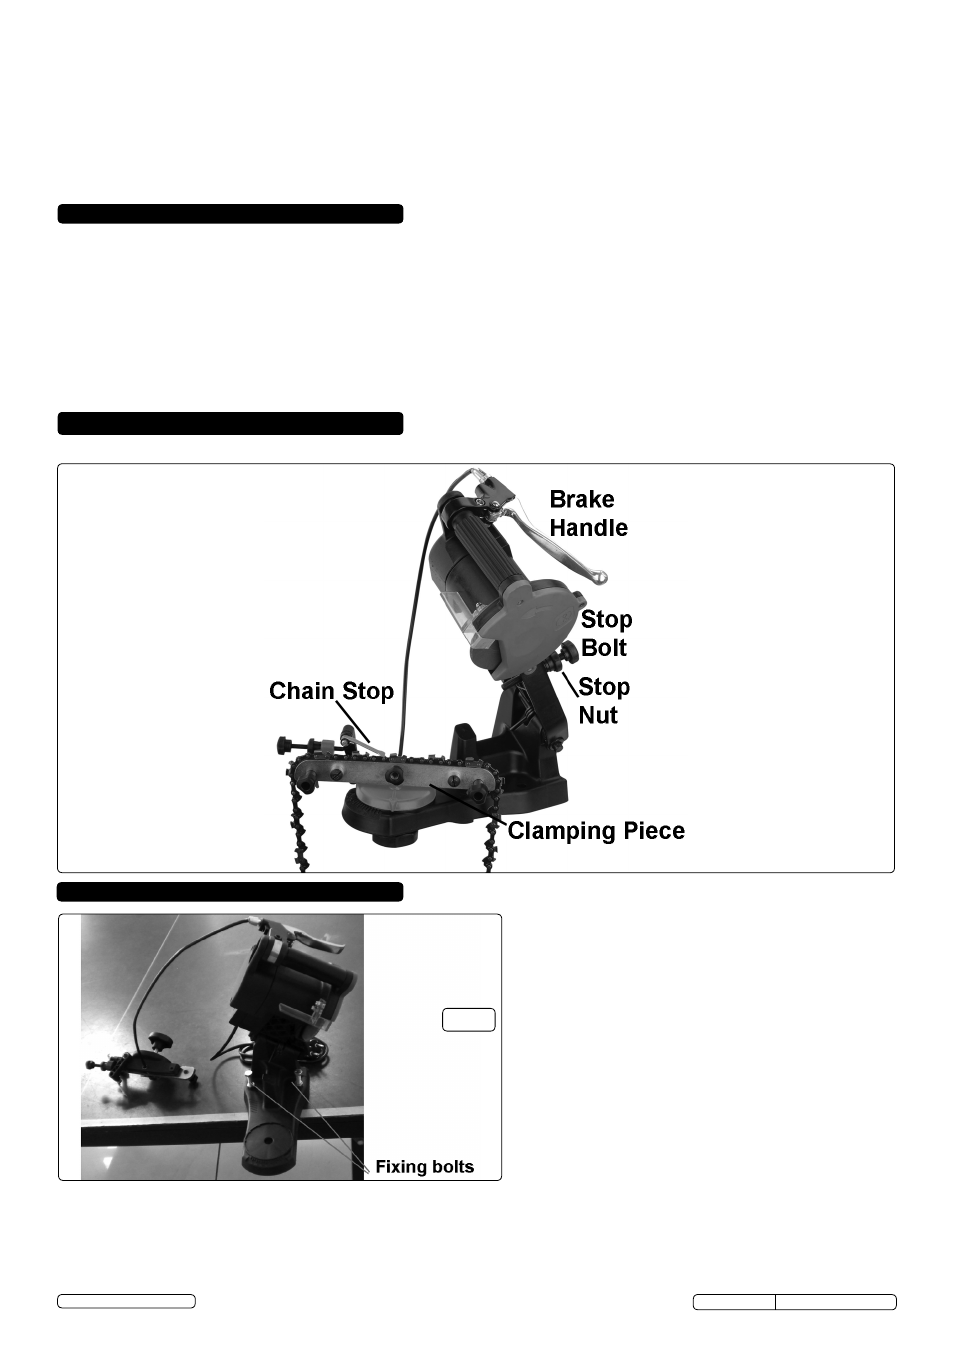
Fig.1