Operation, Specification fig.1 fig.2 – Sealey SD1530 User Manual
Page 2
3. OPERATION
3.1. the soldering iron is primarily intended for the soldering of electrical joints such as the attachment of components to printed
circuit boards and the connection of leads to plugs and sockets used in electronics. (where delicate electronic components are
concerned that may be damaged by excessive heat, the wire being soldered should be held with a pair of thin nosed pliers on the
opposite side of the board so that some of the heat generated by the soldering process is transferred to the pliers.)
3.2.
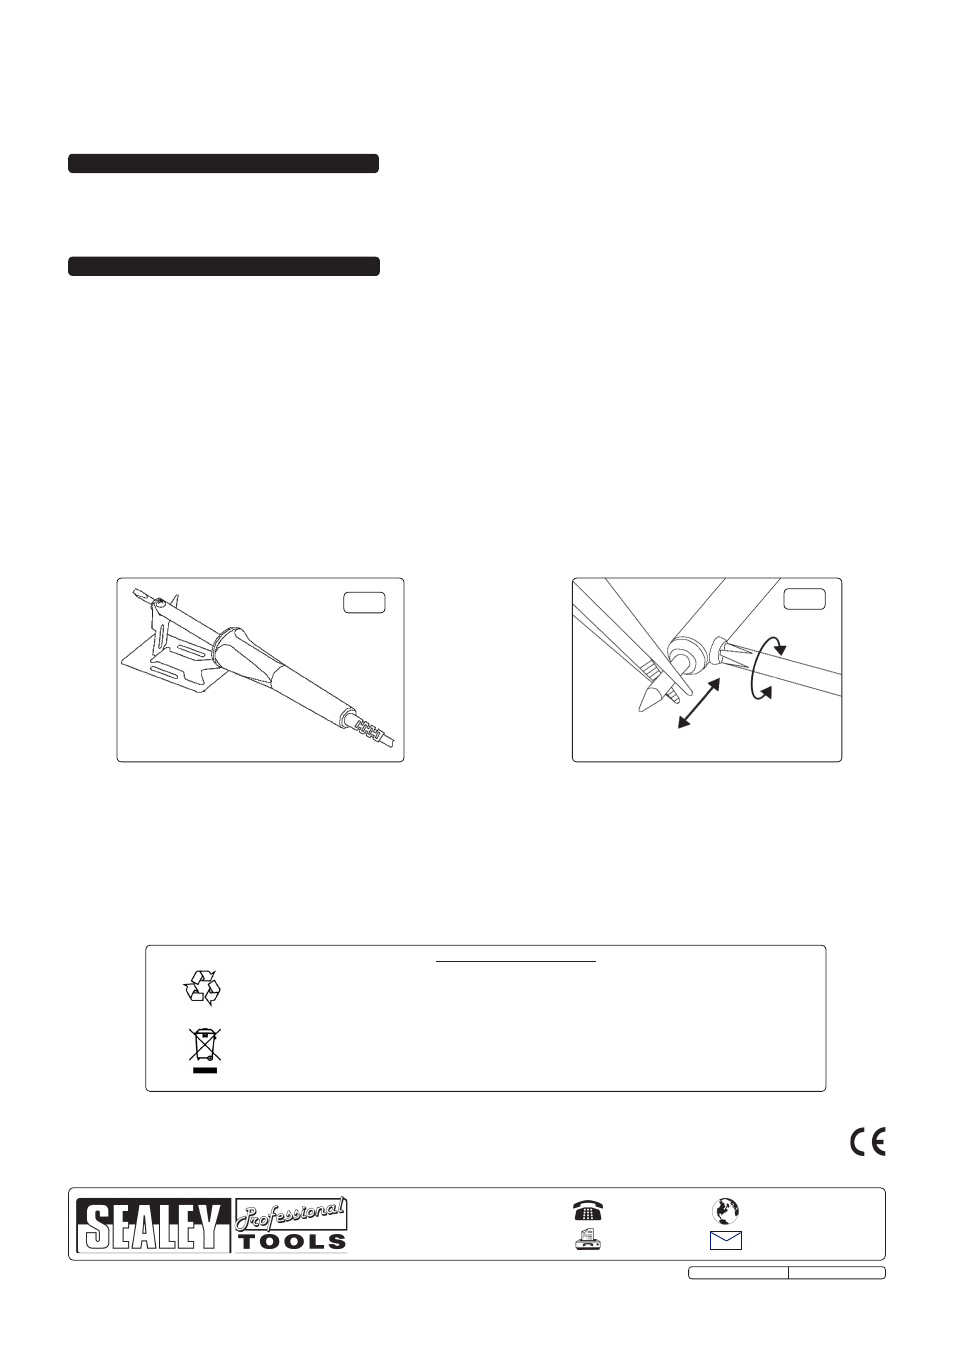
Before using the soldering iron, set up the metal stand provided by bending the centre section upwards so that it is at an angle of
nearly 90° to the rest of the stand (fig.1). rest the soldering iron on the stand. Plug the iron into the mains supply and slide the switch
to either position 'I' or 'II', for the desired wattage setting. Leave the iron on the stand, for it to heat up.
3.3.
when the iron is up to temperature, “tin” the tip by melting a thin layer of solder over the end of it. If any difficulty is experienced in
getting the solder to take to the tip, use a proprietary tip cleaner/tinning product.
3.4.
the items to be soldered must be perfectly clean and free from grease. Ideally, the two items to be joined (such as the end of a wire
and a switch terminal) should be individually tinned before being brought together to ensure a good joint.
3.5.
Ensure that the items to be soldered are accessible and are securely held together.
3.6.
Bring the tip of the soldering iron and the solder to the joint simultaneously. Leave the iron on the joint just long enough to melt
the solder so that it flows onto the two parts to be joined. replace the soldering iron on the stand. Leave the joint to cool. when
finished working, slide the switch to the '0' position and unplug the iron from its supply. Allow it to fully cool before storing it away.
3.7.
do not allow solder to accumulate where the tip enters the iron as this may make the tip difficult to remove. do not get
solder deposits on the tip retaining screw as it may prevent a screwdriver fitting into the cross head. Periodically loosen the tip
retaining screw and rotate the tip in the iron to prevent it seizing into the body. use a proprietary tip cleaner/tinner to keep the tip clean
and correctly tinned.
2. SPECIFICATION
fig.1
fig.2
DO NOT touch the workpiece immediately after working on it, as it will be very hot. Allow it to cool.
DO NOT allow untrained persons or children to operate the soldering iron.
DO NOT operate the soldering iron if damaged.
DO NOT hold the workpiece by hand.
when finished working, store the soldering iron in a safe, dry, childproof location.
NOTE: It is our policy to continually improve products and as such we reserve the right to alter data, specifications and component parts without prior notice.
IMPORTANT: no liability is accepted for incorrect use of this product.
WARRANTY: guarantee is 12 months from purchase date, proof of which will be required for any claim.
INFORMATION: for a copy of our latest catalogue and promotions call us on 01284 757525 and leave your full name and address, including postcode.
01284 757500
01284 703534
Sole UK Distributor, Sealey Group,
Kempson way, suffolk Business Park
,
Bury st. Edmunds, suffolk,
IP32 7Ar
www.sealey.co.uk
Web
Original Language Version
sd1530 & sd4080 Issue: 1 - 13/04/10
Ergonomic handle design with comfortable grip, LEd indicator and three position switch. dual wattage settings allow the user to carry
out work requiring different temperatures. fitted with high quality long life tip, suitable for lead free soldering, and a 1.3mtr cable.
SD1530: Position 1 - 15 watt, Position 2 - 30 watt
SD4080: Position 1 - 40 watt, Position 2 - 80 watt
Environmental Protection.
recycle unwanted materials instead of disposing of them as waste. All tools, accessories and
packaging should be sorted, taken to a recycle centre and disposed of in a manner
which is compatible with the environment.
when the product is no longer required, it must be disposed of in an
environmentally protective way.
3.8.
when the soldering iron is not in use but still hot, ensure that when it is put down, the tip is not touching, or close to, any material that
will melt or is inflammable.
3.9.
After a prolonged period of service the tip may become pitted and need replacing. disconnect the soldering iron from the mains
supply and wait until the iron has completely cooled down. Loosen the tip retaining nut and pull out the old tip with a pair of pliers.
(If
the old tip is difficult to remove, grip it with a pair of pliers and pull it out. do not use pliers to insert the new tip as the plating may be
damaged.)
Insert the new tip and twist it into the orientation you require. Lock the tip in place by tightening the retaining screw (fig.2).
sealey Part no's for replacement tips: Model no. sd1530 -
SD1530/T, Model no. sd4080 - SD4080/T.